How to Do a Handstand (Adho Mukha Vrksasana): A Step-by-Step Guide with Free Video
Learn how to do a handstand (Adho Mukha Vrksasana) in a clear and methodical way. This tutorial breaks the pose down into a progression of achievable stages that build strength, confidence, and skill. With a focus on the Iyengar Yoga approach, you’ll gain a deeper understanding of alignment, technique, and structure.
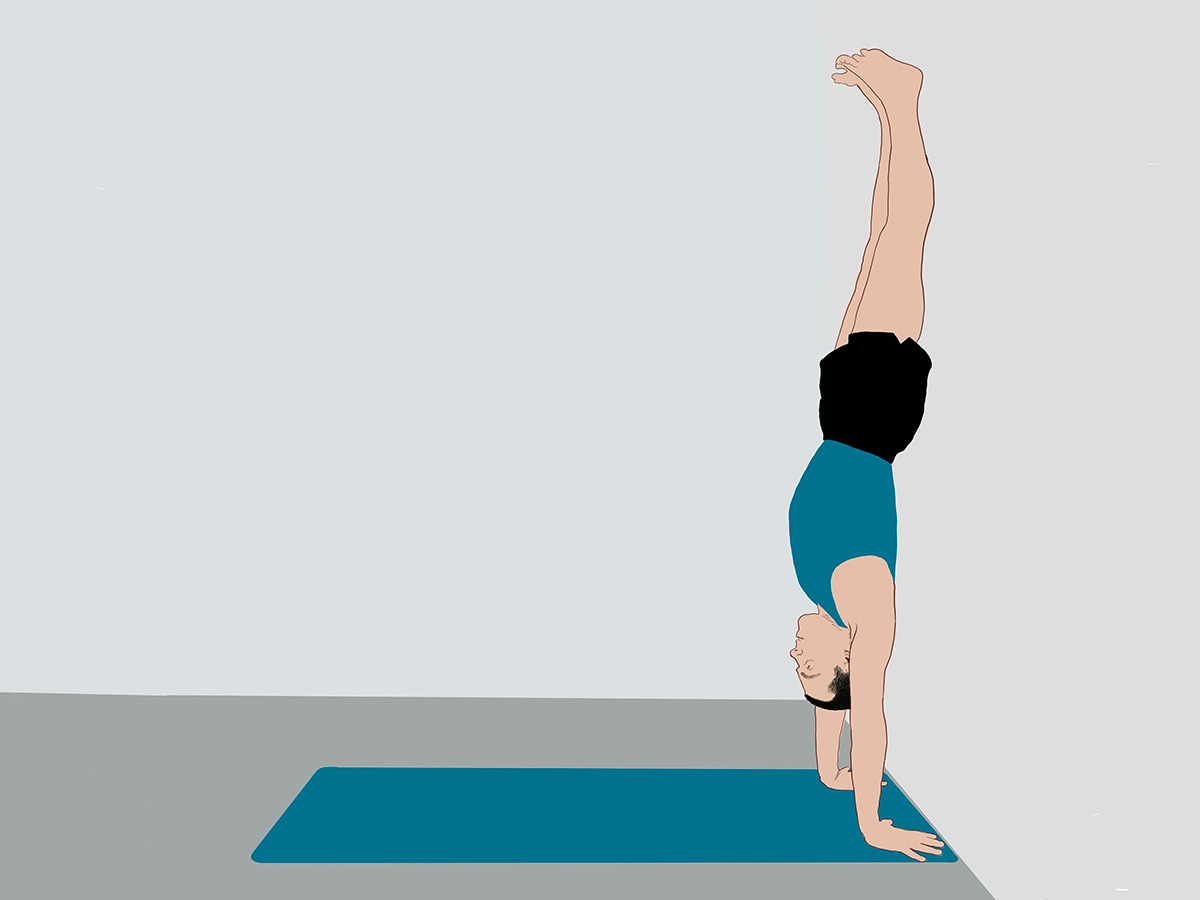
Handstand (Adho Mukha Vrksasana) is an advanced inversion that builds upper body strength, improves balance, and enhances body awareness. In the pose, the body is inverted with the arms straight and the legs extended vertically overhead, supported by the hands on the floor. It challenges coordination, cultivates confidence, and offers profound physical and mental benefits.
In the Iyengar method, handstand is taught progressively and with precision. The emphasis is on proper alignment, stability, and preparatory strength-building. Props such as walls, blocks, and bolsters are incorporated to help students develop awareness and refine their technique safely. Rather than rushing into the full pose, Iyengar Yoga breaks the asana into foundational components — making it accessible and effective for a wide range of practitioners.
Free Handstand Video Tutorial
Watch the free 40-minute instructional video from Yoga Selection. It guides you step-by-step through each stage of the pose, including preparatory techniques, wall-supported variations, and tips for refining your final handstand.
Step-by-Step Breakdown: Visual Guide to Handstand
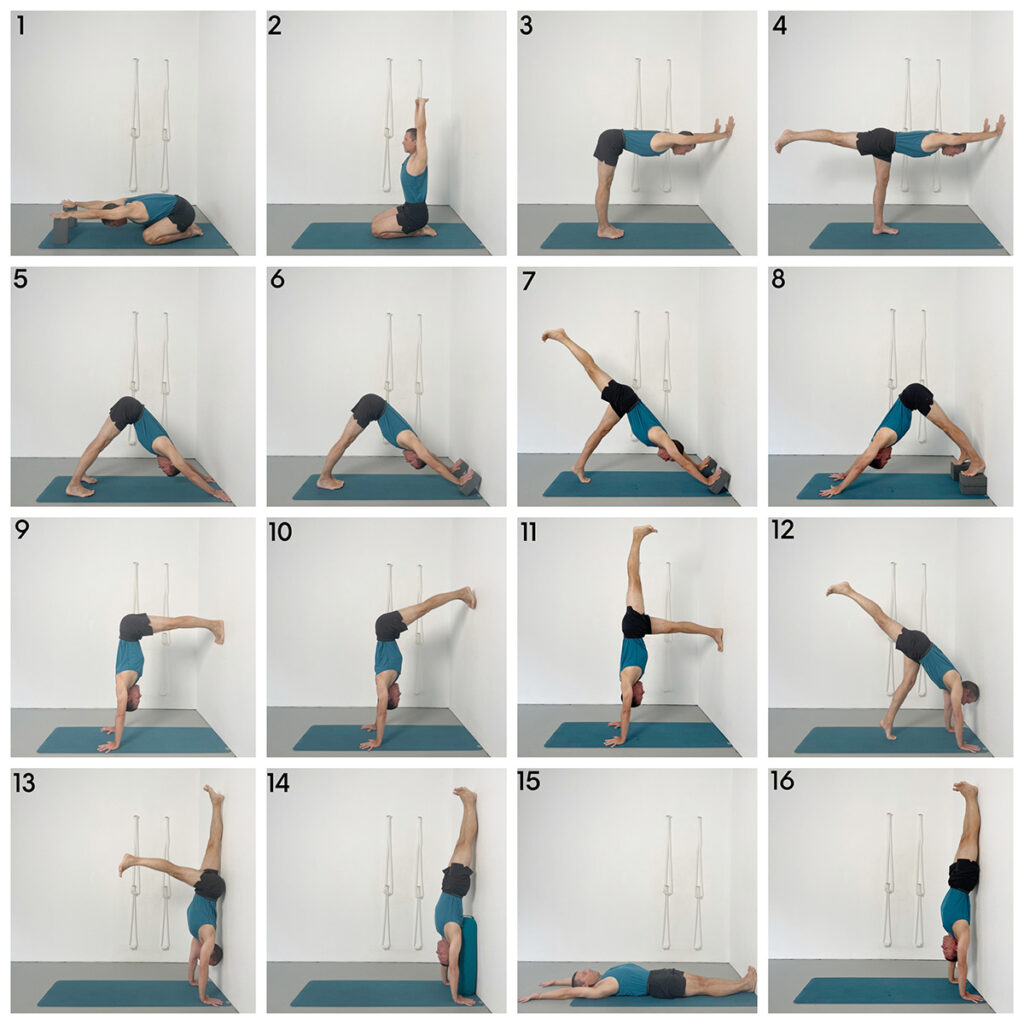
Stage 1: Adho Mukha Virasana (Virasana Forwards) with Hands on Blocks
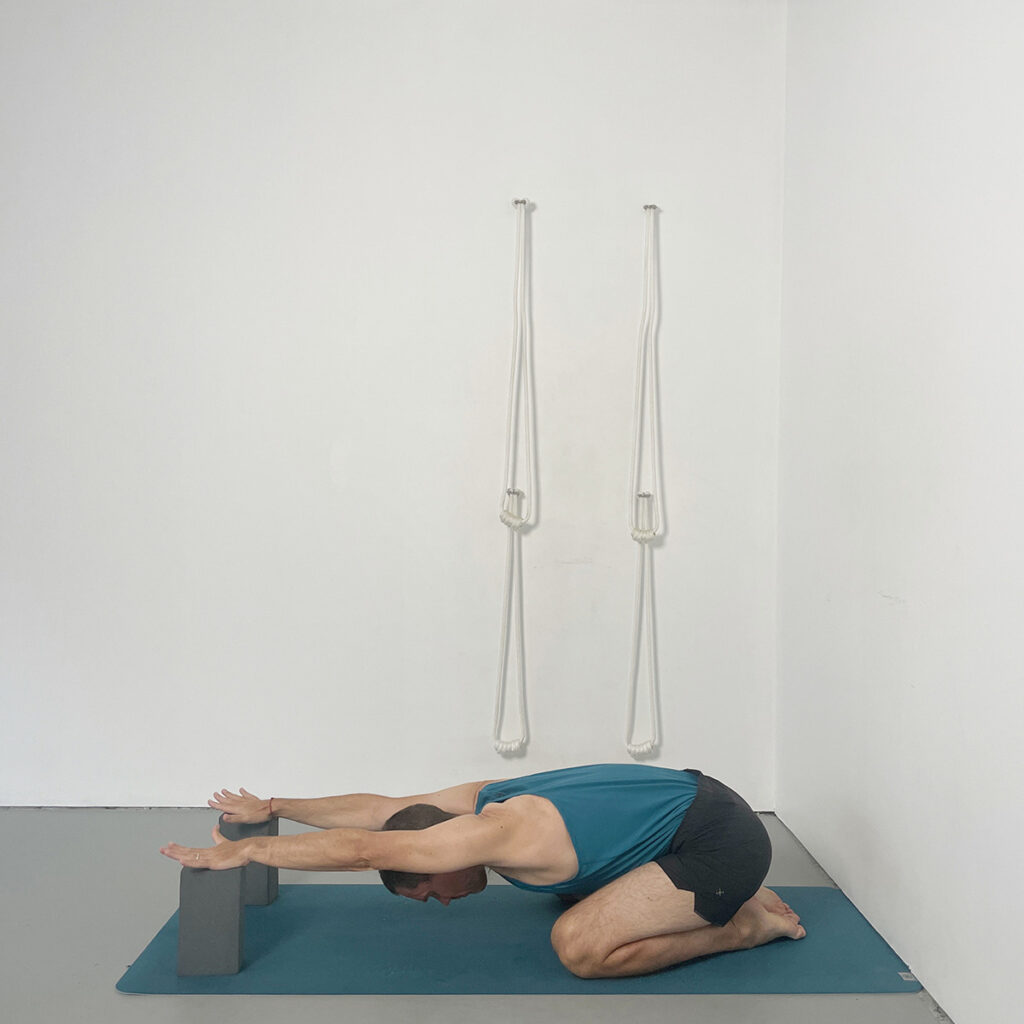
This pose introduces the foundational arm alignment and connection through the shoulders — essential for handstand work. This stage builds the sense of connection between the arms and the pelvis, which becomes critical when bearing weight in inversion.
Key Actions:
- Kneel with big toes touching, knees apart, and sit back onto your heels.
- Walk your hands forward and place them on blocks, shoulder-width apart.
- Spread your fingers and point the middle fingers directly forward.
- Press hips back and down toward the heels.
- Straighten your elbows as you press the hands down, feeling the arms connect back through the shoulders to the hips.
Stage 2: Parvatasana in Virasana (Arms Overhead in Kneeling)
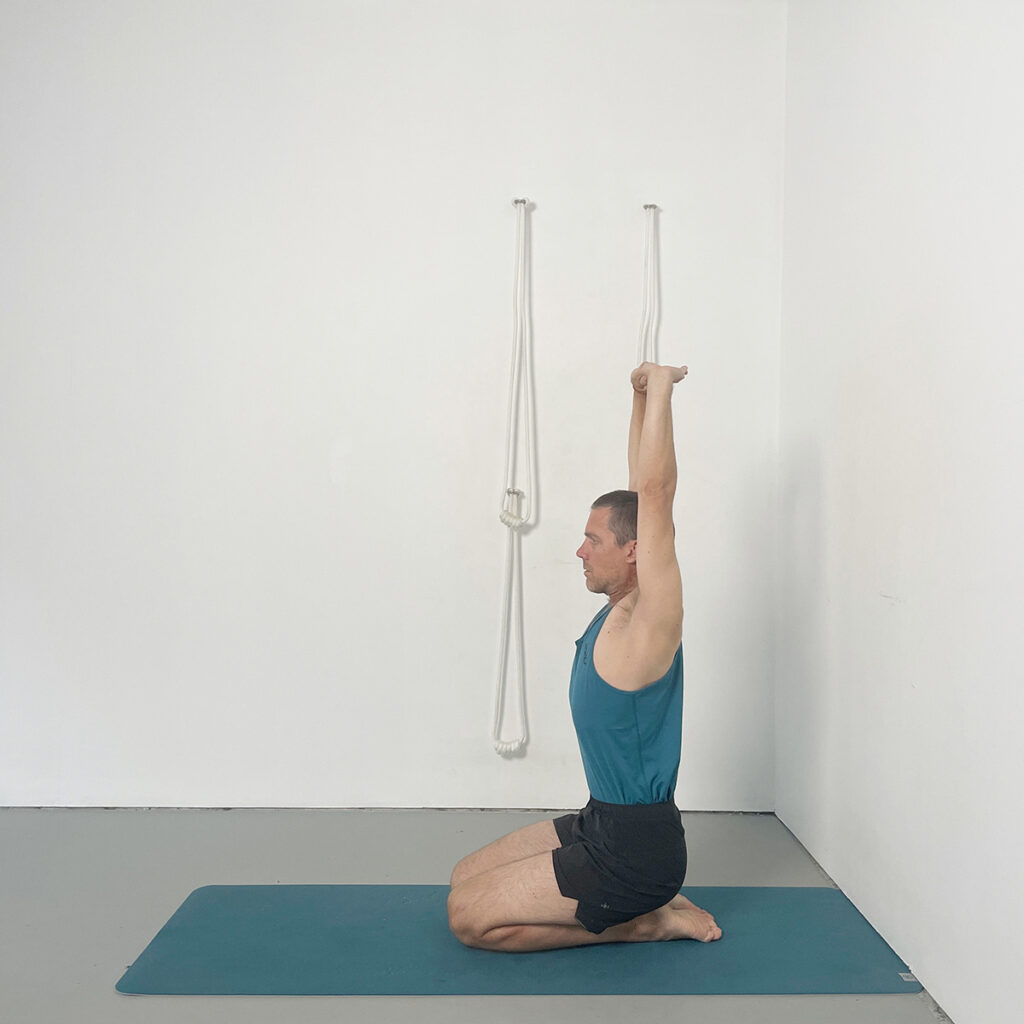
This stage develops vertical arm extension while maintaining spinal lift and shoulder integrity — essential for overhead alignment in handstand.
Key Actions:
- Sit in Virasana and interlock fingers, palms turned upward.
- Raise the arms overhead, extending fully without letting elbows bend.
- Keep shoulders away from ears while lifting the arms.
- Draw lower ribs into the body to avoid over-arching the back.
- Observe the vertical alignment of wrists, elbows, and shoulders.
Stage 3: Ardha Uttanasana at the Wall
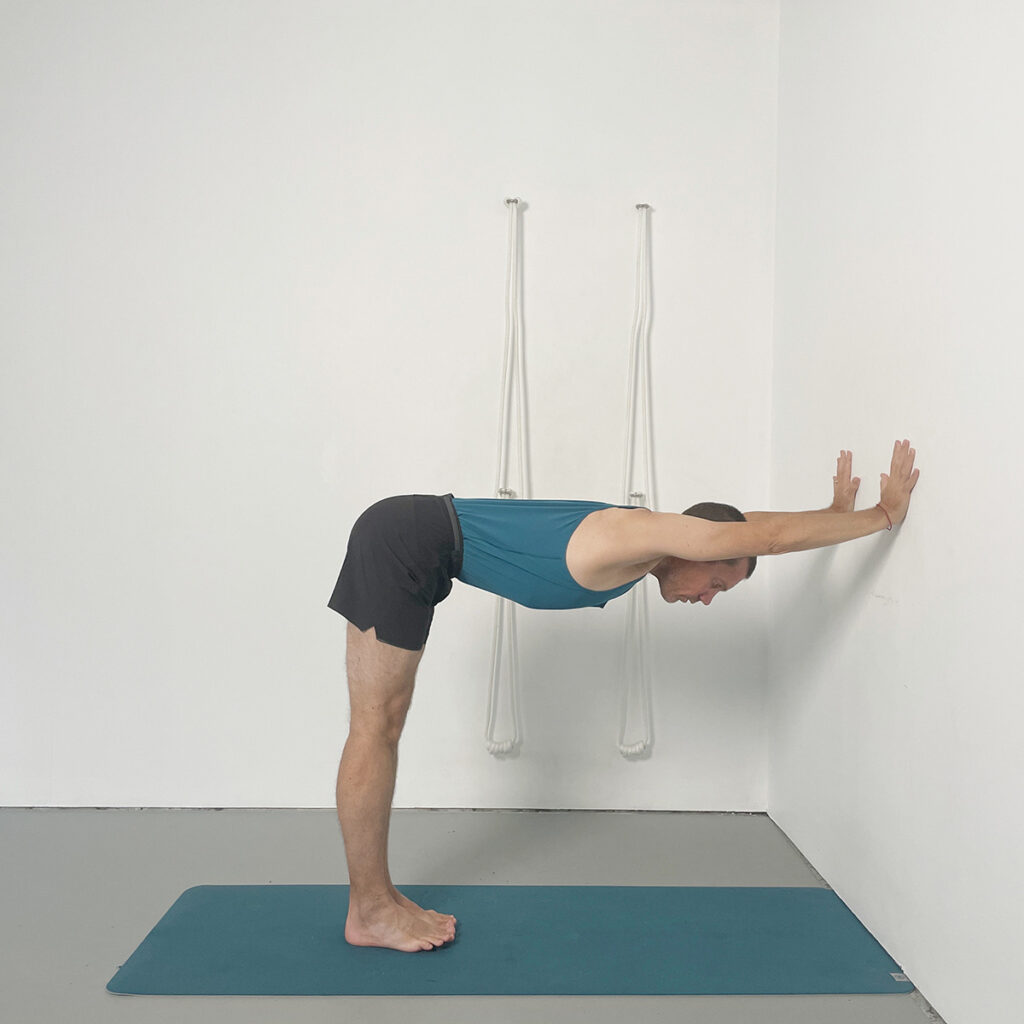
An important stage for learning to bear weight through the arms with correct alignment.
Key Actions:
- Stand facing the wall, hands at hip height, shoulder-width apart.
- Spread fingers and point middle fingers straight up.
- Step back into a right angle with your body.
- Press hands firmly into the wall and straighten the elbows.
- Move hips back as if someone is pulling them away from the wall.
Stage 4: Eka Pada Ardha Uttanasana at the Wall
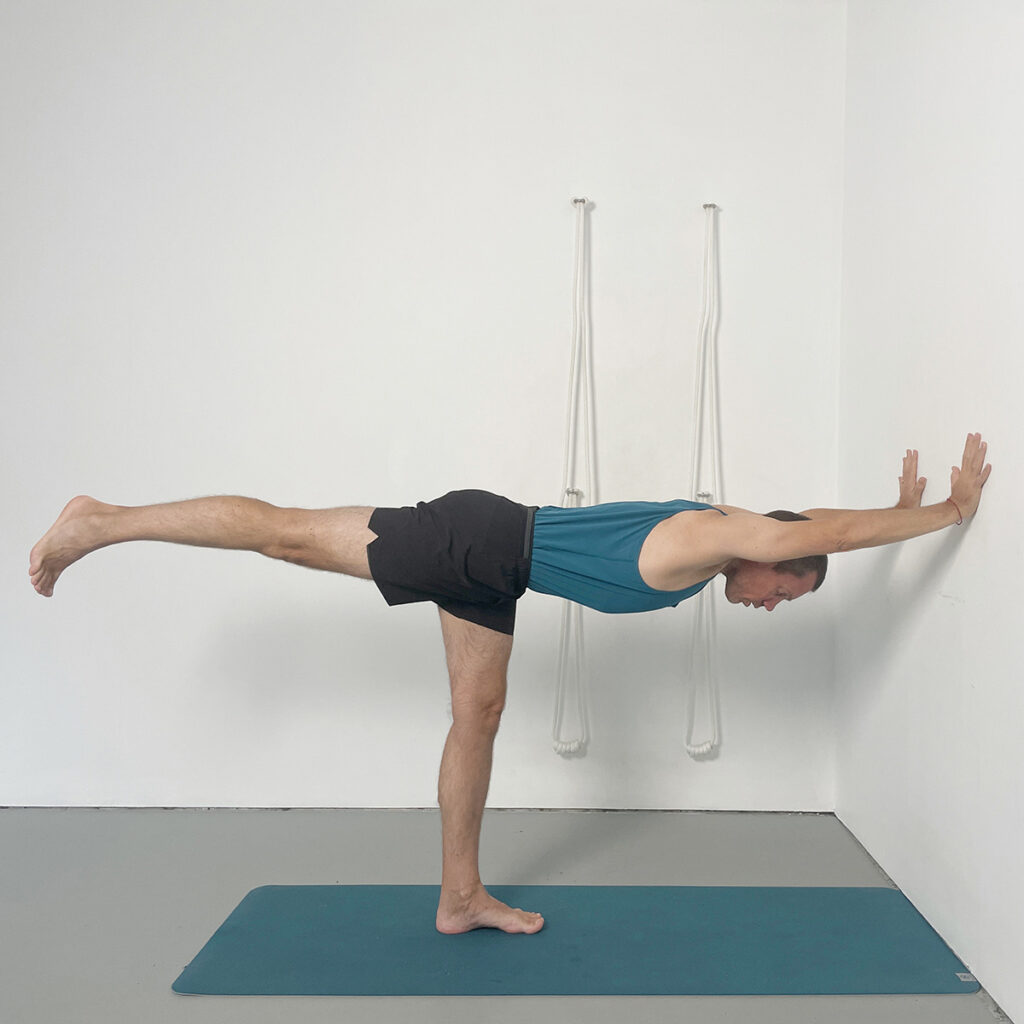
This introduces leg action and teaches you to maintain pelvic levelness while extending a single leg.
Key Actions:
- From Stage 3 position, bring the feet together so that the big toes and inner heels touch.
- From Stage 3 position, lift the right leg parallel to the floor.
- Firm the right buttock and straighten the leg fully.
- Lengthen from the inner groin to the inner heel.
- Keep hips level; avoid dropping the opposite hip.
- Repeat on the left leg, observing symmetry.
Stage 5: Adho Mukha Svanasana (Downward Facing Dog Pose) – Hands to Wall
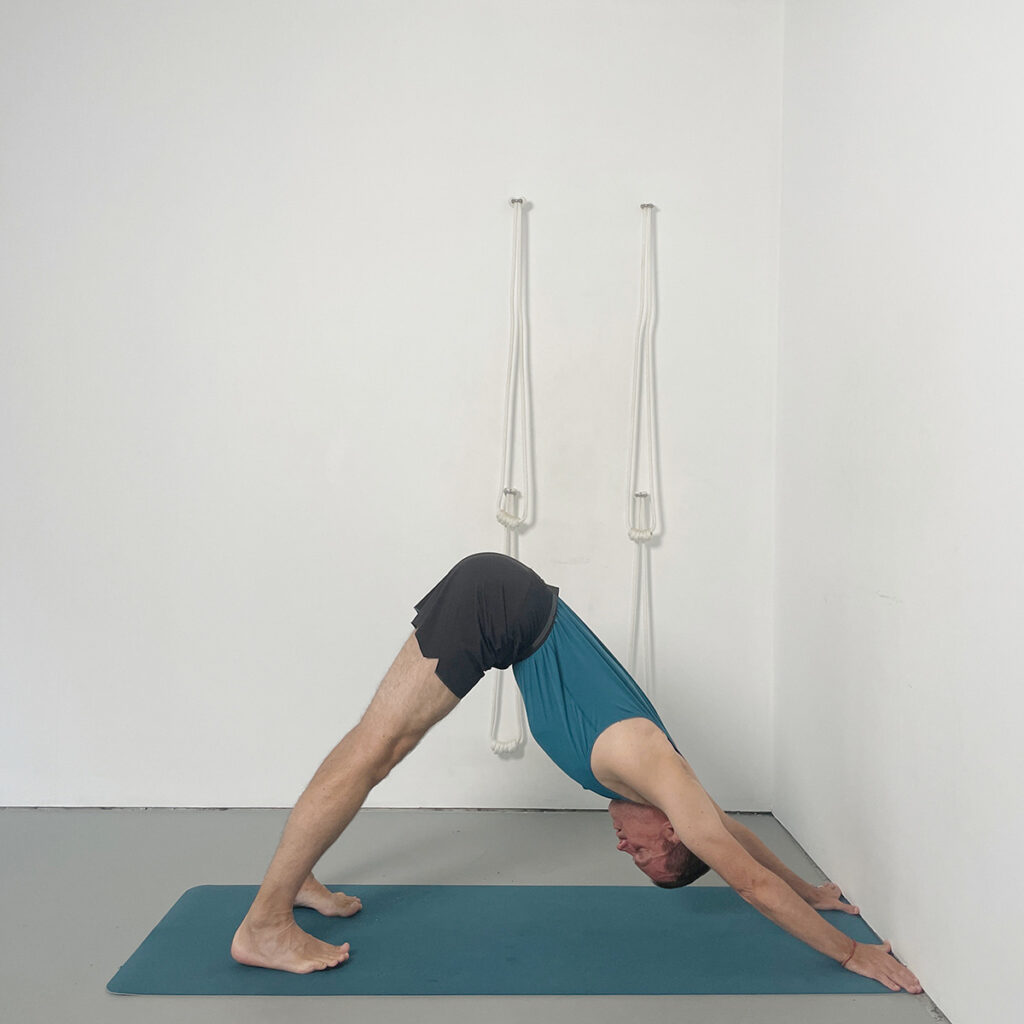
This variation of Downward Facing Dog shifts more body weight into the arms and begins to mimic the inverted action of handstand, while developing shoulder extension and strength.
Key Actions:
- Place hands on the wall shoulder-width, feet on the floor.
- Step back to form downward dog, pressing hips back and upward.
- Press hands down to lift side ribs up
- Press tops of thighs back
- Descend heels down
Stage 6: Adho Mukha Svanasana Preparation – Hands on Angled Blocks
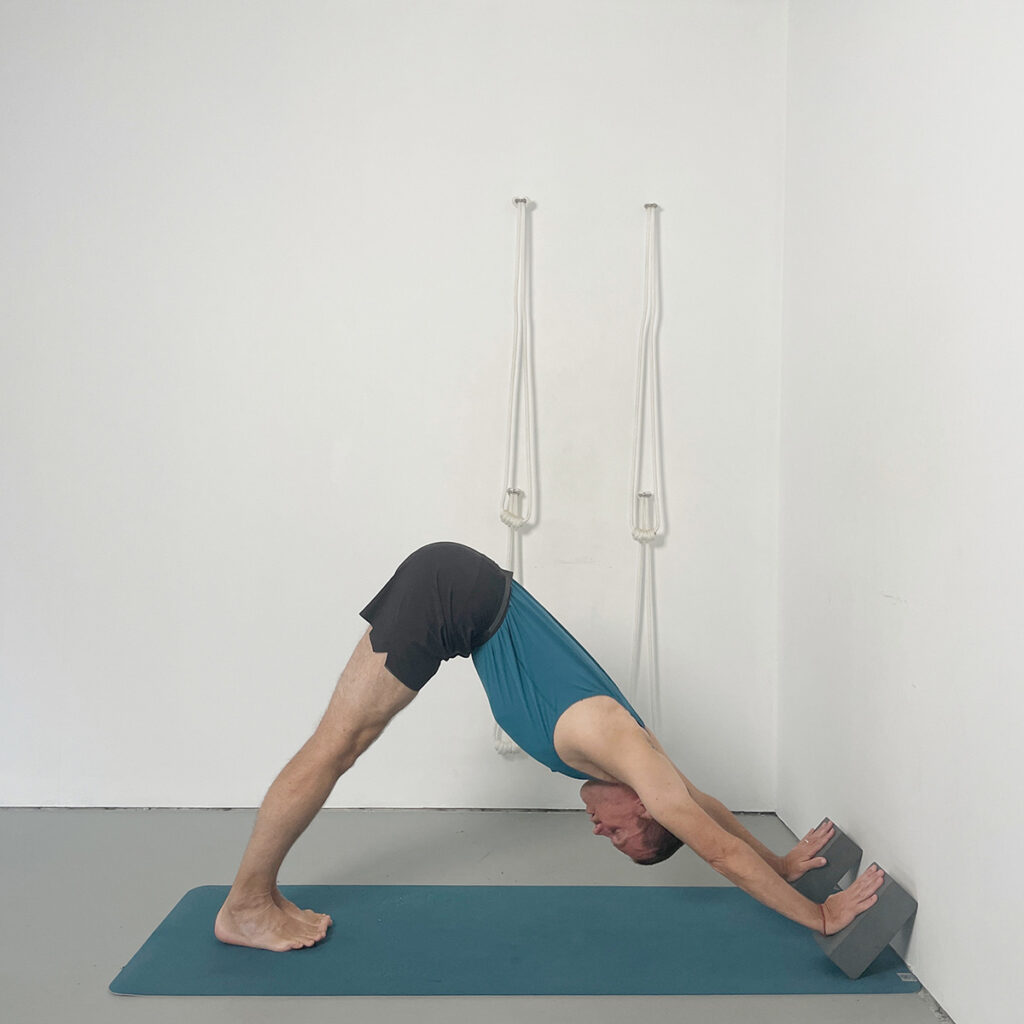
This stage helps improve wrist mobility by placing the hands in a more handstand-like angle, without the full load of inversion. It’s useful for developing wrist flexibility and strength in preparation for bearing more weight.
Key Actions:
- Place hands on angled blocks at the wall.
- Spread fingers and press down through the index finger bases.
- Keep elbows straight and lift up through shoulders
- Whilst pressing hands into blocks lift your pelvis up and back
- Press into the blocks to lift your whole spine
Stage 7: Eka Pada Adho Mukha Svanasana Preparation – With Angled Blocks
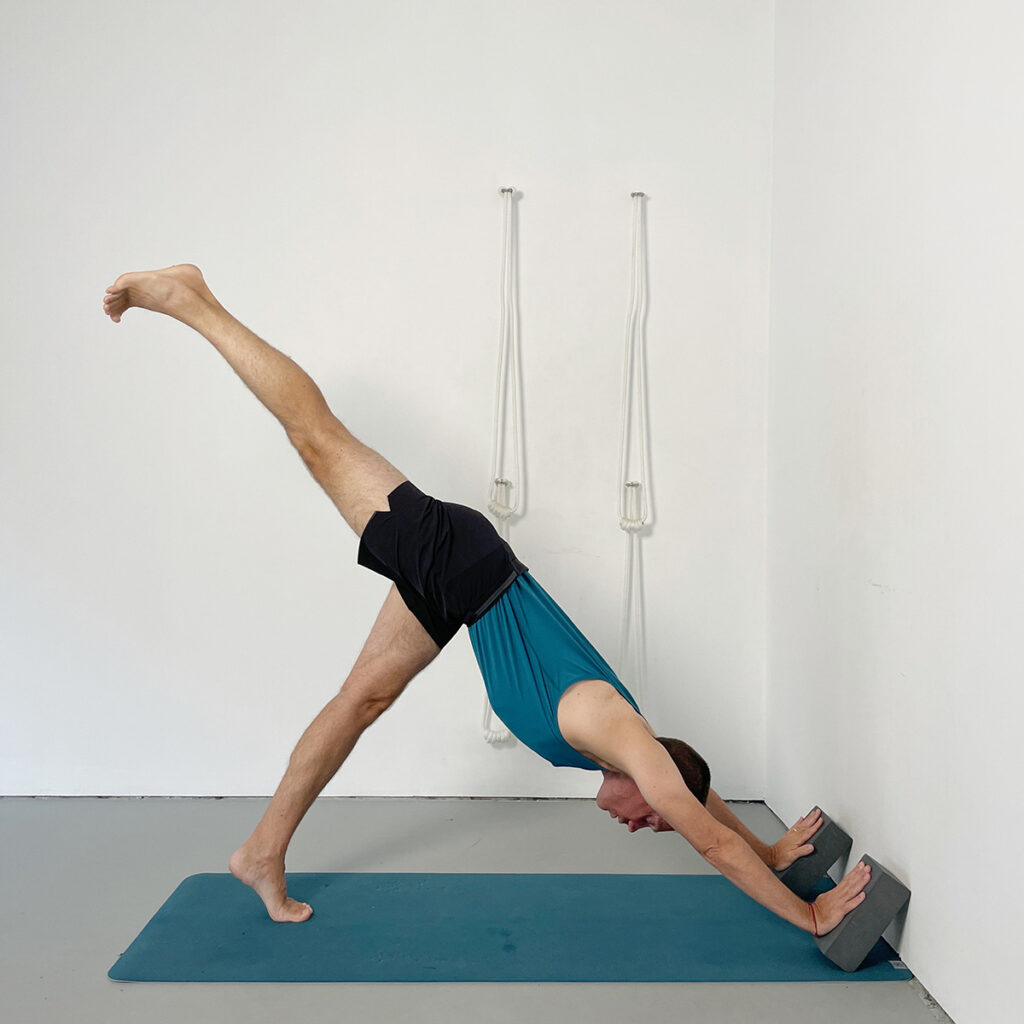
Builds on Stage 6 by incorporating unilateral leg lifts to challenge balance and core strength.
Key Actions:
- From Stage 6 setup, lift the right leg up
- Keep the knee straight and firm the buttock.
- Extend through the inner heel.
- Ensure hips stay level.
- Repeat with the left leg.
Stage 8: Adho Mukha Svanasana with Feet on Blocks
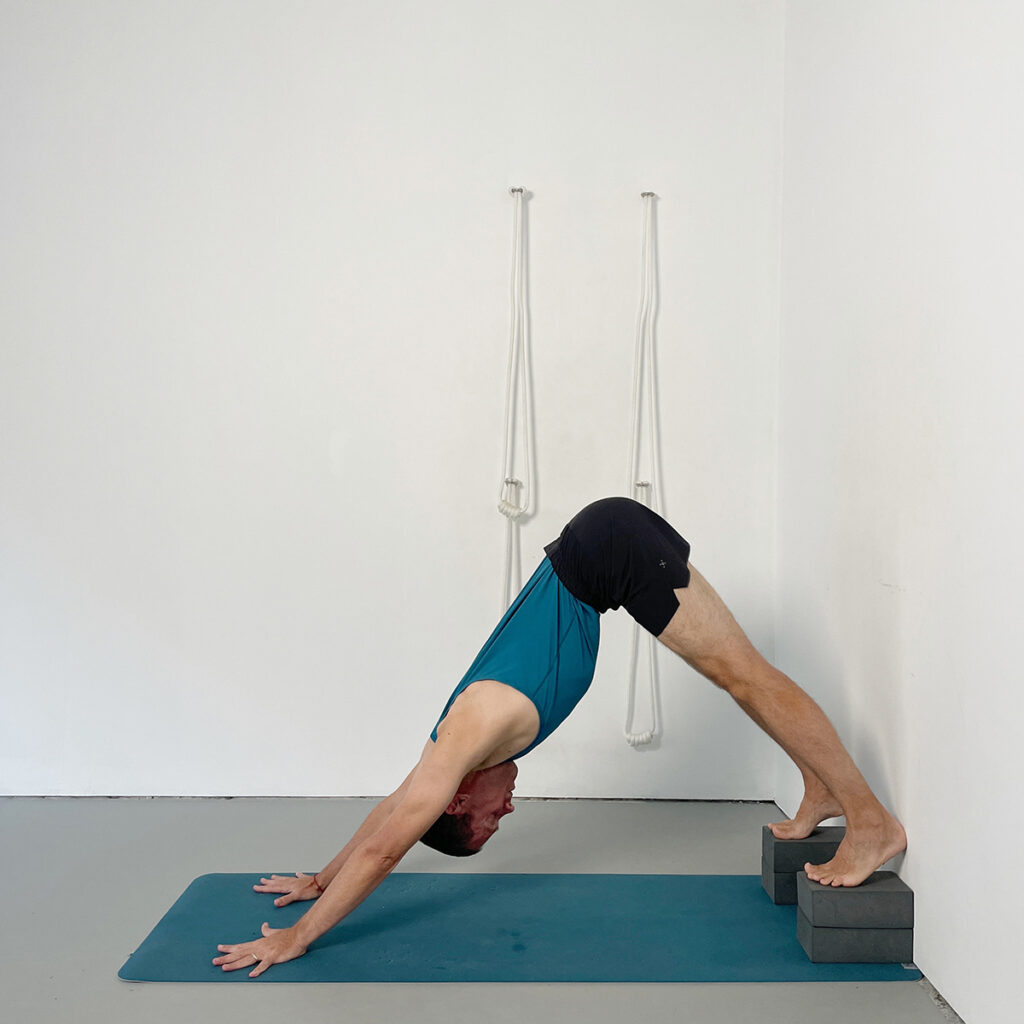
Elevating the feet intensifies the inversion effect, encouraging more weight in the arms and awakening the shoulder girdle — helping build confidence and strength in supporting body weight through the arms.
Key Actions:
- Place feet on blocks in downward dog.
- Press hands down to lift the weight of the body up.
- Lift hips higher to create more verticality.
- Keep elbows straight and spine lifting.
- Co-ordinate the effort of the arms and legs to harness improved lift
Explore a World of Online Yoga. Unlimited Access to All Classes and Courses.
Try it Free for 14 days. Cancel Anytime.
Stage 9: Half Handstand (Adho Mukha Vrksasana) – Feet to Wall
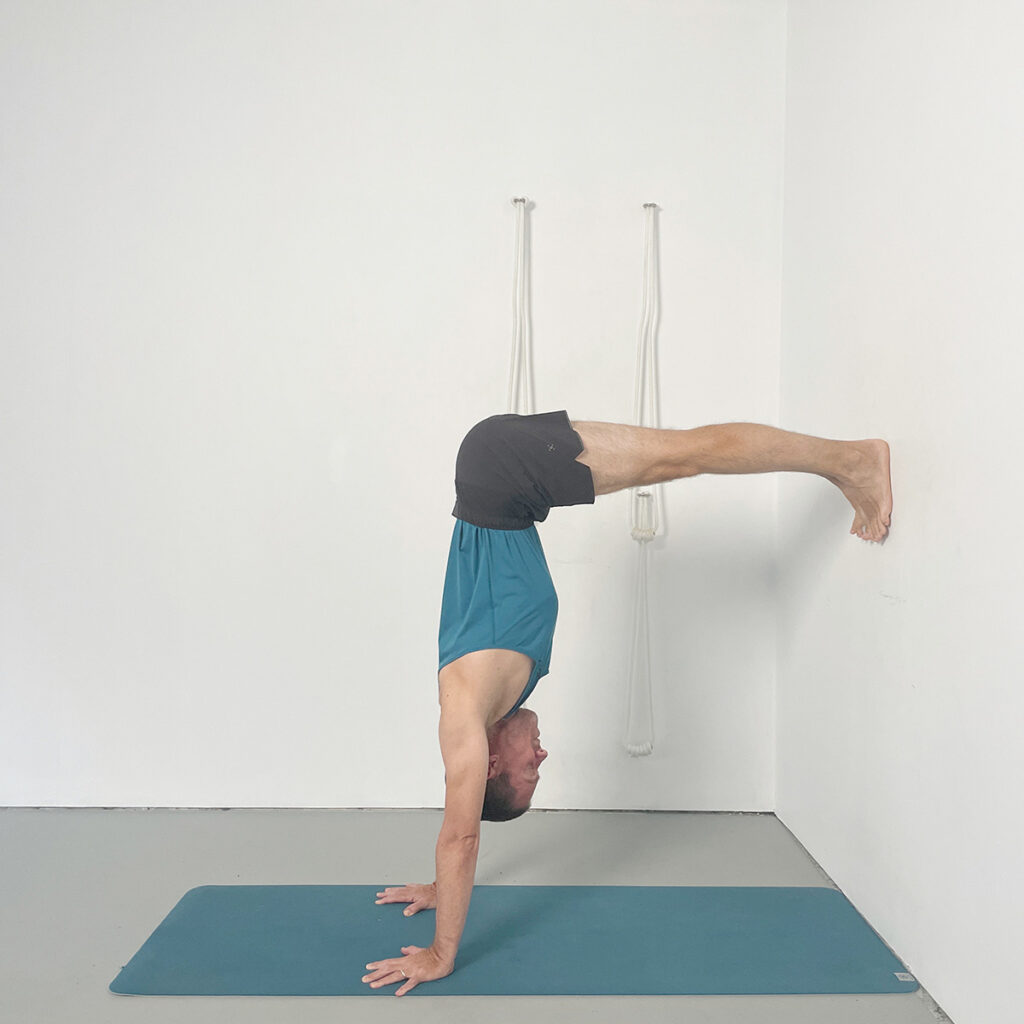
Introduces the body to true inversion and the orientation of handstand.
Key Actions:
- Measure leg-length from wall to determine hand placement.
- Step both feet up the wall, legs parallel to the floor.
- Keep hands shoulder-width and fingers spread.
- Press hands to floor whilst pressing heels into the wall.
- Lift thighs, pelvis and spine up.
Stage 10: Half Handstand (Adho Mukha Vrksasana) – Feet Higher on the Wall
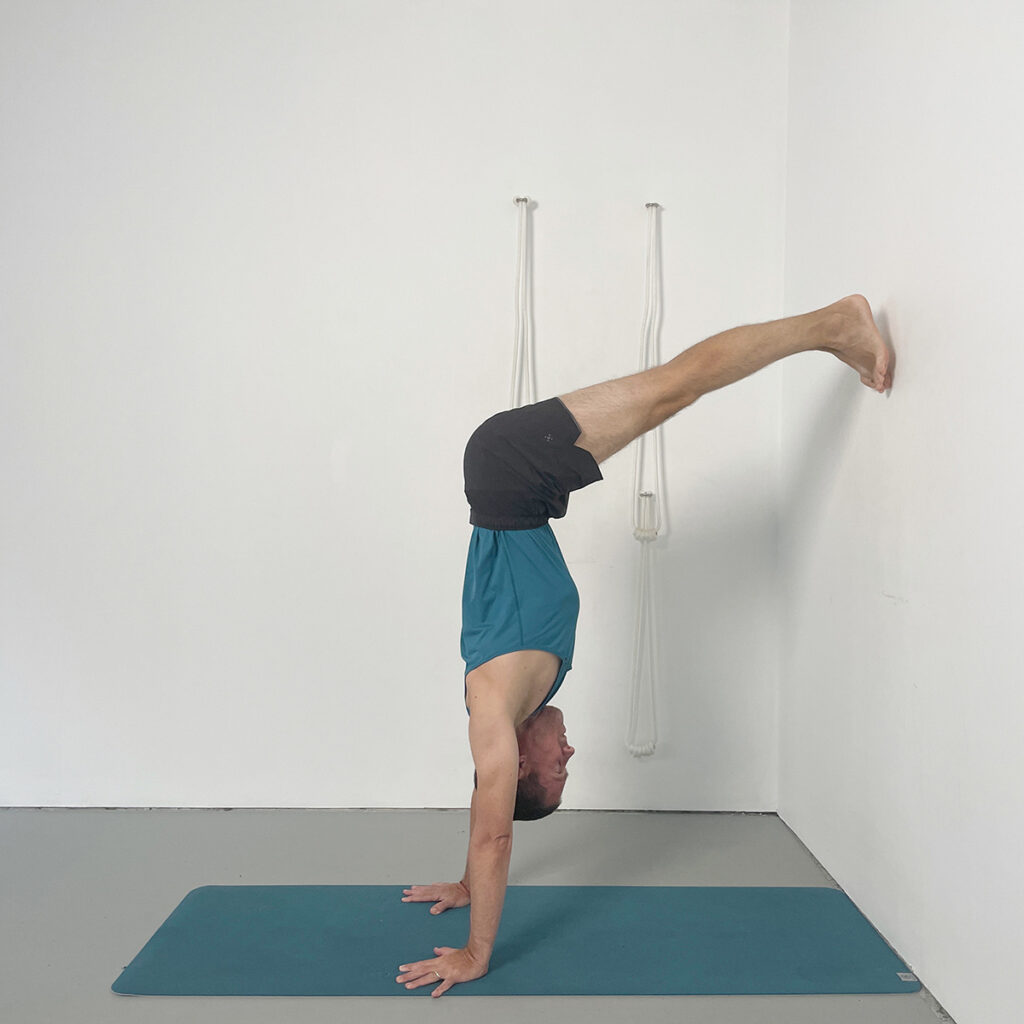
Enhances inversion by increasing the vertical lift of the pelvis.
Key Actions:
- From Stage 9, walk feet higher up the wall.
- Allow only toes or balls of the feet to contact the wall.
- Keep the back of the pelvis lifted.
- Press hands down and lift spine up.
- Engage legs to support upward movement.
Stage 11: Half Handstand (Adho Mukha Vrksasana) – One Leg to Vertical
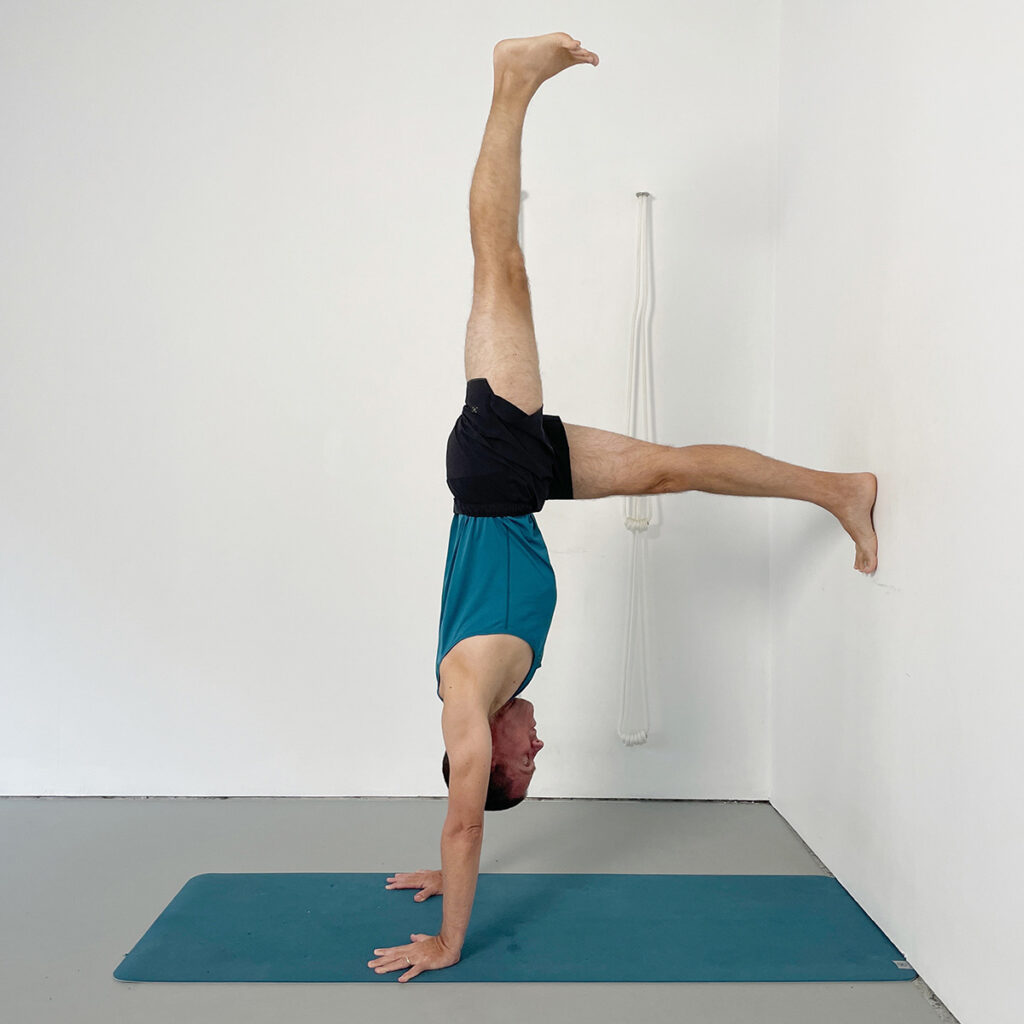
Begins the transition from wall work to vertical balance.
Key Actions:
- From half handstand, bring big toes and heels to touch.
- Raise the right leg to vertical, straightening the knee fully.
- Avoid dropping the opposite hip.
- Press down with hands to lift the whole pose.
- Repeat with the left leg.
Stage 12: Handstand Preparation (Adho Mukha Vrksasana) – Kicking Practice
Builds the leg spring and body coordination needed for kicking up.
Key Actions:
- Place fingertips one palm-width away from the wall.
- Begin hopping with one leg while the other stays lifted.
- Kick off and land with the same foot.
- Keep the top leg straight and swinging in a wide arc.
- Absorb landing with a bent knee.
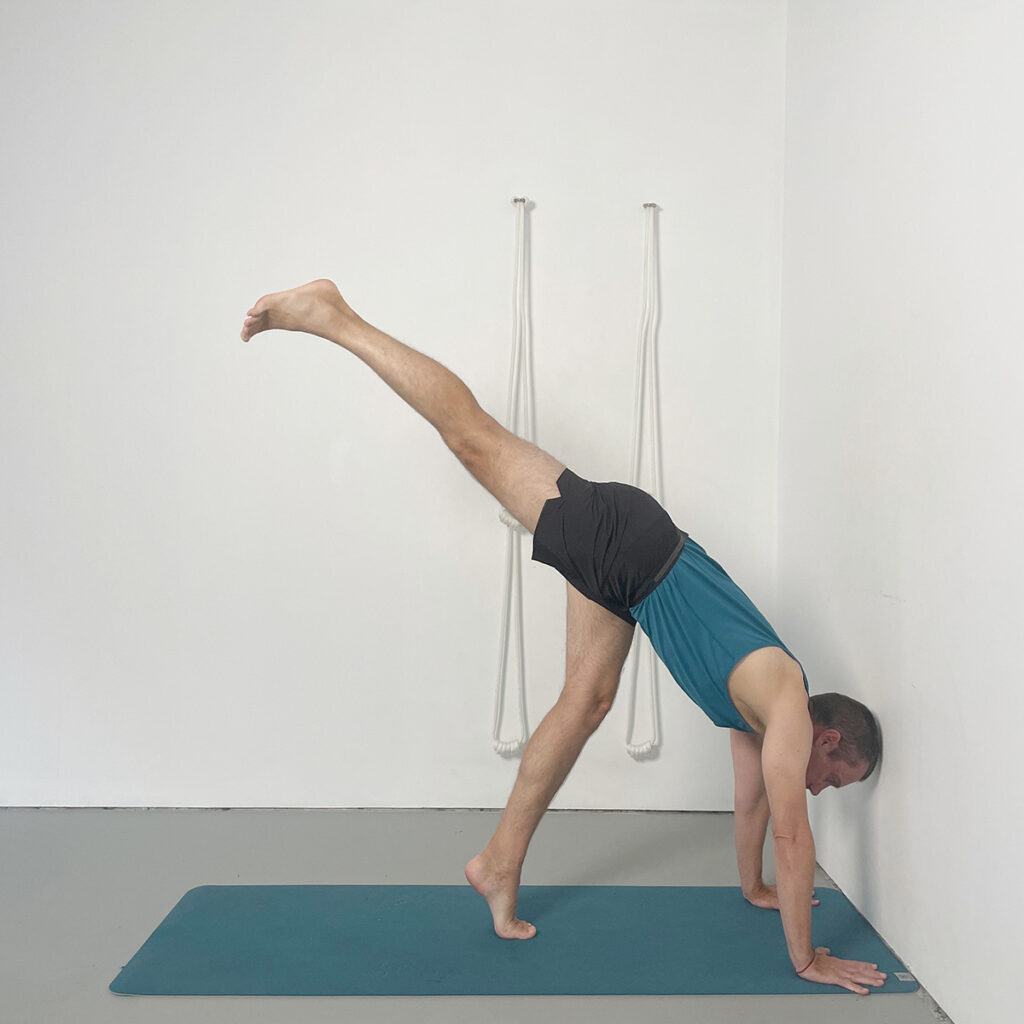
Stage 13: Handstand Entry (Adho Mukha Vrksasana) – Kicking to the Wall
This stage connects the arc of the leg swing with upward momentum, helping to bring the pelvis toward the wall. It refines the action of kicking up with control and clarity, while maintaining strong arm engagement.
Key Actions:
- Kick with the straight leg upwards toward the wall.
- Firm the buttock of the leading leg.
- Keep elbows straight and fingers active.
- Transfer weight from foot to hands as you kick off.
- Touch the wall lightly with the heel.
Stage 14: Handstand Support (Adho Mukha Vrksasana) – Using a Bolster for Kicking and Shoulder Stability
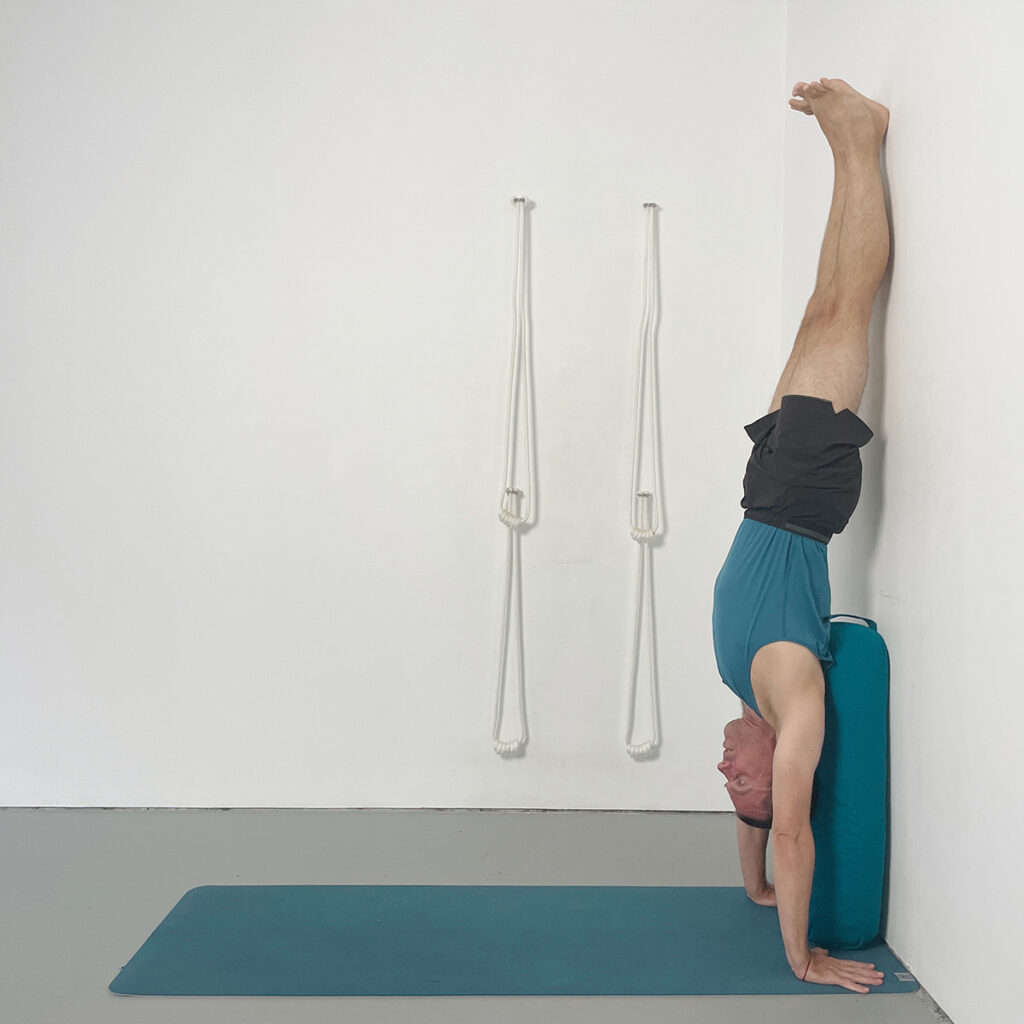
This stage supports those struggling to kick up by preventing the shoulders from collapsing toward the wall. The bolster also offers a sense of security and helps direct the pelvis upward, while building familiarity with the wall and upside-down orientation.
Key Actions:
- Place bolster vertically against the wall.
- Lightly touch the head to bolster for orientation.
- Keep shoulders back and away from the wall.
- Kick up while keeping pelvis moving toward the wall.
- Eventually, try to avoid pushing head into bolster for kick-off leverage.
Stage 15: Handstand Alignment Awareness – Reclined Positioning Practice
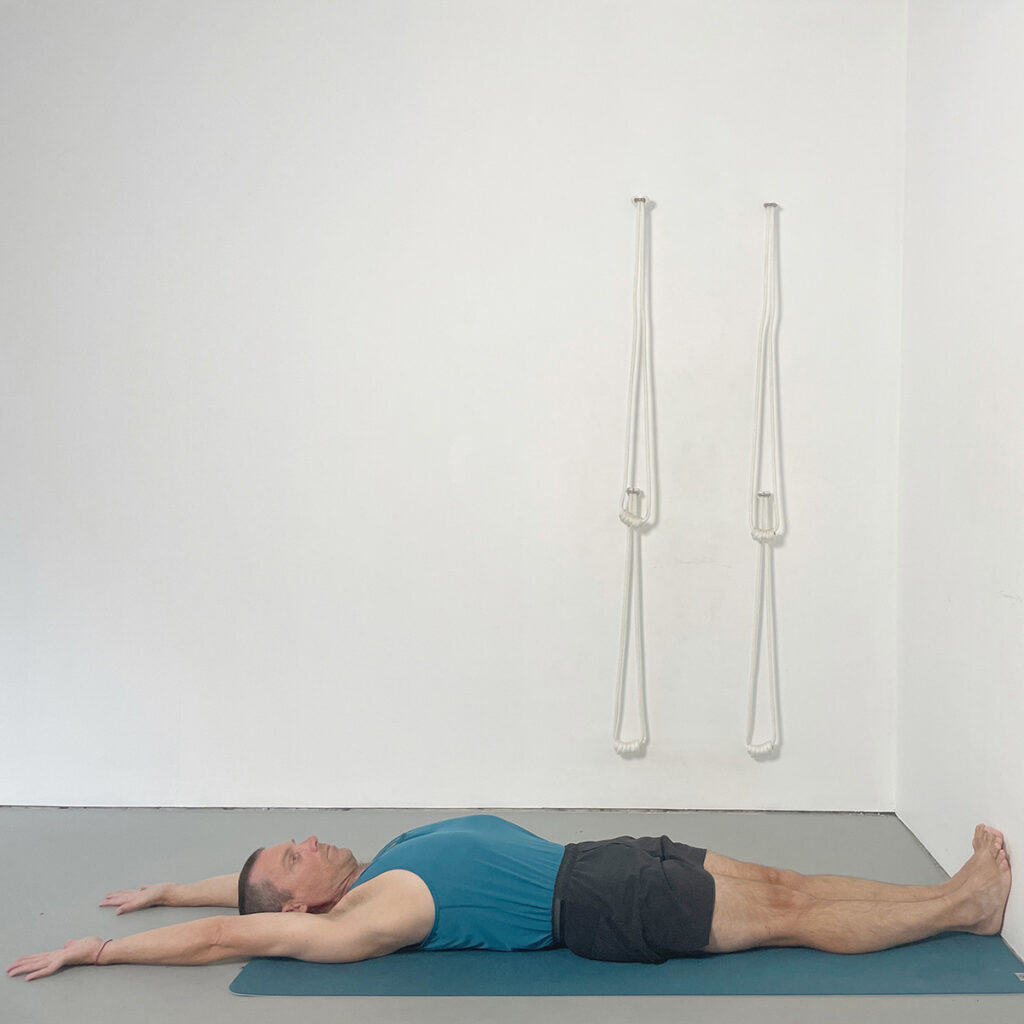
This stage allows you to explore the alignment of ribs, pelvis, and arms without the demands of balancing. It builds awareness of how the spine should be positioned in handstand and helps reduce over-arching in the lower back.
Key Actions:
- Lie on your back with arms extended overhead.
- Draw lower ribs into the body.
- Tuck tailbone under and move back of pelvis away from spine.
- Firm thighs whilst avoiding lumbar overarch.
- Observe and feel proper alignment.
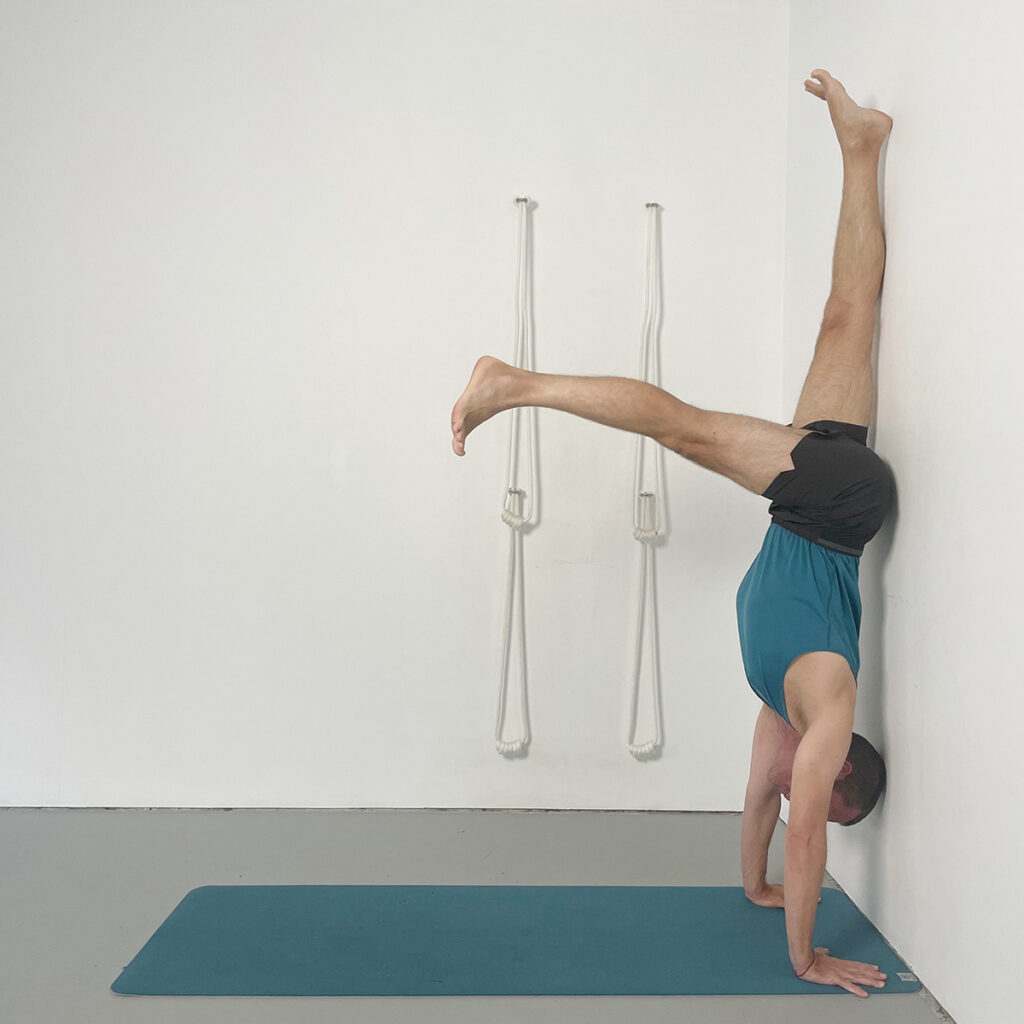
Stage 16: Full Pose (Adho Mukha Vrksasana) – Final Handstand at the Wall
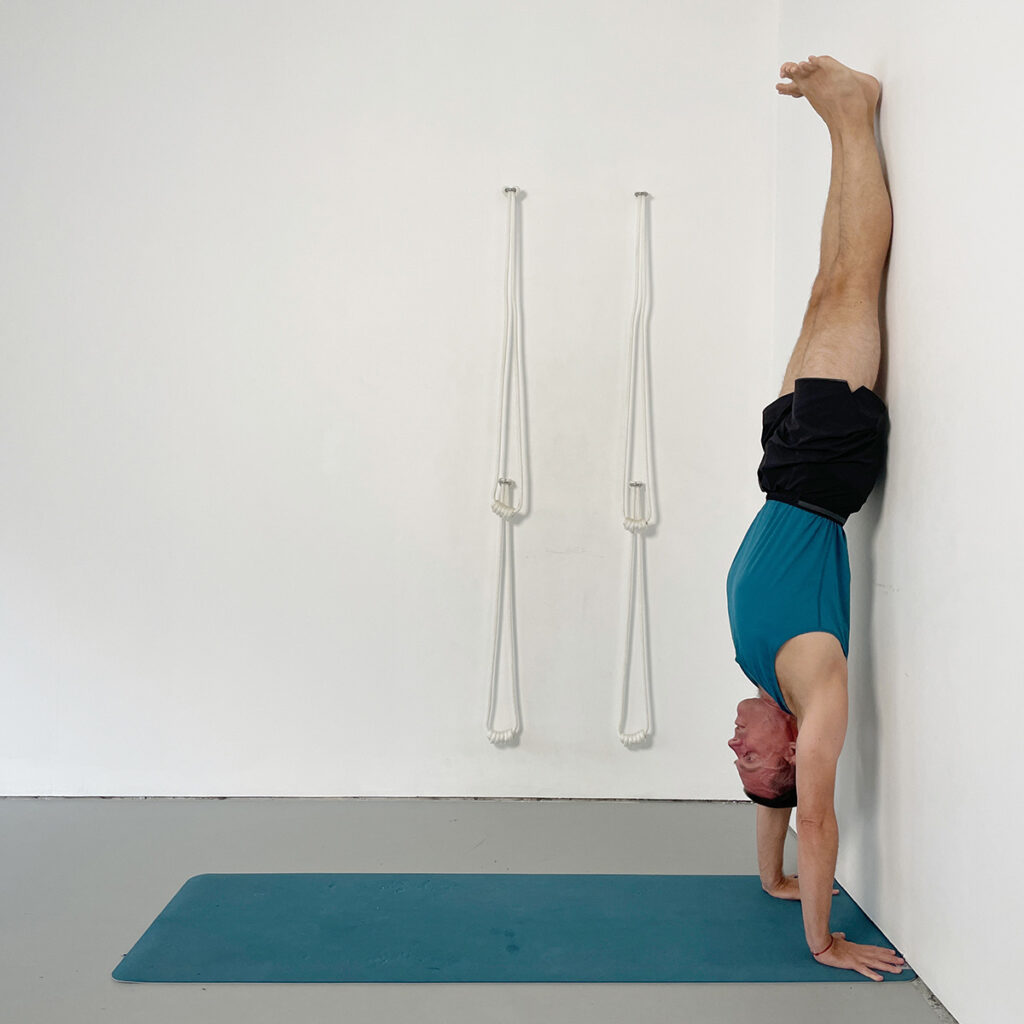
This final stage brings together all preparatory work into the complete expression of Adho Mukha Vrksasana at the wall. It integrates strength, alignment, and confidence — offering a stable foundation for further exploration of free balancing.
Key Actions:
- Kick up with preferred leg and reach wall.
- Adjust head position to look toward room.
- Draw lower ribs into the body.
- Lift back of pelvis and legs vertically.
- Return gaze to floor between hands.
Next Steps: Take Your Handstand Practice Further
Throughout this guide, you’ve learned the step-by-step process of building strength, alignment, and confidence for handstand (Adho Mukha Vrksasana). From preparatory poses to key techniques for kicking up safely, each stage has helped develop the foundational skills necessary to practice and refine your handstand with control and stability.
Ready to go deeper? If you found this tutorial helpful, check out our handstand-specific classes on Yoga Selection, where you can access detailed lessons that will help you refine your practice, including:
Explore Yoga Selection’s Library Today
With over 900 online Iyengar Yoga classes classes and two new videos added each week, Yoga Selection offers a dynamic resource to support your growth as a practitioner. Explore our Yoga Selection Weekly Classes Page to find classes that match your goals and discover new insights in your practice.
Whether you’re revisiting foundational poses, diving into advanced techniques, or exploring therapeutic support, Yoga Selection’s online Iyengar Yoga classes will empower every aspect of your journey. Join our community today and take your practice to new levels of depth and understanding.
Explore a World of Online Yoga. Unlimited Access to All Classes and Courses.
Try it Free for 14 days. Cancel Anytime.
Share:
See Related Blog Posts: