
Supta Virasana: Step-by-Step Guide to Reclining Hero Pose in Iyengar Yoga
Supta Virasana (Reclining Hero Pose) is a foundational Iyengar Yoga pose that improves knee mobility, opens the quadriceps, and supports deep, passive chest opening. Though simple in appearance, this pose requires careful attention to technique, alignment, and support. For many practitioners, especially beginners, Supta Virasana can be challenging. But with consistent practice and the thoughtful use of props, it evolves into a deeply grounding and versatile asana—ideal at the start of an active sequence or within a therapeutic practice.
Supta Virasana, or the Reclining Hero Pose, involves sitting in a kneeling position with your hips placed between the heels, and reclining backward, laying the spine on the floor or a support. While the front thighs stretch and knees remain together, the arms rest alongside the body or extend overhead. This rejuvenating pose enhances knee mobility, quadriceps flexibility, and offers therapeutic benefits for both beginner and advanced yoga practitioners.
This comprehensive tutorial guides you through a progression of nine stages that will help you confidently learn Supta Virasana at your own pace. Each version is matched with precise prop setups and clearly defined actions. Whether you’re working with stiffness or looking to deepen your experience of the pose, these stages will help you approach Supta Virasana safely and effectively.
Visual Overview of Supta Virasana Variations
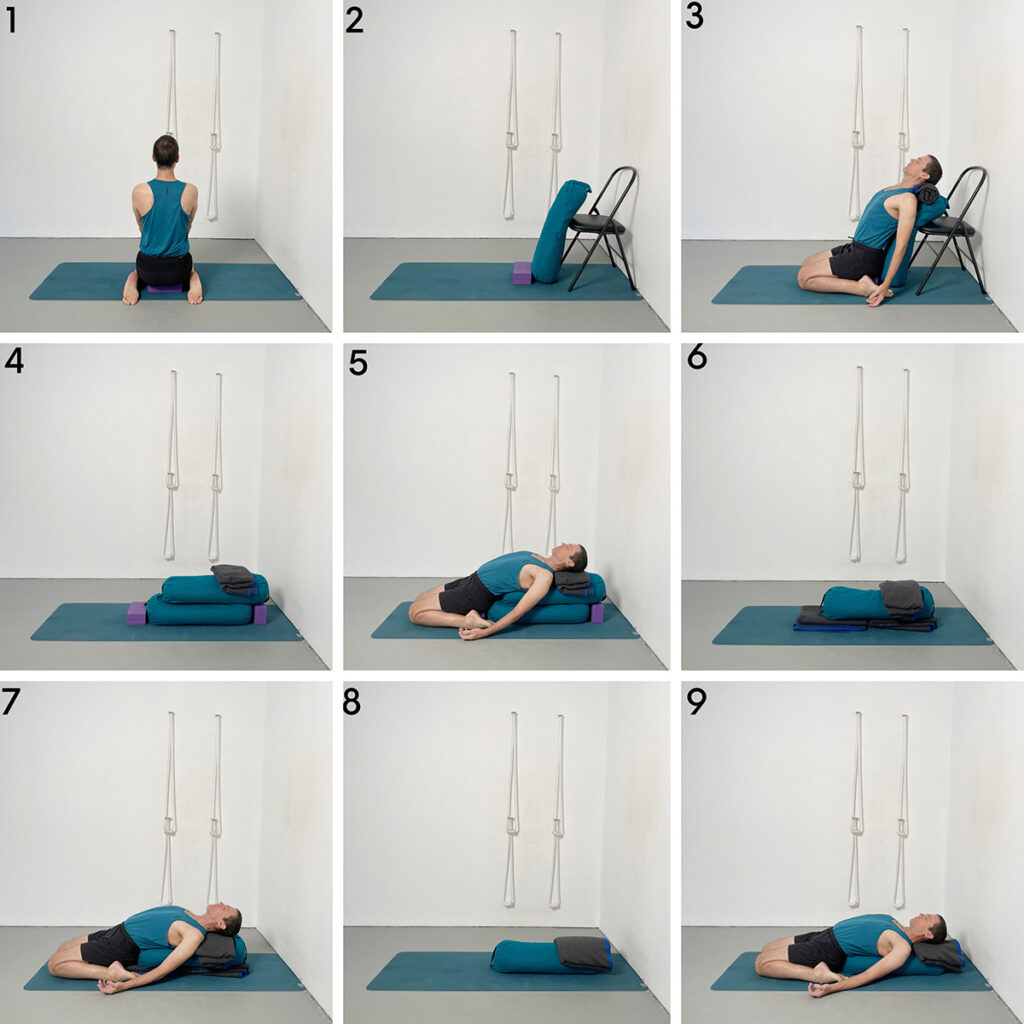
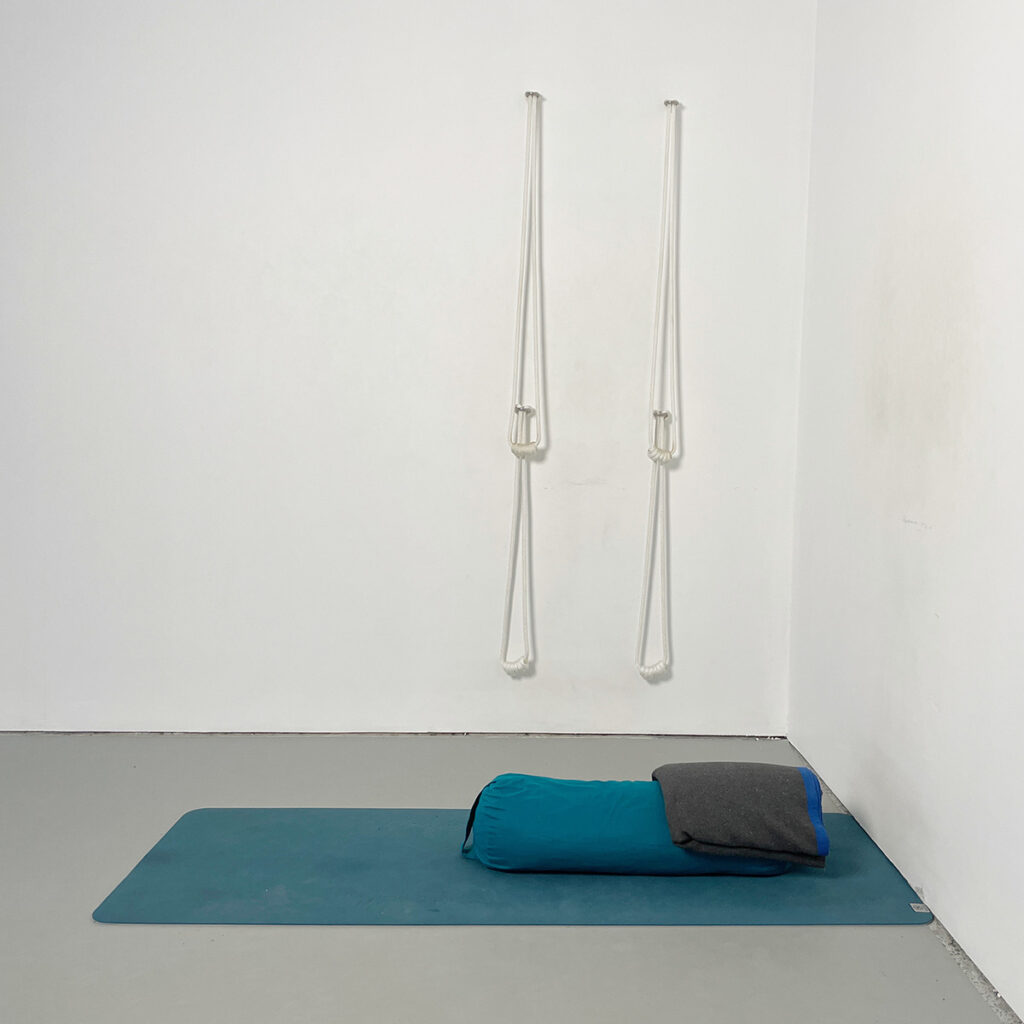
The following image grid shows four main versions of Supta Virasana explored in this tutorial. Each variation is presented with two images: one showing the pose as practiced, and the other showing the prop arrangement on its own. These variations progress from supported and accessible, to more minimal and advanced configurations.
We’ll now explore each variation in detail below using images with clear step-by-step guidance.
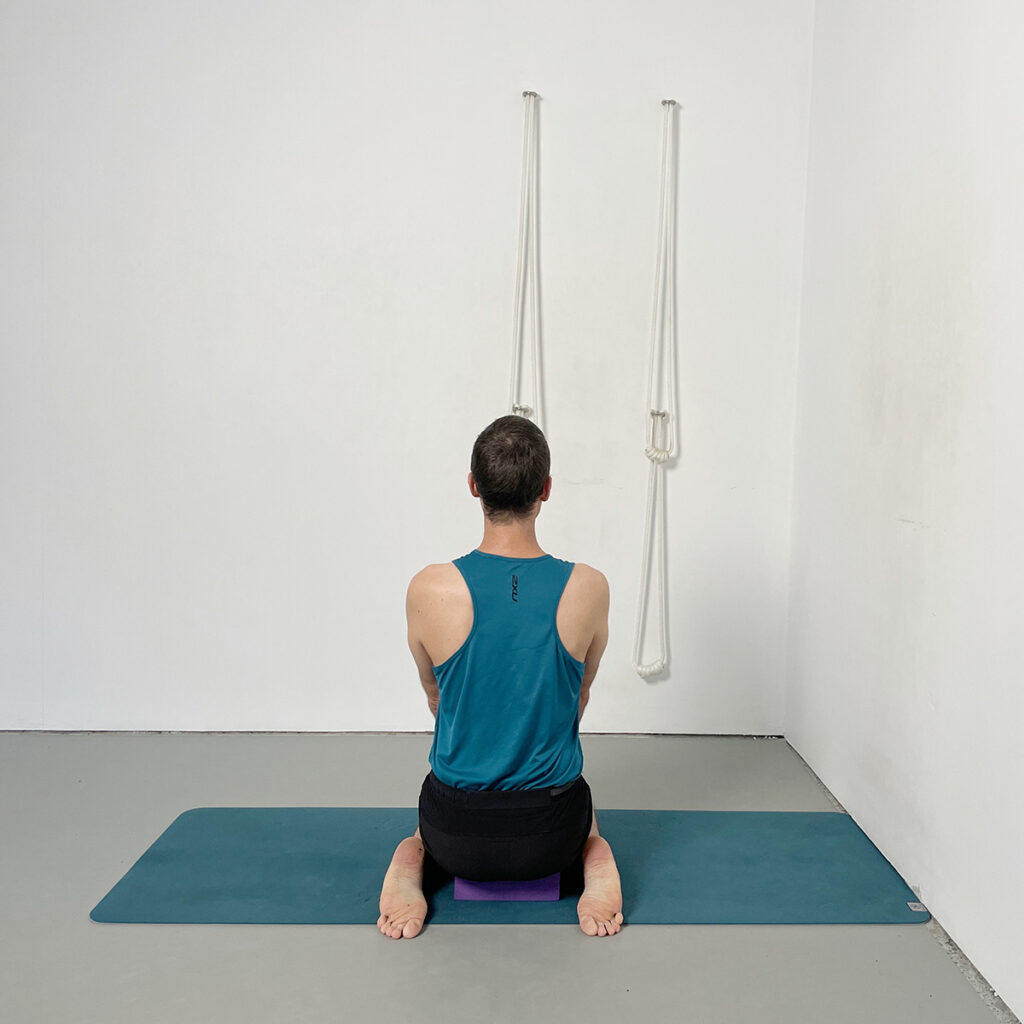
Stage 1: Virasana with Toes Off and On a Folded Blanket
Props: 2 folded blankets
Purpose: This preparatory stage begins opening the shins and ankles without compressing the toes. It eventually encourages full contact between the shins and the floor in preparation for deeper kneeling positions.
Setup & Actions:
- Fold two blankets in half and place them side by side, neat folded edges touching.
- Begin by kneeling so your shins and knees are on the blankets, and your toes hang just off the back edge.
- Heels point straight upward (not touching)
- Sitting bones descend evenly between the heels
- Back of pelvis moves in; chest lifts
- Then, move slightly forward so that your toes are also supported by the blankets.
- Outer ankles draw gently inward
- Knees gently move toward each other
- Spine and chest lift up
Stage 2: Virasana with Offset Blankets
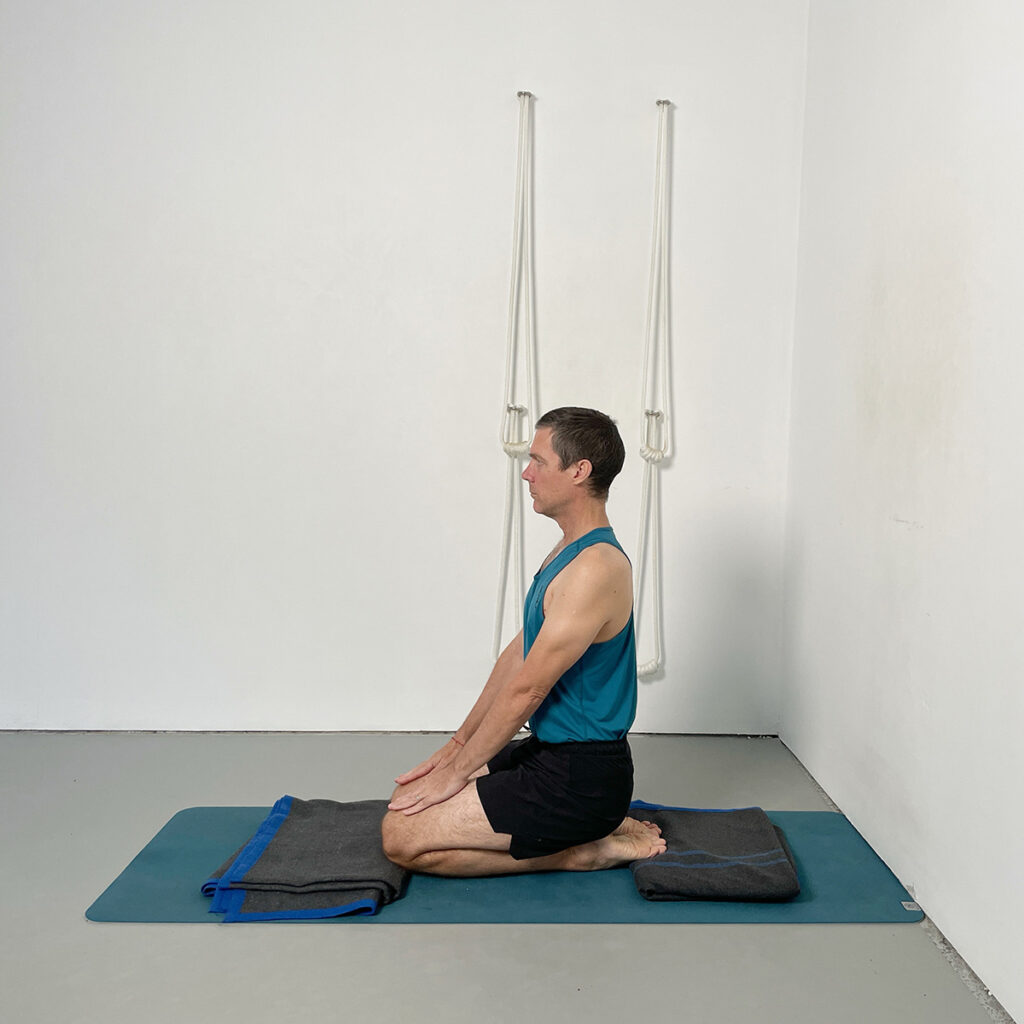
Props: 2 blankets arranged with space between for shin lengthening
Purpose: Extend the skin and muscles along the shinbone; deepen ankle mobility.
Setup & Actions:
- Place one blanket under the knees, one under the feet with a slight gap in between.
- Toes rest on the rear blanket, knees on the front.
- Press palms into thighs, elbows straight, lift chest.
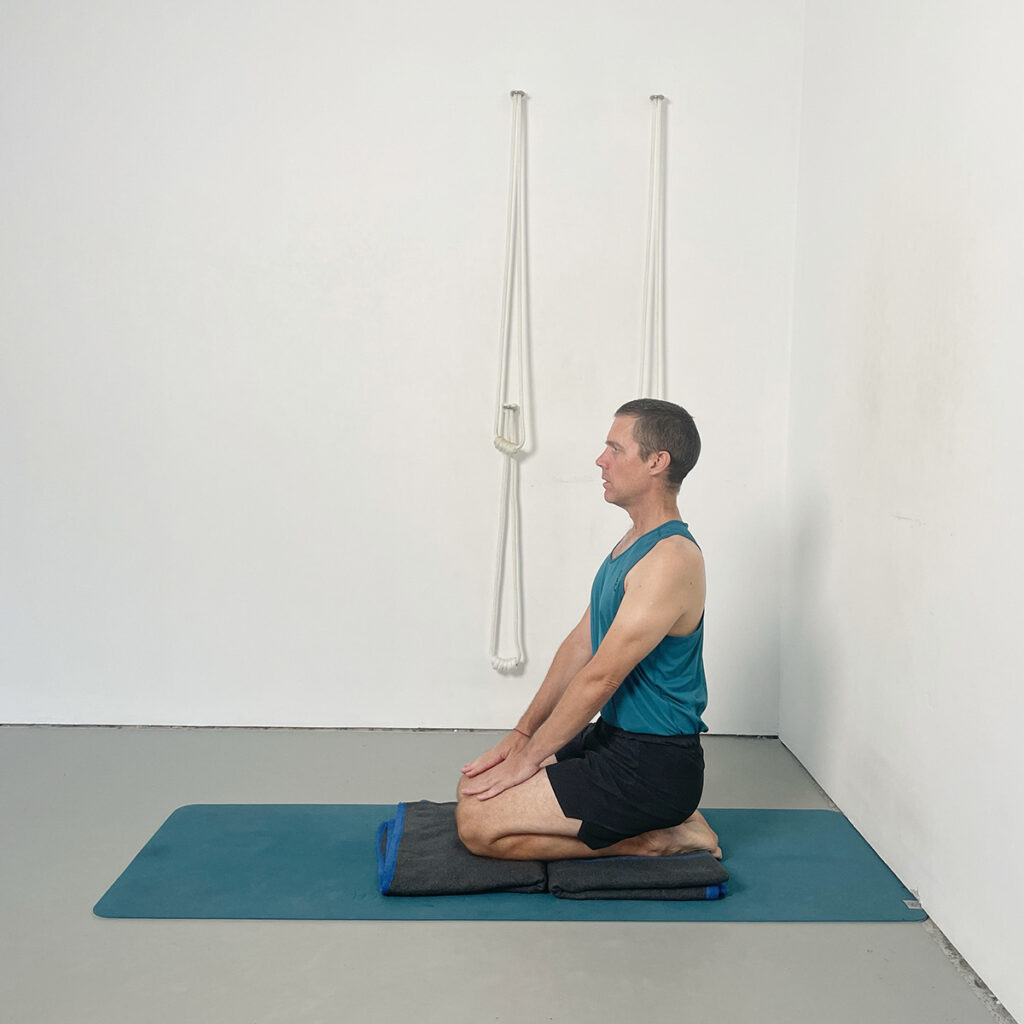
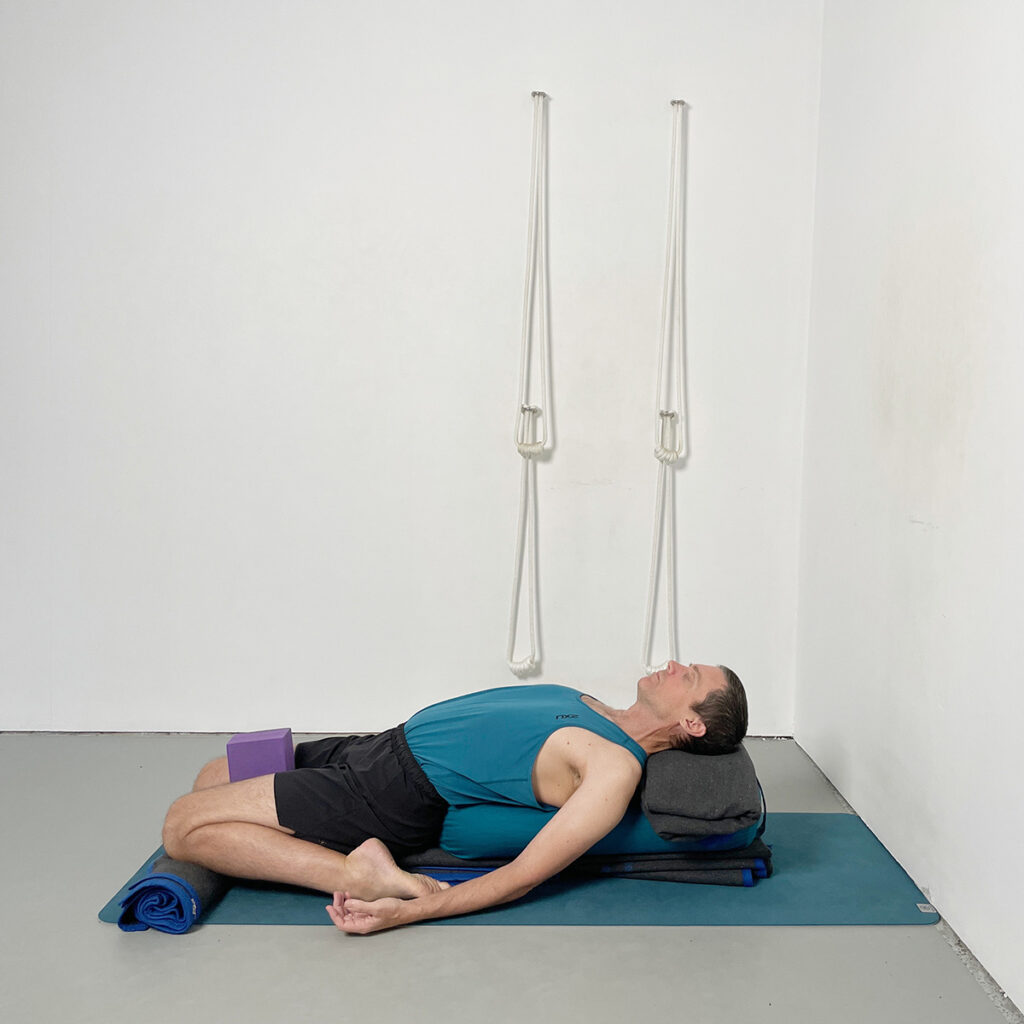
Stage 3: Virasana on a Block (Readiness Check)
Props: 1 flat block
Purpose: Determine if you’re ready to progress further into a reclining versions of Virasana.
Setup & Actions:
- Sit on the block placed between your ankles.
- Use thumbs to pull calf muscles away from knee creases.
- Ensure:
- Little toes contact floor
- Heels remain upright
- Knees contained
- Spine lifts, thighs descend
Stage 4: Reclining onto a Chair + Bolster
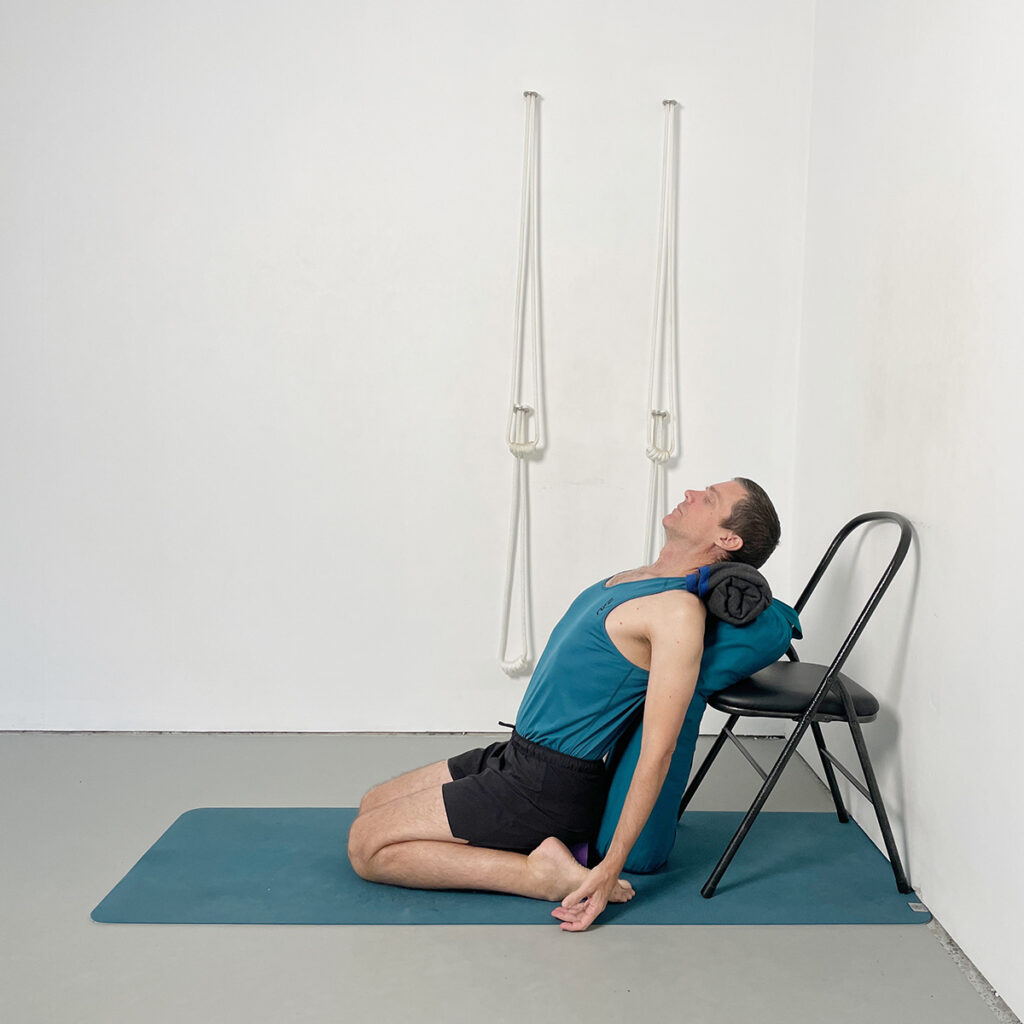
Props: Chair, 2 bolsters, 1 block, 1 rolled blanket (optional blocks under hands)
Purpose: First supported reclining variation
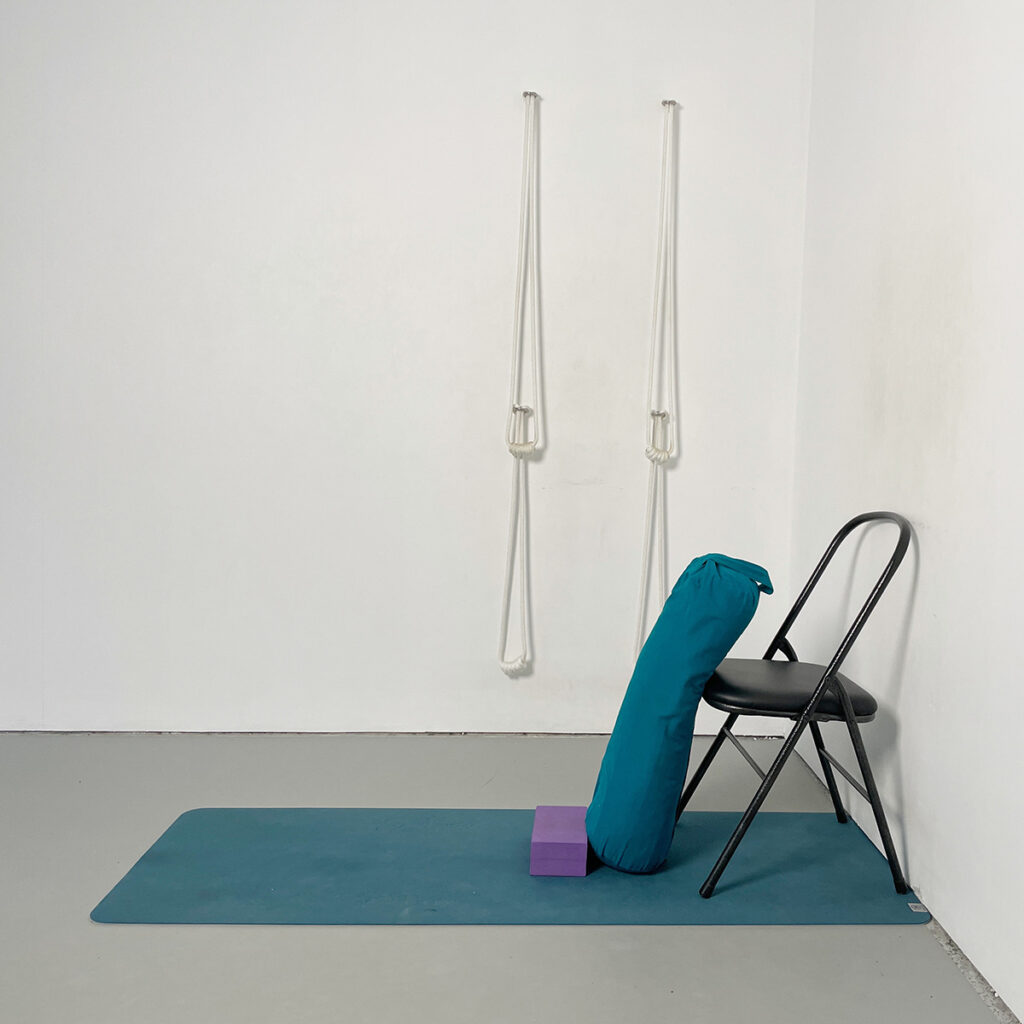
Prop Setup Detail
Setup & Actions:
- Place bolster diagonally against a chair back (chair against a wall for stability)
- Optional: rolled blanket under neck, blocks under hands if fingertips don’t reach floor
- Recline from Virasana on a block
- Ensure:
- Tops of feet press down
- Little toes in contact with floor
- Heels pointing up
- Tailbone tucks under
Stage 5: Reclining on Two Bolsters
Props: 2 bolsters (stacked), 2 blocks, 1 three-fold blanket for head
Purpose: Progress toward fuller recline while maintaining head support

Prop Setup Detail
Setup & Actions:
- One bolster under spine, one overlapping slightly under head
- Head blanket on top of second bolster with block underneath if needed
- Begin recline from sitting on block
- Once reclined:
- Allow knees to lift or widen initially
- Then work gradually to bring knees together and down
- Maintain active pressing of tops of feet
- Tuck tailbone under, lift chest
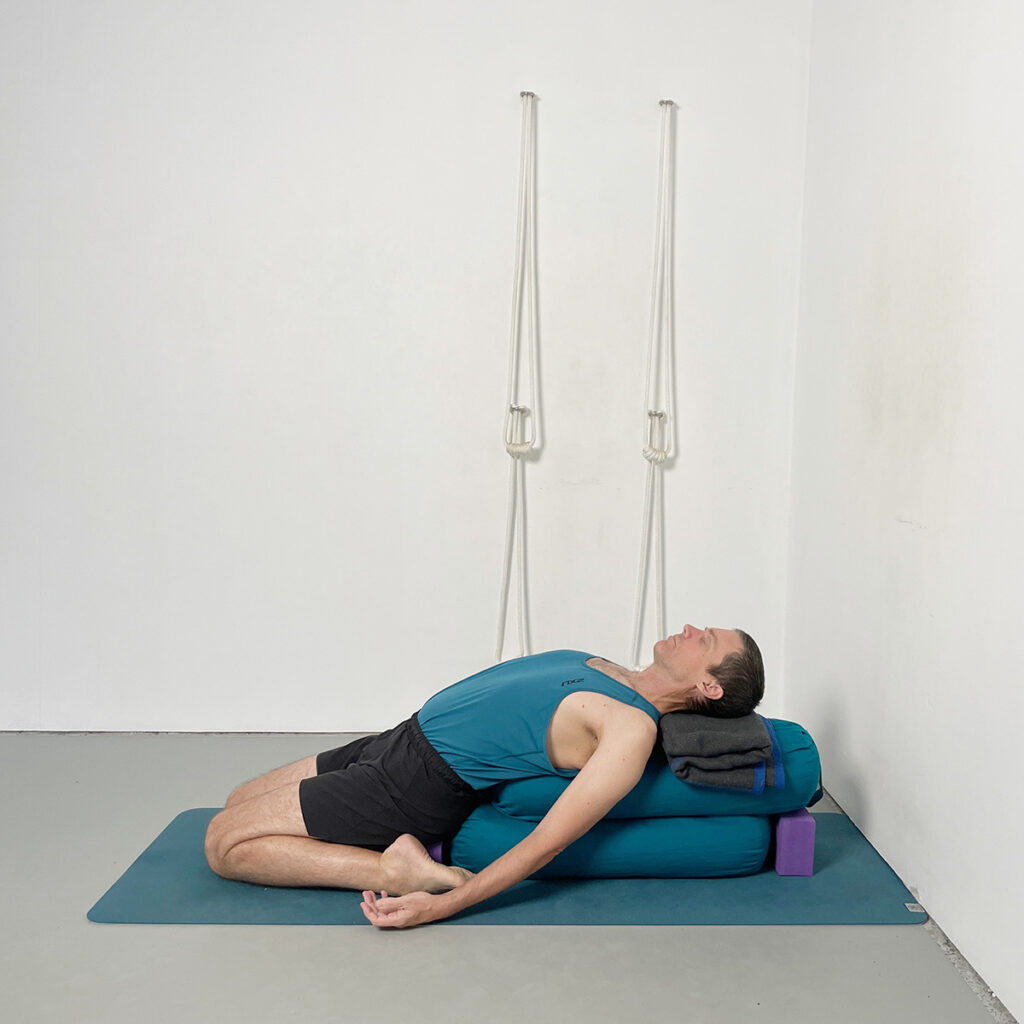
Stage 6: Reclining on One Bolster + 3-Fold Blankets
Props: 1 bolster, 2 three-fold blankets (under pelvis), 1 blanket under head
Purpose: Reduce height under hips; recline closer to the floor
Prop Setup Detail
Setup & Actions:
- Use stacked folded blankets under pelvis instead of a block
- Bolster begins just behind pelvis, in light contact with lower back
- Recline down, support head as needed
- Emphasise:
- Inner knees draw inward
- Tailbone and buttocks tuck under
- Thighbones descend; spine lifts
Stage 7: Troubleshooting: Knees & Quadriceps
Props: Half-fold blanket under knees, block between thighs
Purpose: Prevent knees from lifting/splaying and assist containment
Prop Setup Detail
Setup & Actions:
- Place half-fold blanket under knees before reclining
- Position block between inner thighs (not knees)
- Once reclined:
- Gently squeeze block
- Press knees into blanket
- Inner knee to inner groin draws back
- Tailbone tucks, spine lengthens
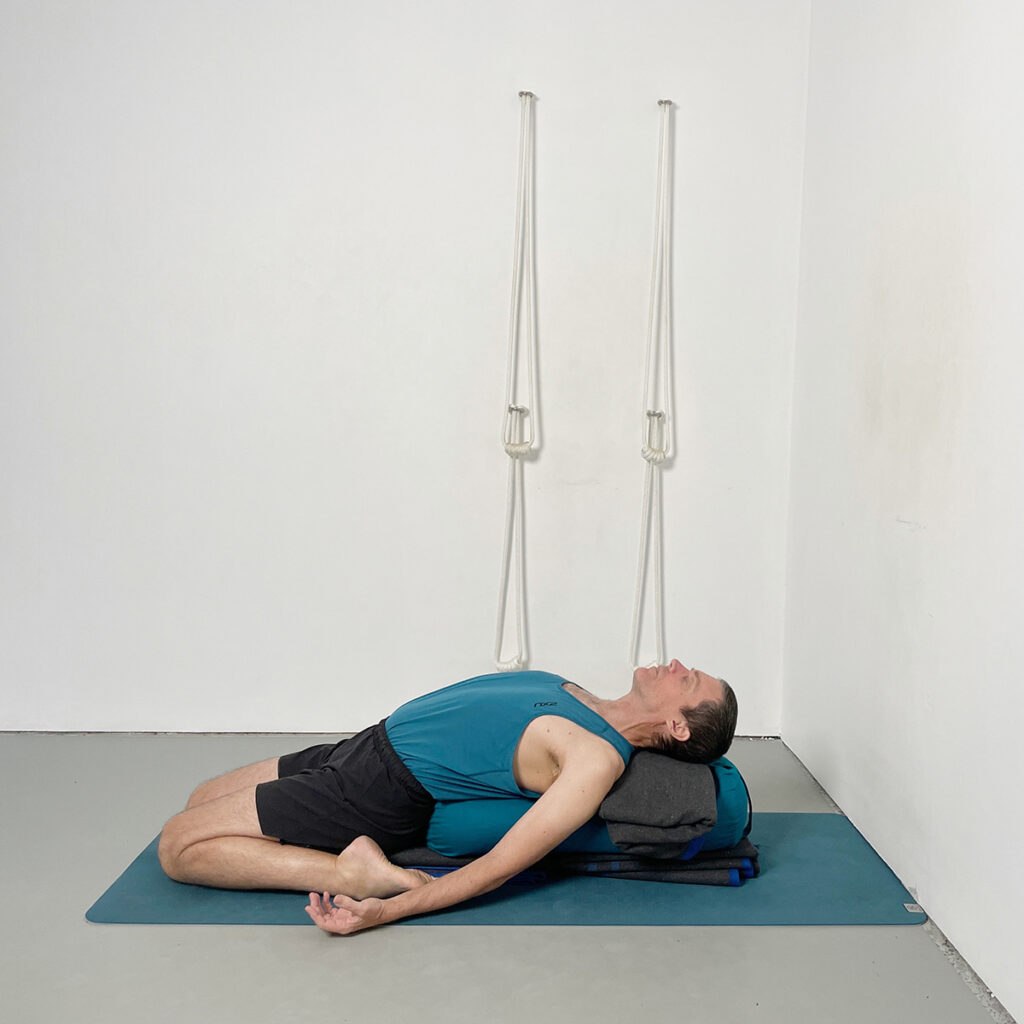
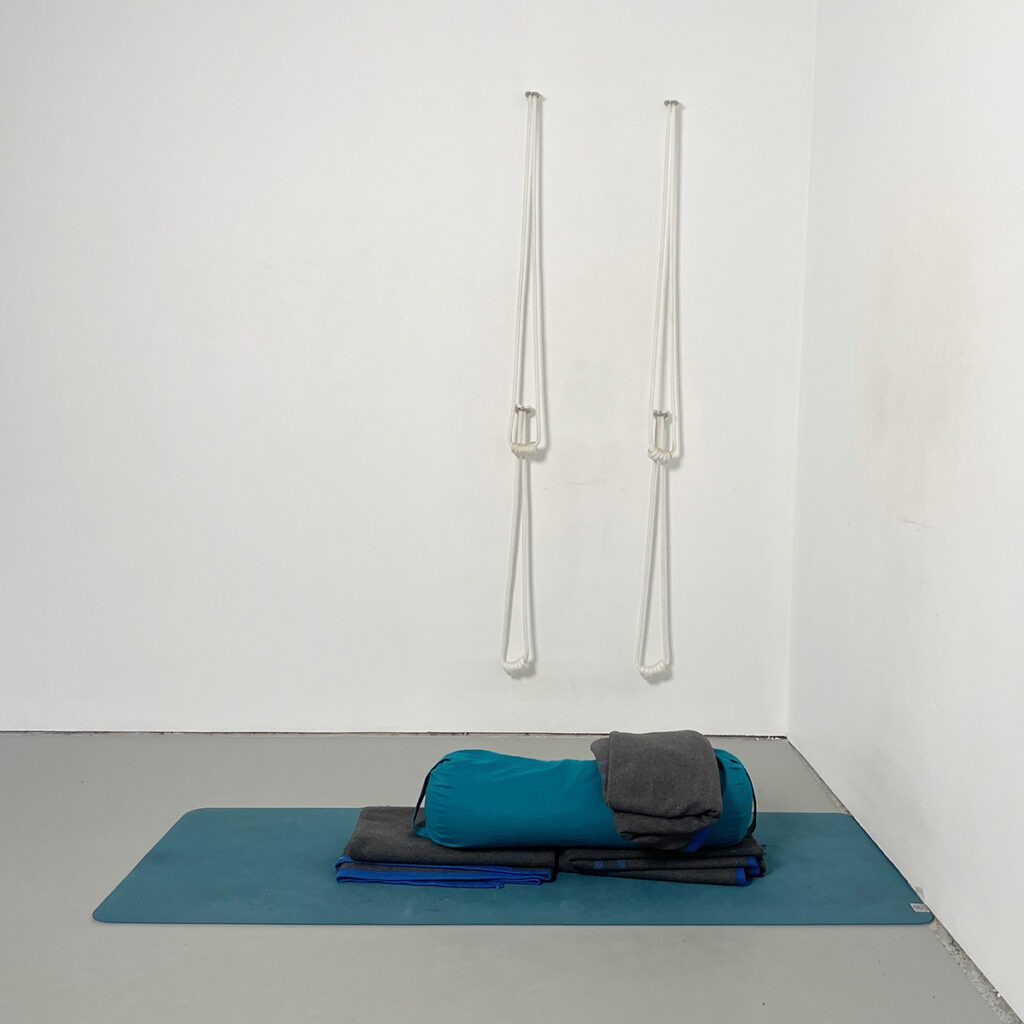
Stage 8: Supta Virasana Final Version with Bolster + Head Blanket
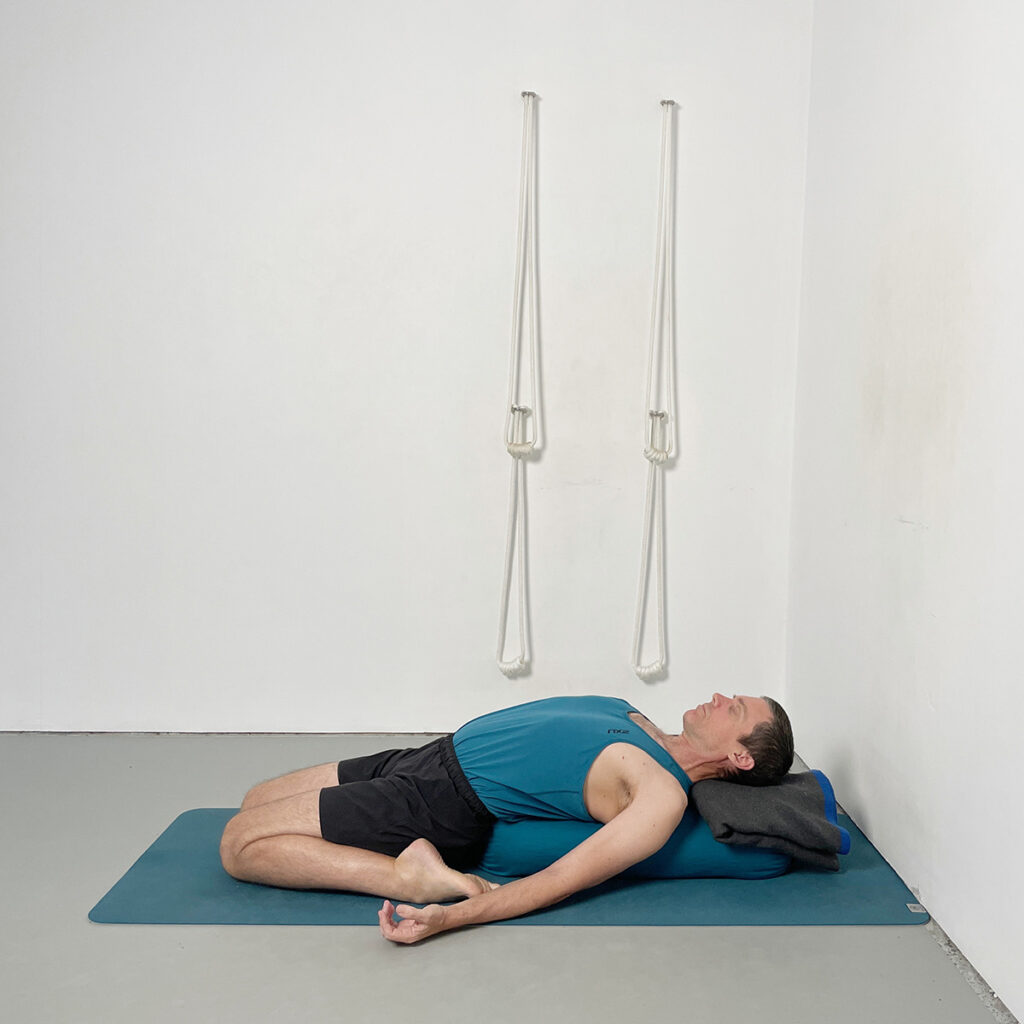
Props: 1 bolster, half-fold head blanket
Purpose: Minimal-prop version often used at the start of a sequence
Prop Setup Detail
Setup & Actions:
- No support under pelvis
- Recline over bolster
- Head supported so chin and forehead are level
- Maintain active containment in knees and ankles
- Let pose settle; use breath to deepen experience
Stage 9: Counterpose — Adho Mukha Virasana
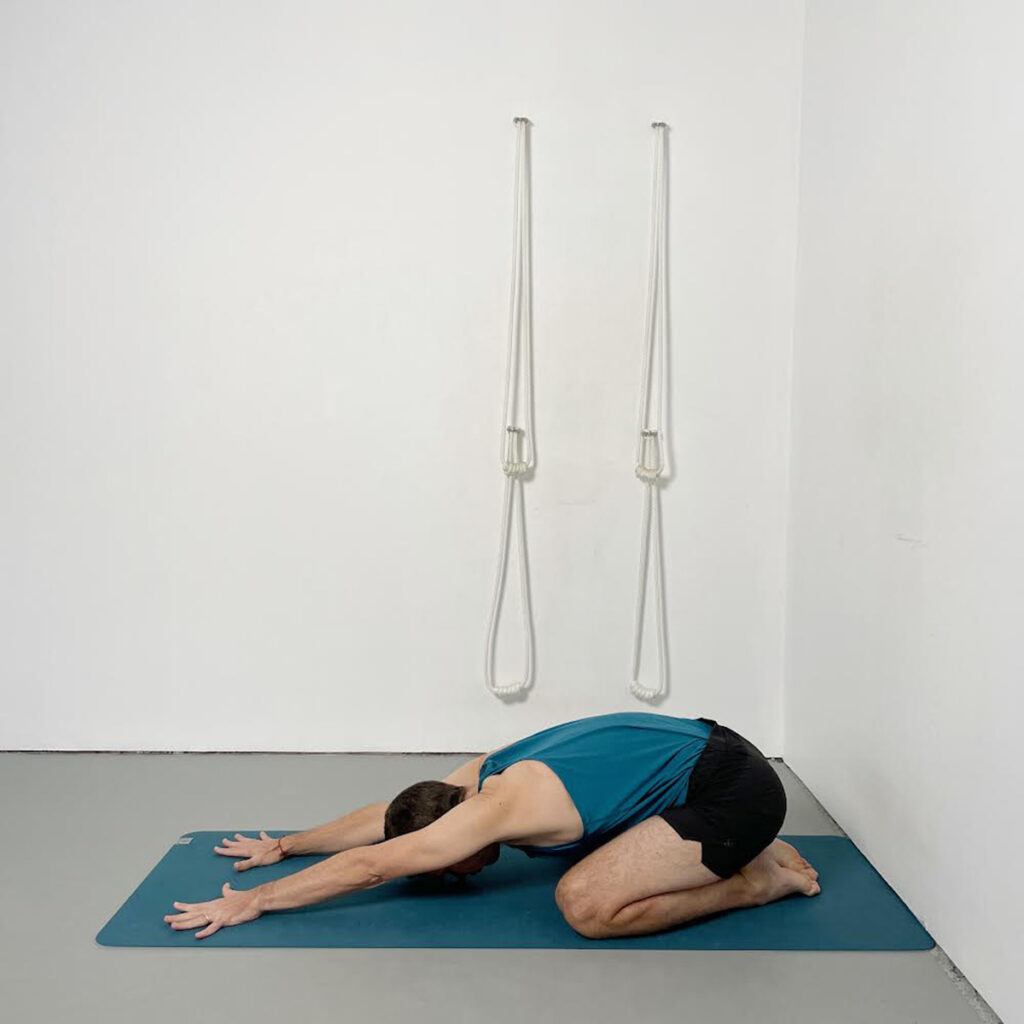
Props: Optional blanket under forehead
Setup & Actions:
- Sit in Virasana, bring knees apart, big toes together
- Walk hands forward
- Let forehead rest
- Draw inner knees to inner groins
- Tuck tailbone, lengthen spine
Why Practice Supta Virasana?
Supta Virasana is a pose that rewards consistency. It creates length in the quadriceps, openness in the hips, and mobility in the knees. It revitalizes tired legs, especially after standing or weight-bearing work. When supported, it can complement restorative or therapeutic sequences. When practiced actively, it’s a powerful way to start a dynamic Iyengar Yoga practice.
As this tutorial shows, Iyengar Yoga offers many thoughtful ways to approach this pose—ensuring that regardless of flexibility or experience, you can find a version of Supta Virasana that works for your body.
Ready to Explore Further?
This blog post is based on a full-length class from the Yoga Selection video library.
Explore Yoga Selection’s Library Today
With over 900 online Iyengar Yoga classes classes and two new videos added each week, Yoga Selection offers a dynamic resource to support your growth as a practitioner. Explore our Yoga Selection Weekly Classes Page to find classes that match your goals and discover new insights in your practice.
Whether you’re revisiting foundational poses, diving into advanced techniques, or exploring therapeutic support, Yoga Selection’s online Iyengar Yoga classes will empower every aspect of your journey. Join our community today and take your practice to new levels of depth and understanding.
Explore a World of Online Yoga. Unlimited Access to All Classes and Courses.
Try it Free for 14 days. Cancel Anytime.
Share:
See Related Blog Posts: