Sirsasana (Headstand) Explained: A Comprehensive Guide for Iyengar Yoga Practitioners
Take a deep-dive into Sirsasana as we as we present a comprehensive, step-by-step guide to this vital asana in the world of Iyengar Yoga. Headstand is one of the most rewarding yoga postures, offering benefits for circulation, mental clarity, and overall strength. However, achieving a stable and safe inversion requires proper preparation and alignment.
Sirsasana, commonly known as headstand, is often referred to as the king of yoga postures. B.K.S. Iyengar, in his book Light on Yoga, highlights its significance as a fundamental inversion. This pose and its variations are regularly incorporated into Iyengar Yoga sequences, offering numerous physical and mental benefits. However, learning to perform Sirsasana safely requires patience, strength, and technical awareness.
Before attempting a full headstand, it is essential to establish a strong foundation with preparatory variations. Rushing into the pose without proper groundwork can lead to misalignment and strain. This guide provides a structured approach to developing strength, confidence, and technical proficiency in Sirsasana.
Explore a World of Online Yoga. Unlimited Access to All Classes and Courses.
Try it Free for 14 days. Cancel Anytime.
Building Strength and Confidence: Preparatory Sirsasana Variations

This variation is an ideal starting point when learning how to do a headstand. The objective here is to build strength in the upper body so that you are able to support your body weight whilst in an upside down position. In addition to strength you are learning techniques that help your shoulders to lift. When you get to the stage of stepping up the wall you are also gaining familiarity with being in an upside down position. Note that the head is completely off the floor with these variations.

Key Instructions:
- Interlock your fingers and have your elbows shoulder width.
- Start in a kneeling position the straighten your legs and lift your pelvis up without dropping your shoulders.
- Press your forearms down to lift your shoulders up.
- Walk your feet closer to your elbows without your shoulders leaning forwards.
- To step up the wall, position your elbows are a leg’s length away for the wall. As you step up the wall lift your pelvis upwards and back towards the wall.
- Once both feet have come to the wall press your heels into the wall and lift your thighs upwards.
Harnessing Stability: Headstand Variations with the Support of a Block

Using a block in headstand preparation helps reinforce correct alignment by preventing the upper back from collapsing, which can place unnecessary strain on the neck. This variation helps practitioners develop shoulder stability and engagement while maintaining control in the pose. The head remains completely off the floor in this version, emphasizing the role of the arms and shoulders in supporting the body weight.

Key Instructions:
- Hold the block against the wall while positioning the elbows about 10 cm away from it .
- Once you straighten your legs the block will be wedged in position between the wall and your upper back. At this point one hand at a time can slide down to the floor so that you can interlock your fingers.
- Lift your heels up and walk your feet in so that your hips begin to sit more directly over your shoulders.
- As you press your forearms down turn the outer armpits away from the wall. This will ensure that your shoulders spread outwards as they lift upwards.
See the Full Sequence in Action: Watch the Free Step-by-Step Video on Sirsasana (Headstand)
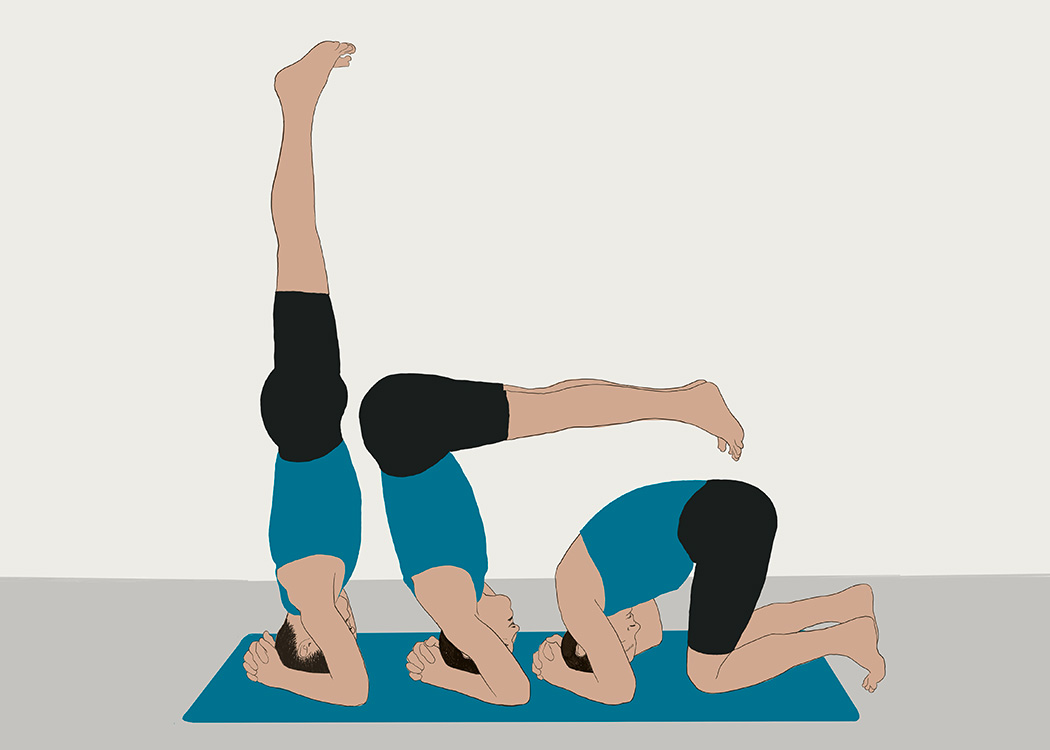
Progressing Towards Full Inversion: Kicking Up into Headstand (Sirsasana)
Once strength and alignment have been developed, practitioners can begin working towards a full inversion. At this stage, the head should still be off the floor, with the focus on controlled kicking rather than rushing to balance upside down.

A helpful approach is to work with a light hopping action, repeatedly kicking off the same foot while landing back down. This allows practitioners to gradually reach greater height and control at their own pace. Once the leading heel makes contact with the wall, the next step is to lift both legs into the pose.

Key Instructions:
- Place the knuckles of the interlocked fingers in contact with the wall.
- Ensure that you elbows are directly under you shoulders.
- Raise up your pelvis and walk your feet closer to your elbows.
- Make sure that the leading leg is straight at the knee.
- Bend the opposite leg and use it like a spring to kick up to the wall.
- Transfer your body weight from the kicking foot into the forearms as you kick off. If you do not make it all the way up land back down to the floor with the same foot that kicked off. If you do make it all the way up stay in the pose for five even breaths.
- Slide your heels as high as possible up the wall and lift the back of your pelvis upwards towards the ceiling.
Establishing Correct Alignment: Head Placement and Shoulder Engagement in Headstand

At this point, you are ready to begin placing the top of your head lightly on the floor. It’s important to first identify the crown of the head so that the neck maintains its natural curve while lengthening upward to full capacity. Using arranged blocks (pictured above) to support the upper back ensures that the contact between the head and floor is minimal, allowing you to become familiar with this position without putting strain on the neck.
Position your hands on the sides of the block so that your fingertips wrap around its edges. This helps lift and broaden the shoulders, providing stability and reducing downward pressure on the neck. From this supported setup, you may choose to begin experimenting with kicking up into a full inversion. However, even without lifting the feet off the floor, learning how to engage the shoulders correctly is a key step in progressing safely toward headstand.

Key Instructions:
- Make sure that your blocks are balanced and stable.
- Place the top of your head to the floor with the back of your skull a couple of centimetres away from the bottom block.
- Position you hands on the outsides of the block. Your fingertips will wrap around the ends of the block.
- Press the block firmly into the floor with your thumbs.
- Ensure that your elbows remain shoulder width as you straighten your legs and walk in with your feet. The top block will be securely positioned between your upper back and the wall.
- As you remain in the pose turn your outer armpits away from the wall to ensure lifting and spreading in your shoulders.
Full Sirsasana: Progressing from Wall Support to Free Balance

Once stability is established against the wall, the next goal is to refine endurance and control in the full pose. Initially, it is common to hold headstand for short durations, with a one-minute stay being a good early target. Over time, longer holds of five to seven minutes allow for deeper benefits. After developing confidence using the wall, practitioners can begin working on balancing freely.
Key Instructions:
- Make a cup shape with your hands that roughly moulds the back of the skull.
- When you place your head to the floor check that the back of your skull lightly touches the fleshy base of each thumb.
- Keep the inner wrist aligned with the outer wrist.
- Press both elbows down with even pressure as you kick up.
- Once up, lift your shoulders upwards, lift the back of your pelvis upwards, lift the insides of your legs upwards, lift your inner heels and big toe bases upwards.
Expanding Your Yoga Journey: Unlimited Access to Video Library and Live Classes
As a Yoga Selection member you will also have unlimited access to our extensive video library with 900+ on demand classes, a wide array of additional courses, with two new videos released each week. You can also join live classes in real time for more personalised input.
Explore a World of Online Yoga. Unlimited Access to All Classes and Courses.
Try it Free for 14 days. Cancel Anytime.
Share:
See Related Blog Posts: