Build a Strong Foundation in Iyengar Yoga
If you’re new to Iyengar Yoga, or looking to deepen your understanding of its foundational principles, this class is the ideal place to begin. It offers a complete introduction to Iyengar Yoga for beginners, focusing on a carefully selected sequence of 16 standing poses – each taught with precision and clarity, following the methodical approach that defines Iyengar Yoga.
This is more than just a sequence of poses. It’s a practical Iyengar Yoga sequence designed to teach you how to balance, align, and develop awareness in the body – using techniques that apply to all future yoga practice. You’ll start by establishing foundational alignment in Tadasana and progress through a structured series of standing pose variations, culminating in a quiet Savasana to help you absorb the effects of your work.
The class is suitable for complete beginners, as well as experienced students returning to core principles. It’s designed to be practiced at home, using minimal props, with detailed instructions to help you understand not only what to do—but why it matters.
You can follow the entire 60-minute beginner yoga class online in the free video below. Or, explore each of the 16 poses in detail further down the page, with step-by-step instructions and clear images drawn directly from the class.
This article also serves as a sample of the structured, in-depth teaching available in Yoga Selection’s 30-class Beginner Course – a comprehensive online yoga program designed to take complete beginners through a step-by-step path toward confident, independent yoga practice.
Start Your Iyengar Yoga Journey
Get full access to our complete library of structured beginner classes — perfect for building confidence and skill, step by step.
Start Free TrialNo commitment. Cancel anytime.
Explore 16 Iyengar Yoga Poses for Beginners
Table of Contents
- Build a Strong Foundation in Iyengar Yoga
- Free 60-Minute Beginner Class Video
- 1. Tadasana with Feet Hip-Width Apart
- 2. Wide-Legged Standing Base with Hands on Hips (Utthita Hasta Padasana)
- 3. Arms Extended Overhead in Wide-Legged Stance
- 4. Arms Extended Sideways in Wide-Legged Stance (Utthita Hasta Padasana)
- 5. Tadasana with Feet Together – Four Corners of the Feet
- 6. Trikonasana Preparation – Bottom Hand to Shin
- 7. Trikonasana – Full Pose with Top Arm Extended
- 8. Virabhadrasana II Preparation – Hands on Hips
- 9. Virabhadrasana II – Full Pose with Arms Extended
- 10. Parsvakonasana Preparation – Bottom Hand on Block
- 11. Parsvakonasana – Full Pose with Top Arm Extended
- 12. Parsvottanasana Preparation – Hands on Hips
- 13. Parsvottanasana – Hands on Blocks
- 14. Prasarita Padottanasana Preparation – Hands on Hips
- 15. Prasarita Padottanasana – Hands on Blocks
- 16. Savasana – Final Resting Pose
Free 60-Minute Beginner Class Video
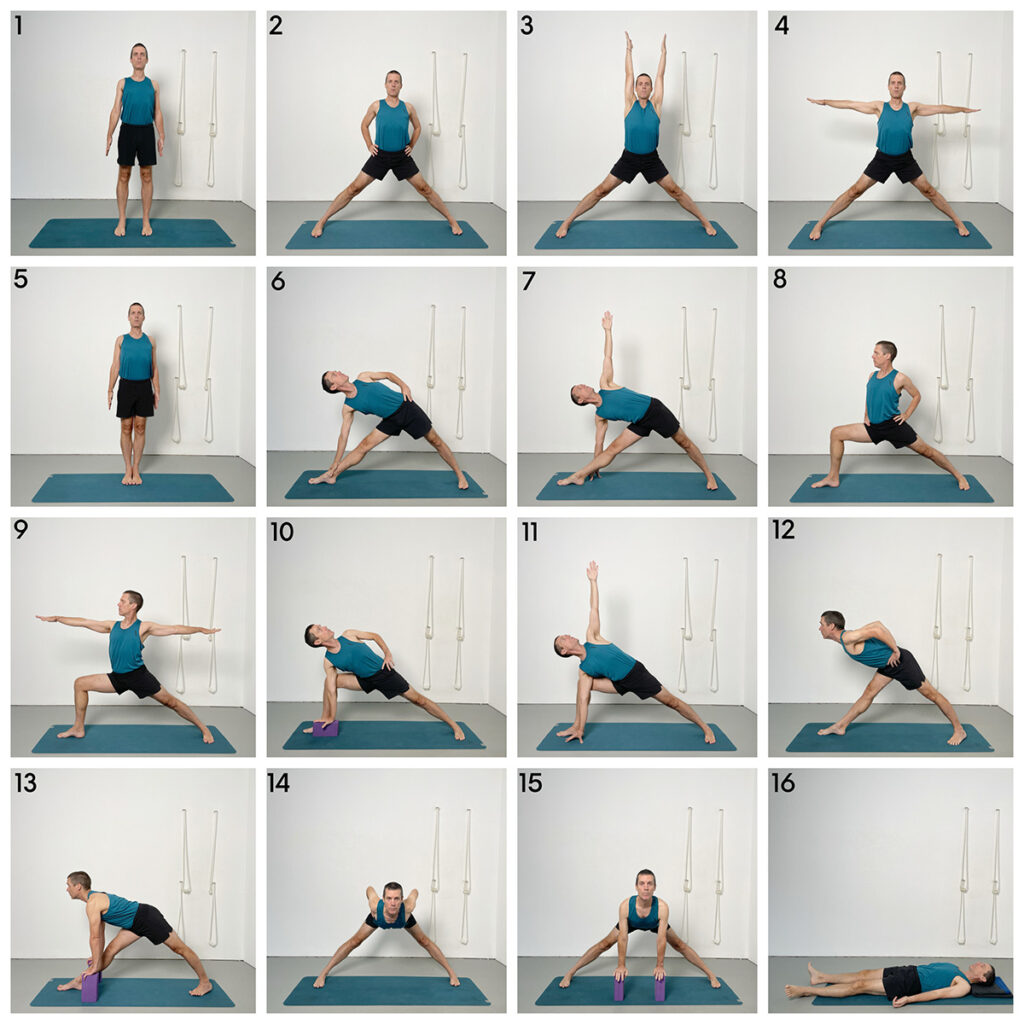
This 60-minute Iyengar Yoga for Beginners video guides you through the same foundational standing poses featured in the article. It’s designed for beginners, with clear instructions, minimal props, and a focus on alignment, balance, and body awareness. Use it to follow along and build confidence in your home practice. For a more structured progression, you can continue with our 30-class beginner course.
Preview the 16 Poses
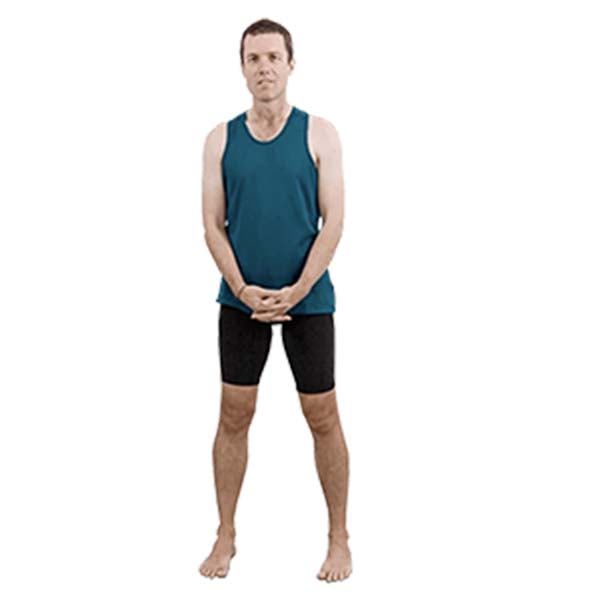
1. Tadasana with Feet Hip-Width Apart
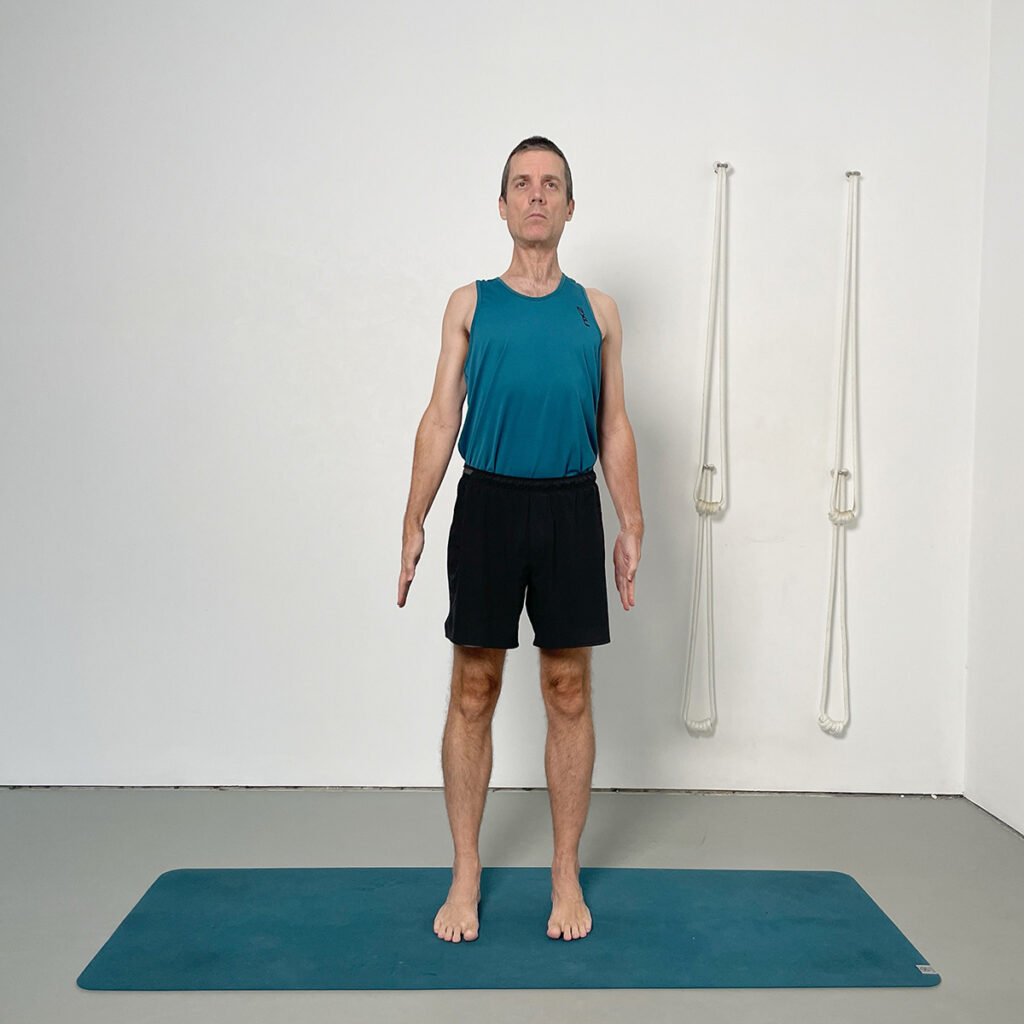
This initial version of Tadasana introduces core principles of alignment, balance, and lift that carry through the rest of the class. Practiced with the feet hip-width apart, it provides a stable base for exploring how the soles of the feet influence posture, and how small shifts in head, shoulder, and pelvic alignment affect balance and energetic lift. This variation sets the stage for refining weight distribution across the feet and learning to lift against gravity with minimal exertion.
Key Actions:
- Stand with feet hip-width apart and the inner edges of the feet straight.
- Distribute your weight evenly across the soles of the feet—front to back and side to side.
- Bring the head back over the ankles, allowing the shoulders to roll back and the shoulder blades to move in.
- Firm the thighs, grip the kneecaps, and move the back of the pelvis in and the tailbone down.
- Press the big toe bases down to create lift from the feet upward through the legs.
- Roll the shoulders back, straighten the elbows, and lift both the center and sides of the chest upward.
2. Wide-Legged Standing Base with Hands on Hips (Utthita Hasta Padasana)
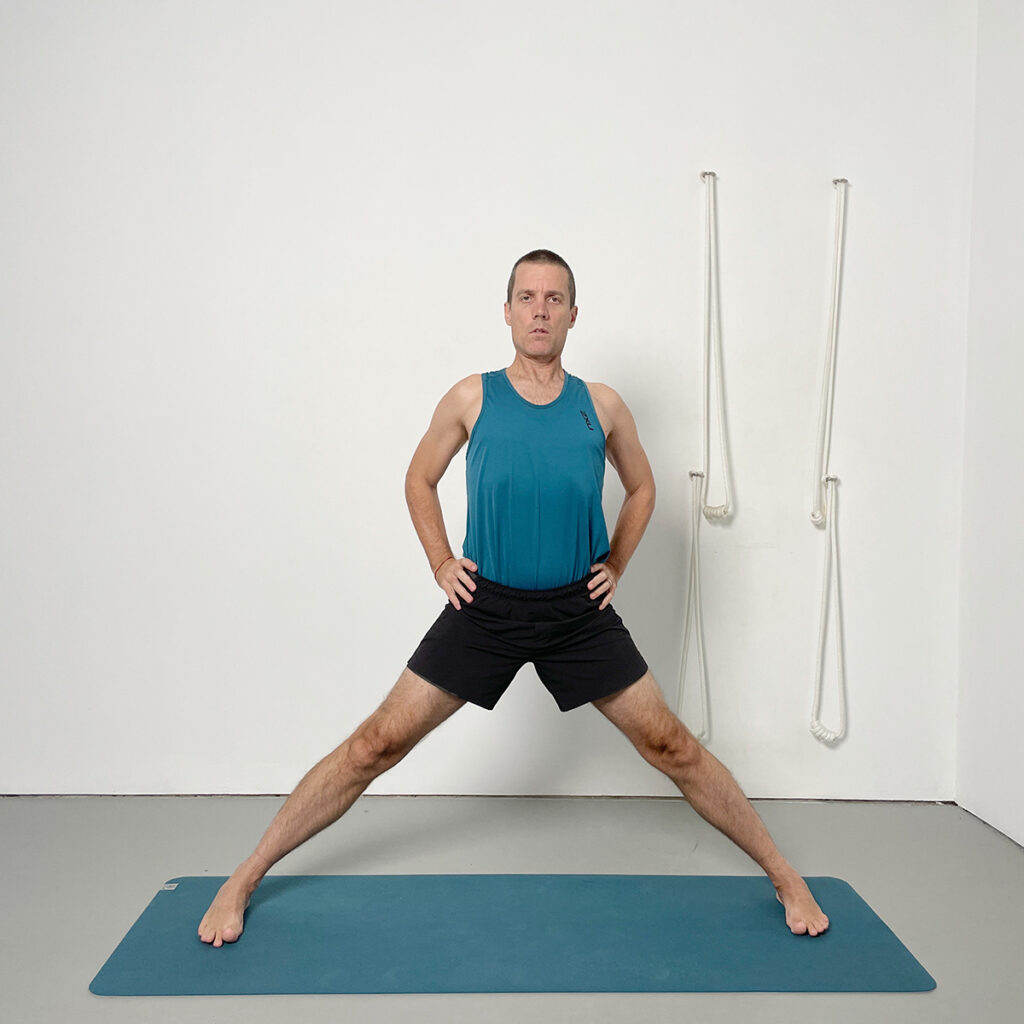
Step the feet out to a legs-length distance to deepen your understanding of how the feet, hips, and spine interact in standing poses practiced with a wider base. It builds on the foundational alignment principles from Tadasana, but adds complexity by introducing lateral weight distribution. The focus is on establishing even balance across all four corners of the feet and generating lift through subtle adjustments in the legs and pelvis.
- Step the feet wide apart, approximately a leg’s length distance
- Ensure both feet point straight ahead and check for even weight across the feet
- Press the outer edges of the feet down to balance the weight across the inner and outer feet
- Lift the toes to engage the big toe bases, then press them down to initiate upward lift
- Firm the thighs and draw the back of the pelvis in while keeping the tailbone moving down
- With hands on hips, roll the shoulders back and lift the chest, coordinating the actions of the legs with the torso
3. Arms Extended Overhead in Wide-Legged Stance
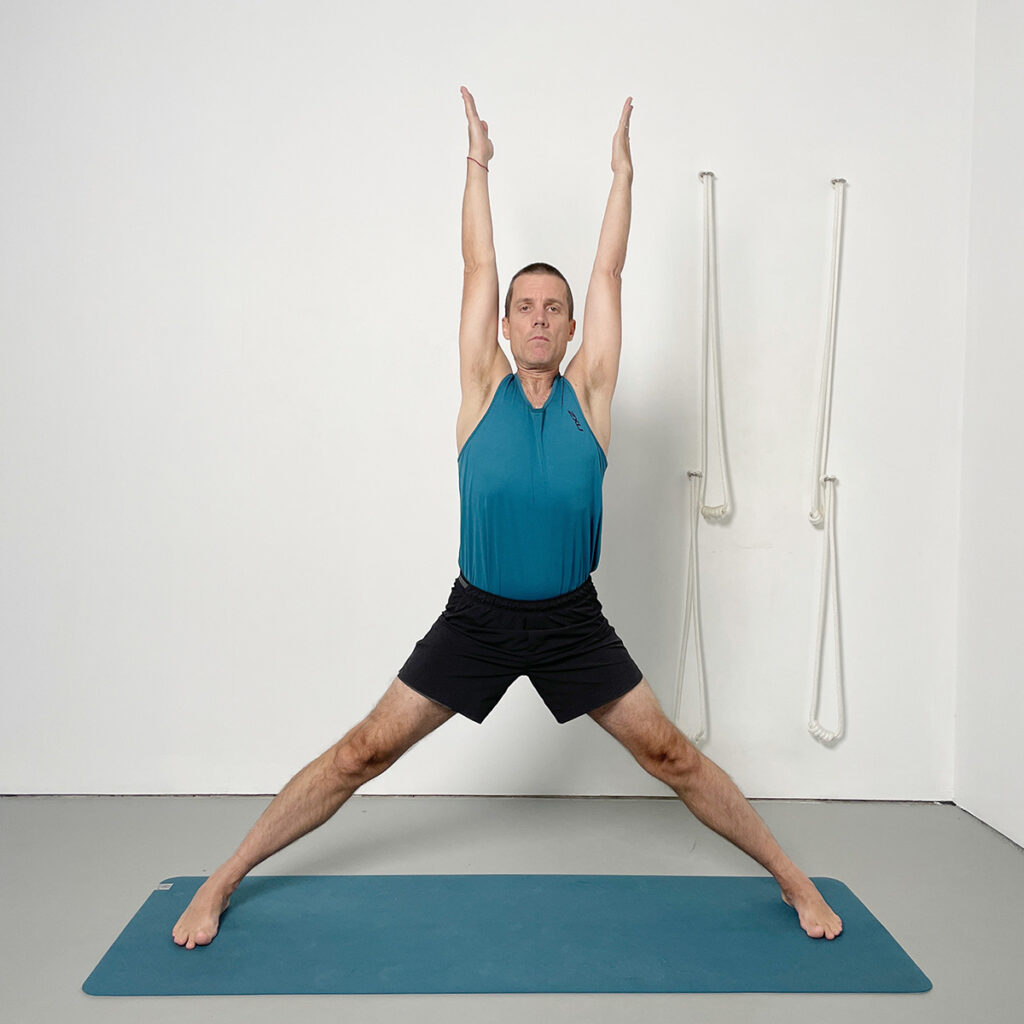
This variation adds an upward extension of the arms to further develop lift through the body. While the lower body maintains the balanced foundation of the previous position, raising the arms creates an opportunity to enhance lift in the chest and spine. The coordinated action of the arms, legs, and pelvis promotes integration and length throughout the posture.
- Begin in a wide-legged stance with feet straight and legs firm
- Press the big toe bases down and maintain even weight across all four corners of the feet
- Draw the thighs back, move the back of the pelvis in, and lengthen the tailbone down
- Raise both arms vertically overhead, keeping them parallel with palms facing inward
- Use the upward reach of the arms to lift the armpit chest and extend the sides of the trunk
- Keep the shoulders moving back and down as the chest lifts upward into the pose
4. Arms Extended Sideways in Wide-Legged Stance (Utthita Hasta Padasana)
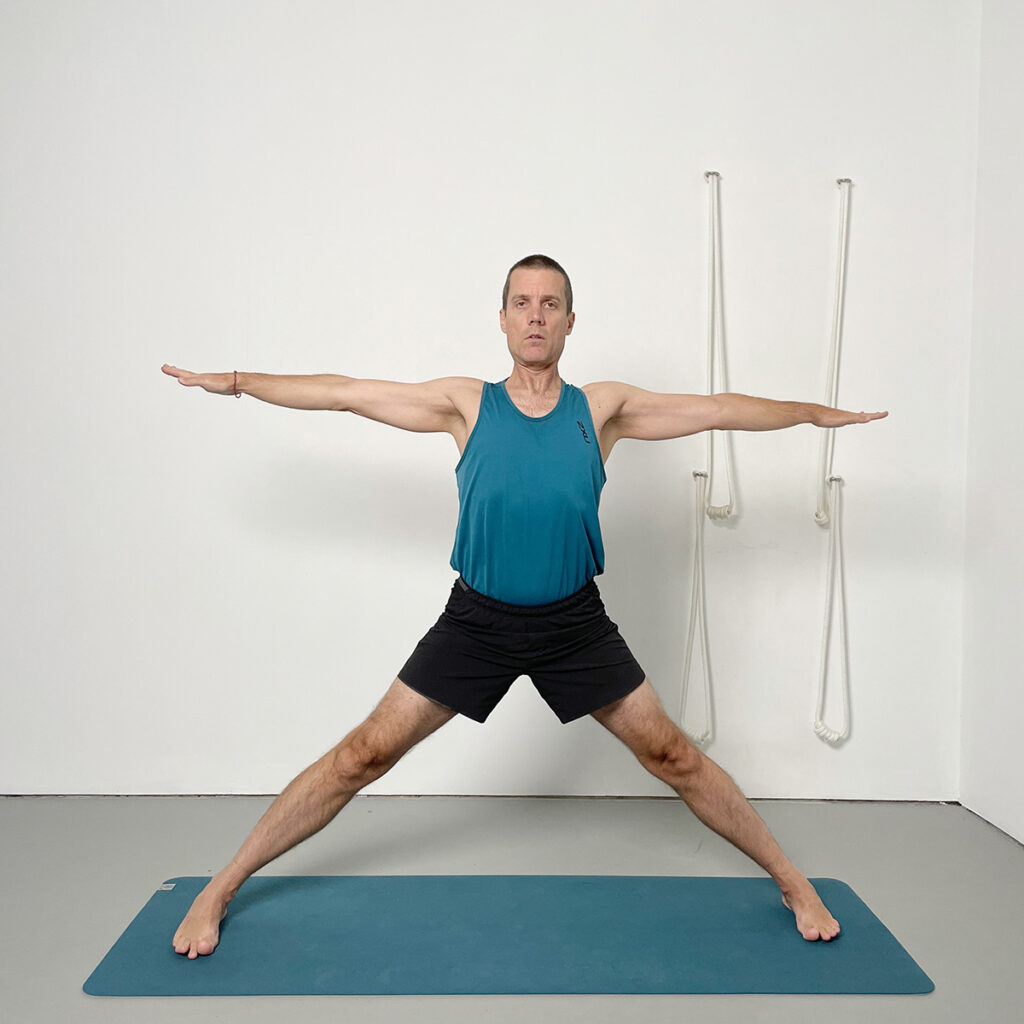
From the wide-legged foundation, this variation brings the arms out to the sides to shoulder height, encouraging lateral expansion and strengthening the connection between the limbs and trunk. The pose develops awareness of shoulder alignment, the role of the shoulder blades in lifting the chest, and the subtle interplay between stability and extension.
- Begin in a wide-legged stance with the feet pointing straight ahead and legs firm
- Extend the arms out to the sides at shoulder height with palms facing down
- Lift the underside of the elbows upwards while keeping the wrists level with the shoulders
- Squeeze the shoulder blades in and draw the shoulders down into the body
- Use the arms to expand outward while maintaining lift in the chest and upward extension from the pelvis
- Keep the gaze forward and the body evenly balanced across the soles of the feet
5. Tadasana with Feet Together – Four Corners of the Feet
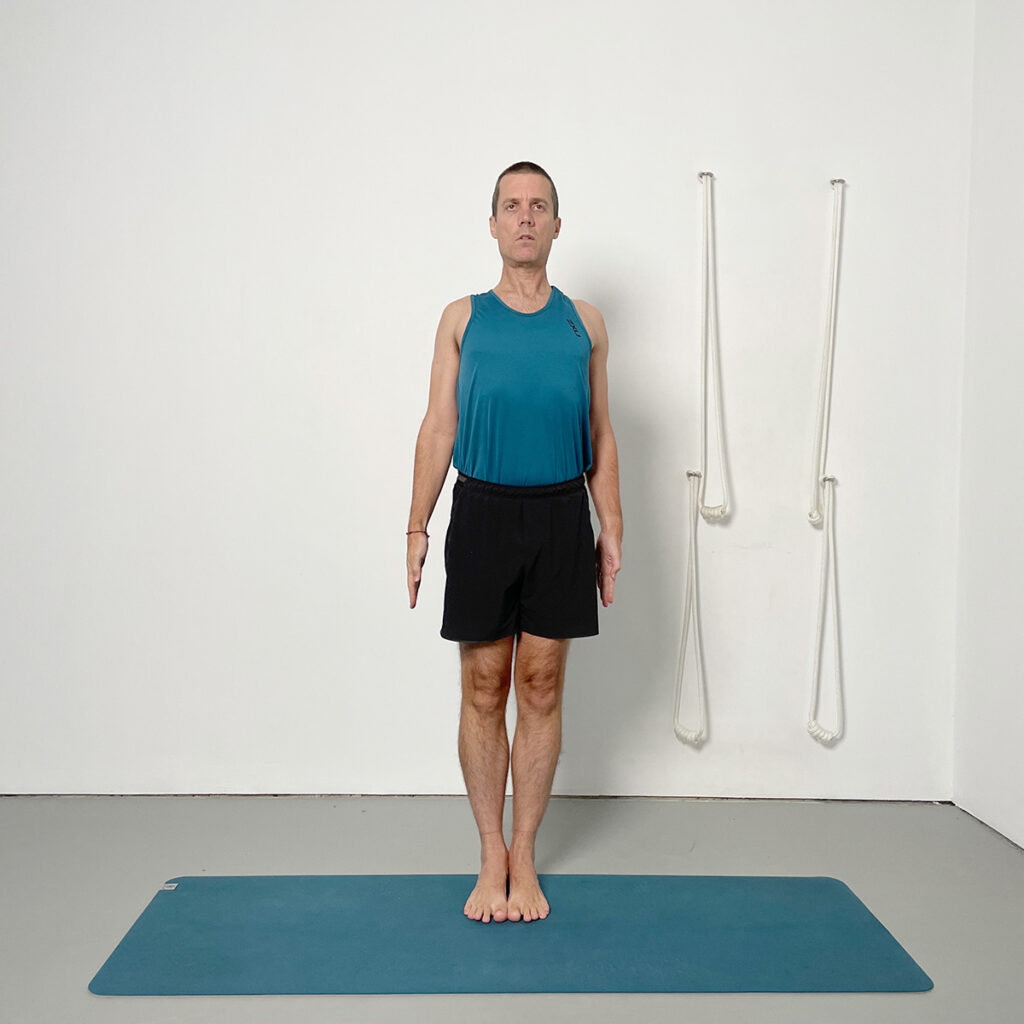
Returning to Tadasana with the feet together reinforces the foundational alignment principles and introduces a key Iyengar teaching: balancing weight evenly across the four corners of the feet. This moment in the sequence consolidates earlier work on stability, lift, and awareness in preparation for the standing pose variations that follow.
- Stand with the big toes and inner heels touching, feet straight
- Balance the weight evenly across the four corners of the feet: big toe base, little toe base, inner heel, outer heel
- Firm the thighs, grip the kneecaps, and move the back of the pelvis in with the tailbone lengthening down
- Roll the shoulders back, move the shoulder blades in, and lift the chest
- Coordinate the actions of the legs and arms to promote upward lift through the spine
- Observe the sensation of stability and balance through the feet before transitioning to lateral standing poses
6. Trikonasana Preparation – Bottom Hand to Shin
This simplified variation of Trikonasana emphasizes foundational alignment by placing the top hand on the hip. This position allows the top shoulder to move back more easily and helps establish the vertical alignment of the shoulders, hips, and ankles — a key reference from Tadasana. With the hand on the shin and top hand on the hip, the practitioner can correct common imbalances, such as the front hip protruding back or the top shoulder leaning forward. This version provides a stable and clear setup, laying the groundwork for transitioning to the full pose in the next stage.
- Step the feet wide and turn the back foot slightly in and the front leg fully out
- Align the front heel with the arch of the back foot
- Extend both arms out to the sides, then place the top hand on the hip and the bottom hand on the shin
- Keep the bottom hand at a height that allows the front hip to move into alignment above the ankle
- Roll the top shoulder back to align the shoulders vertically and open the chest
- Press down firmly through the back heel to stabilize the pose and enhance balance
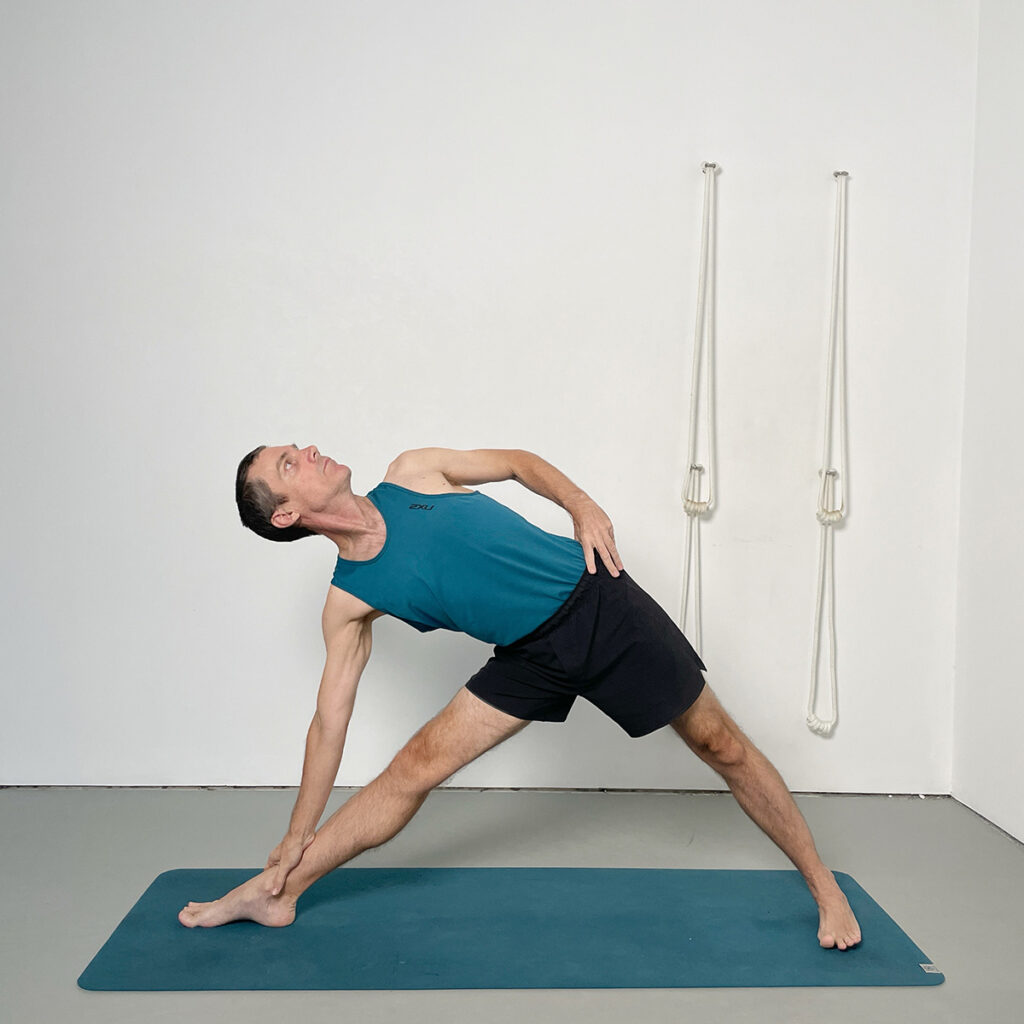
7. Trikonasana – Full Pose with Top Arm Extended
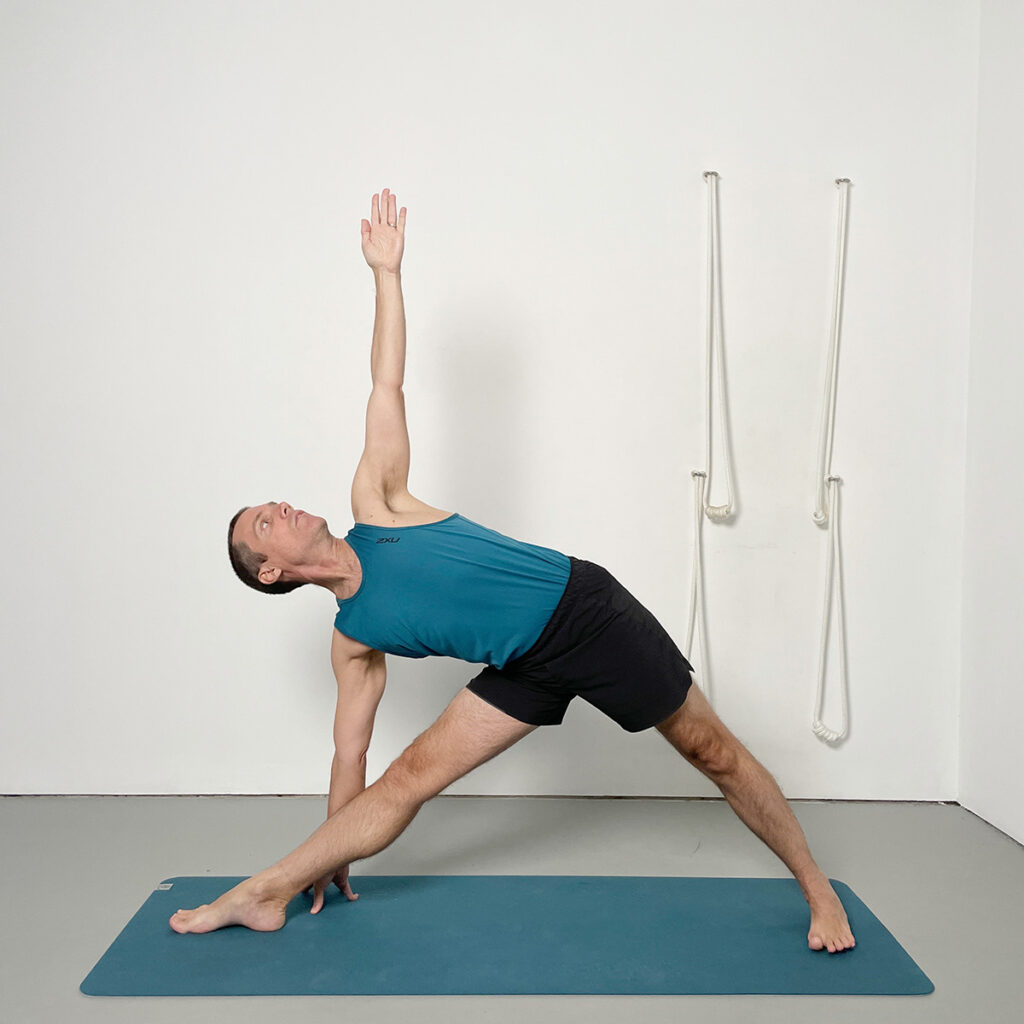
This version builds directly on the previous variation, adding the upward extension of the top arm. With the lower body and trunk already stabilized, the added arm action encourages greater lift in the chest and a sense of integration across the whole body. The extended arm reinforces the vertical alignment of the pose, while helping the chest turn more fully and the gaze lift with less strain on the neck.
- Begin as in the previous variation, with the feet wide and front heel aligned with the back arch
- Bring the bottom hand to the shin and the top hand initially to the hip to set the alignment
- Press the back heel firmly down to stabilize the legs and improve balance
- Move the front hip in and the top shoulder back to establish vertical alignment of ankles, hips, and shoulders
- Turn the chest upward and extend the top arm straight up, wrist above the shoulder
- Look up toward the top thumb, keeping the chest lifted and the neck relaxed
8. Virabhadrasana II Preparation – Hands on Hips
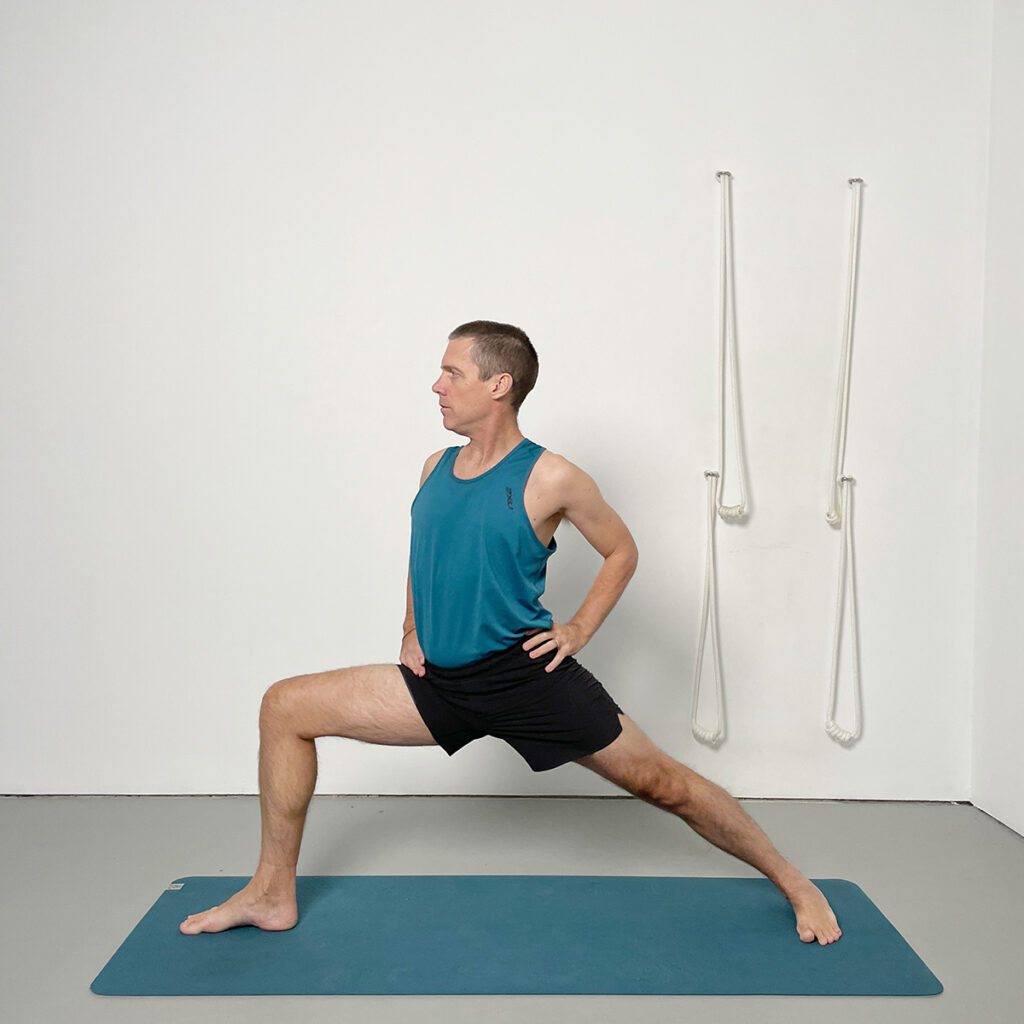
This preparation for Virabhadrasana II isolates the actions of the legs, hips, and spine before adding the complexity of arm extension. With the hands on the hips, the focus shifts to maintaining balance and level hips while bending the front leg. The position helps prevent common distortions such as the front knee collapsing inward or the torso leaning laterally. This variation sets the foundation for the full pose and improves awareness of weight distribution between both legs.
- Begin in a wide stance with the back foot slightly turned in and the front leg turned fully out
- Align the front heel with the arch of the back foot
- Keep the torso upright and the hips level as you bend the front knee
- Focus on descending the front hip socket down rather than pushing the knee forward
- Press the back heel firmly into the floor and draw the outer back hip in to stabilize the pelvis
- Maintain an even lift through the spine as you prepare for the arm extension in the full pose
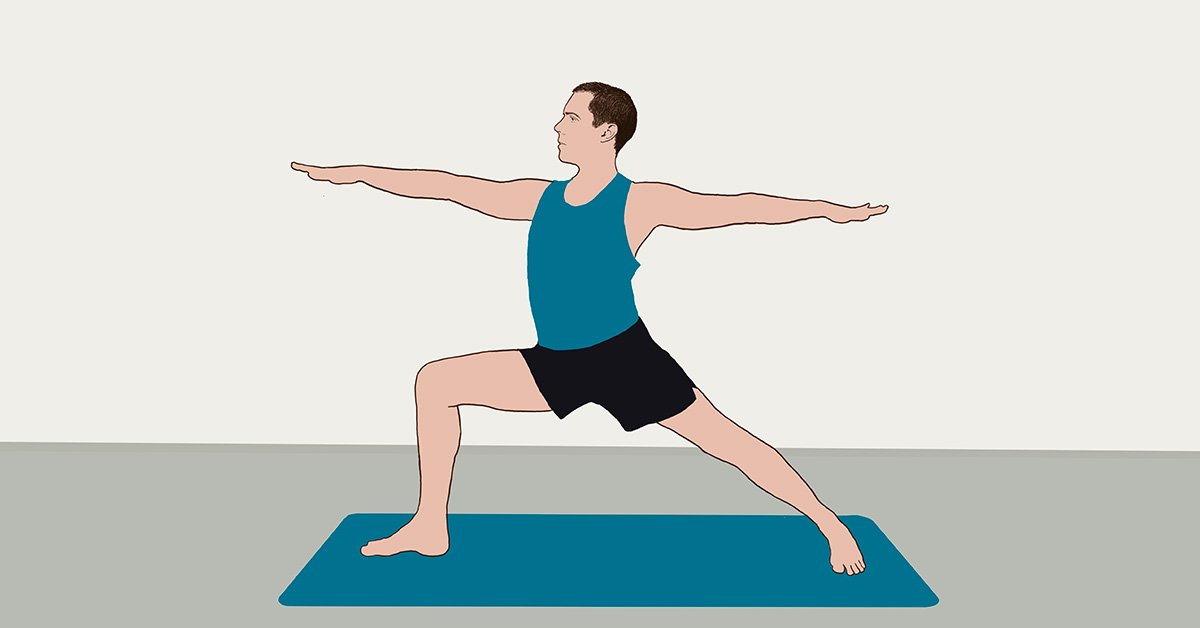
9. Virabhadrasana II – Full Pose with Arms Extended
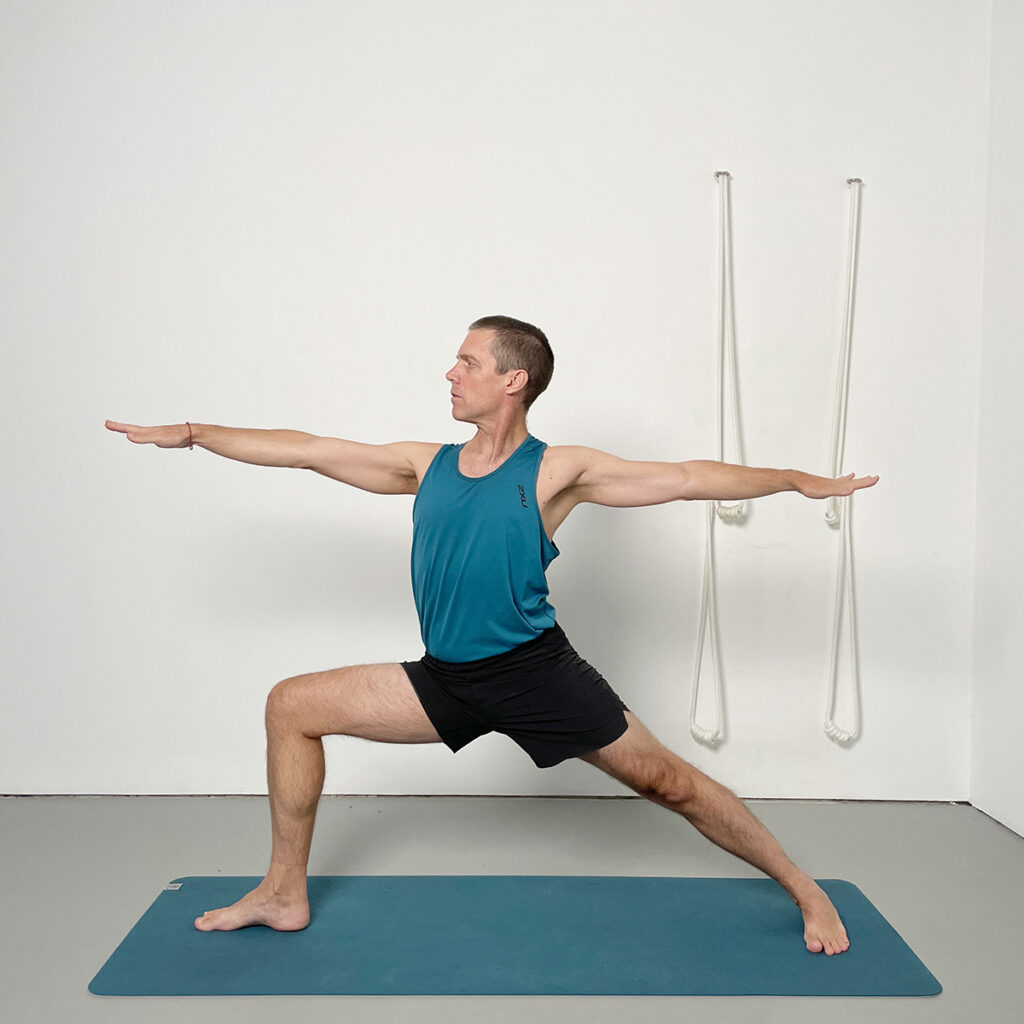
Building on the hip and leg alignment established in the previous variation, this full version of Virabhadrasana II adds the extended arm position to complete the classical pose. The arms act as a continuation of the spine, helping to lift the chest and broaden the torso. Attention is given to maintaining balance, uprightness, and integration as the gaze turns over the front arm. This pose strengthens the legs, refines spatial awareness, and reinforces the vertical alignment of the shoulders above the hips.
- Begin in a wide stance with the front leg turned out and back foot slightly turned in
- Bend the front knee deeply, ensuring the inner knee stays aligned over the inner heel
- Keep the back heel grounded and the back thigh pressing back as the outer hip draws in
- Raise both arms to shoulder height, palms facing down and wrists in line with the shoulders
- Lengthen outward through both arms while lifting the chest and rolling the shoulders back
- Turn the gaze over the front hand while maintaining balance through both legs
10. Parsvakonasana Preparation – Bottom Hand on Block
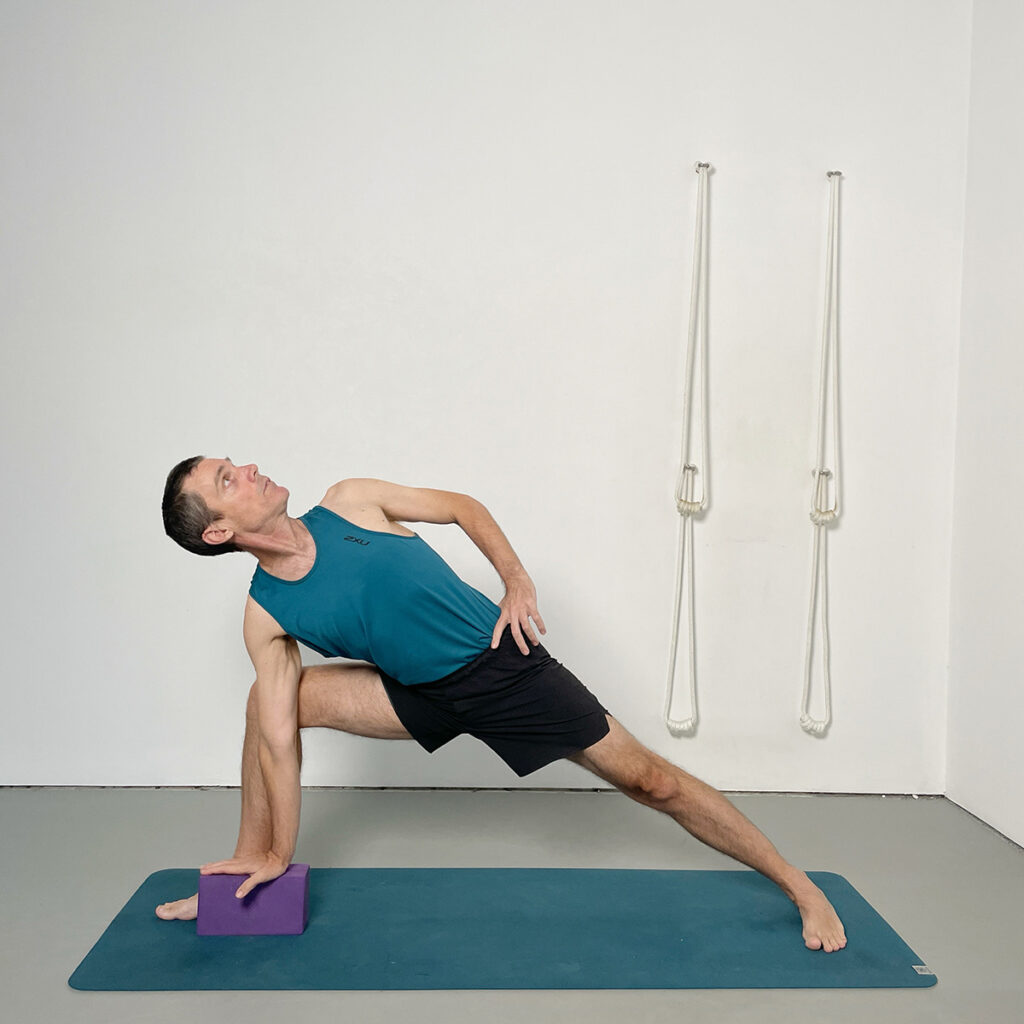
This variation of Parsvakonasana uses a block to support the bottom hand, reducing the workload on the legs and making balanced alignment more accessible—particularly for stiffer bodies. Without this support, reaching the hand to the floor can often distort the pose, causing the front hip to push back and the top shoulder to lean forward. The block enables you to focus on improving hip mobility while maintaining vertical alignment through the shoulders, hips, and ankles. This simplified version offers a well-balanced setup that prepares you for the full pose in the next stage, where the top arm is extended upward.
- Begin in a wide stance with the front leg turned out and the back foot turned slightly in
- Place a yoga block beside the inner heel of the front foot before entering the pose
- Bend the front leg and lower the bottom hand to the block, keeping the arm wedged against the inner knee
- Use the arm to keep the front knee aligned directly above the heel and prevent it from collapsing inward
- Press the back heel firmly down and draw the back thigh and outer hip in to stabilize the pelvis
- Roll the top shoulder back and turn the chest upward while keeping the top hand on the hip
11. Parsvakonasana – Full Pose with Top Arm Extended
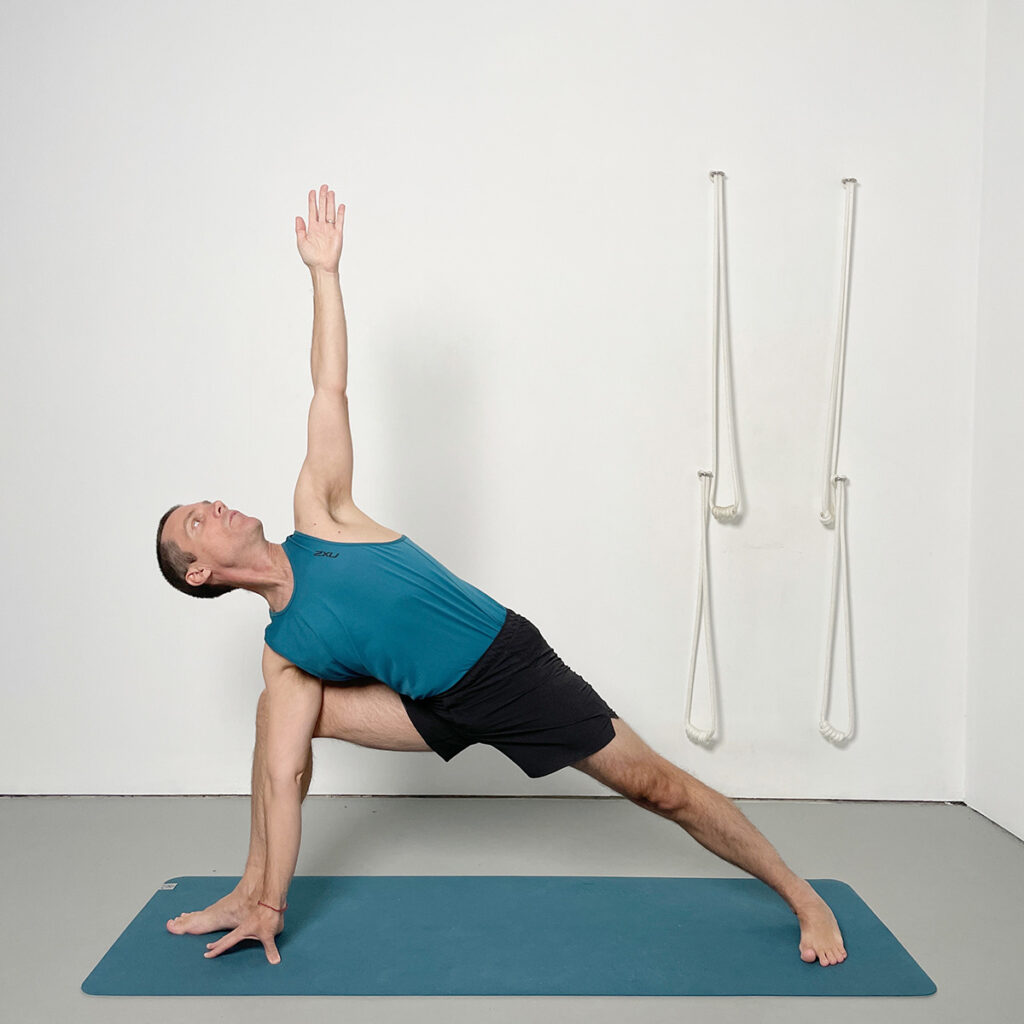
This full version of Parsvakonasana builds on the supported variation by adding the upward extension of the top arm. With the foundation already in place, extending the arm completes the classical shape of the pose and allows you to work more fully with spinal rotation and chest opening. The gaze turns upward as the chest broadens and lifts, and the alignment of the hips and shoulders is maintained through the actions established in the previous variation.
- Set up as in the previous variation, with the bottom hand pressing into a block beside the front foot
- Keep the arm firm against the inner knee to support knee alignment above the heel
- Stabilize the back leg by pressing the back heel down and keeping the thigh pressed back
- Move the front hip into the body and roll the top shoulder back to open the chest
- Extend the top arm straight upward, wrist above the shoulder, and turn the gaze toward the top thumb
- Maintain the lift of the chest and the length of the spine as the pose expands upward and outward
12. Parsvottanasana Preparation – Hands on Hips
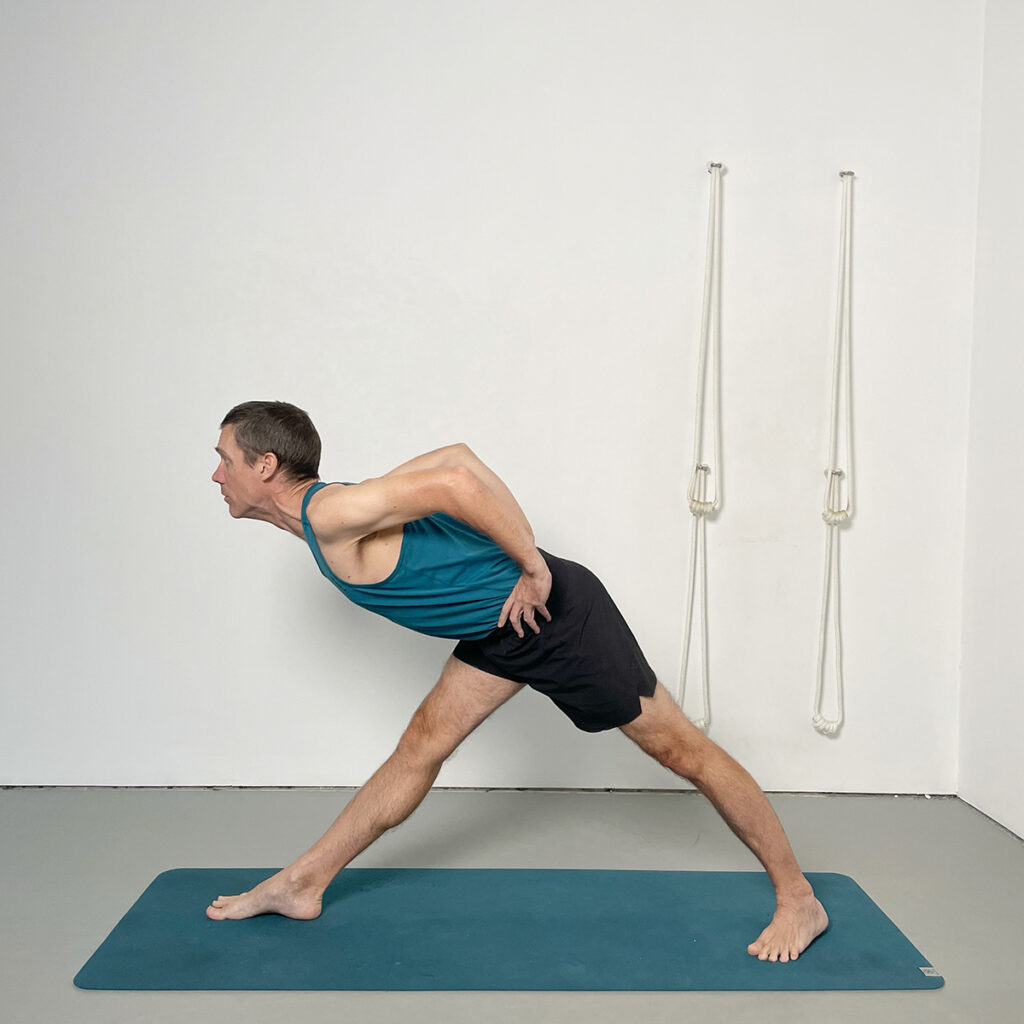
This variation of Parsvottanasana is practiced with a legs-length stance and the back foot turned in more deeply to allow the hips to turn square to the front leg. Keeping the hands on the hips increases awareness of pelvic alignment—helping you feel whether the hips are level or slanted. As you begin to fold forward, the hand placement also supports an open chest and a long spine, allowing the sternum to move clearly away from the navel. Focusing too early on reaching the floor or blocks often leads to rounding the back and collapsing the chest. This variation establishes spinal length and chest lift before progressing to the next stage.
- Step the feet to a legs-length distance with the back foot turned in more deeply
- Align the front heel with the back heel and square the hips to face forward
- Keep the hands on the hips to monitor and guide pelvic alignment
- Press the back heel firmly into the floor and turn the back calf from inner to outer
- Lift the front of the pelvis and draw the sternum away from the navel to lengthen the spine
- Fold forward partway, keeping the spine long and the chest open
13. Parsvottanasana – Hands on Blocks

This full variation of Parsvottanasana builds on the previous stage by bringing the hands down to blocks. With spinal length and chest lift already established, the hands can now support the pose without collapsing the upper back or shortening the front body. Placing the hands on blocks provides balance and support, taking some of the workload off the legs and allowing for more refined adjustments to the alignment of the hips, chest, and spine.
- Begin in the same legs-length stance with the back foot turned in and the hips squared forward
- Maintain the lift of the sternum away from the navel as you fold forward to place the hands on blocks
- Press evenly through all four corners of both feet to stabilize your base
- Turn the back calf outward and draw the back inner groin and buttock forward to level the hips
- Press the front big toe base down and lift the front thigh into the hip socket
- With hands pressing into the blocks, continue extending the spine forward and lifting the chest
14. Prasarita Padottanasana Preparation – Hands on Hips
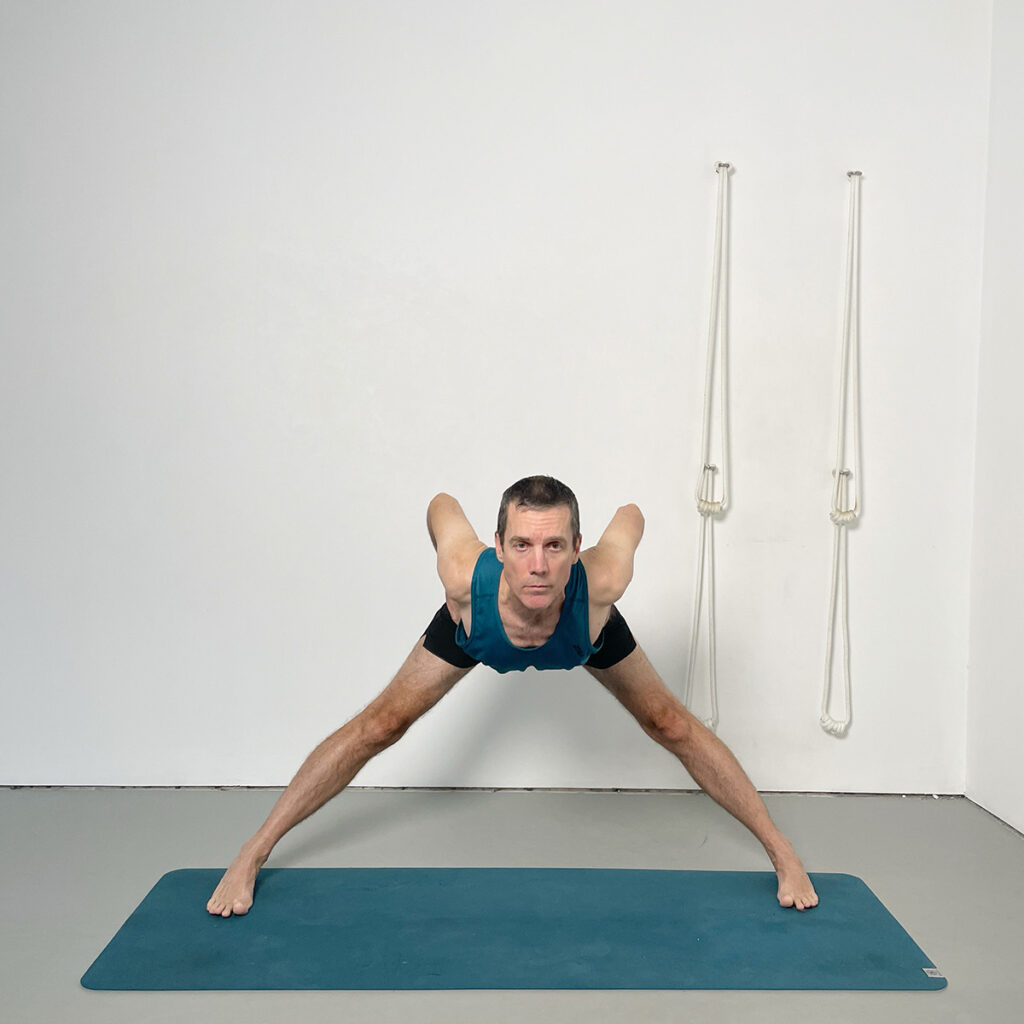
This preparatory version of Prasarita Padottanasana focuses on establishing an even foundation across the soles of the feet while initiating forward extension from the hips. With the hands remaining on the hips, attention stays on maintaining a straight spine and open chest rather than reaching for depth. The stance remains wide, and the work of the feet, legs, and pelvis is refined to create lift and stability before transitioning to the full pose.
- Step the feet wide apart, ensuring the inner edges of the feet are parallel
- Distribute weight evenly across the four corners of both feet, including the outer edges
- Press the big toe bases down and draw the thighs back as the back of the pelvis moves in
- With hands on hips, lengthen the front of the torso and draw the sternum away from the navel
- Begin to fold forward while keeping the spine straight and the chest open
- Stop short of the point where the back rounds or the chest collapses
15. Prasarita Padottanasana – Hands on Blocks
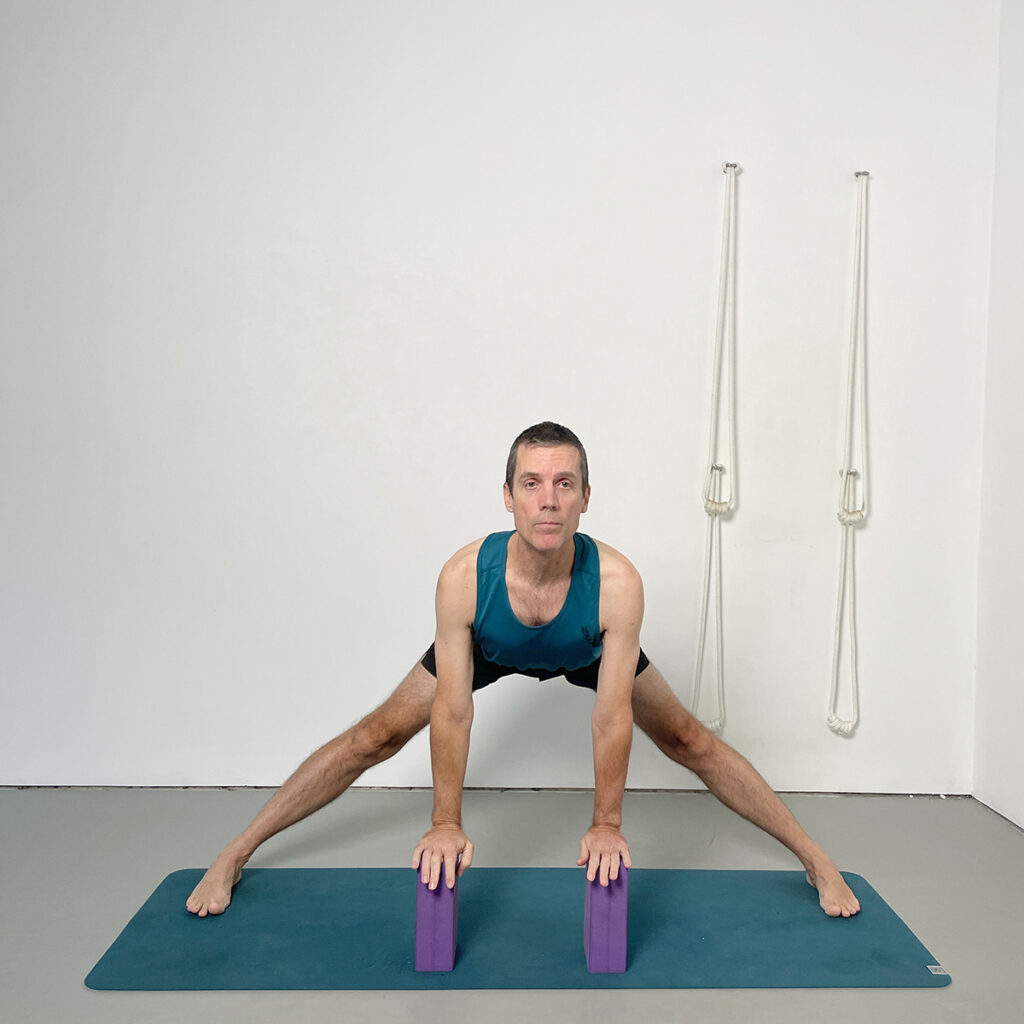
This full variation of Prasarita Padottanasana introduces support from blocks to help maintain spinal extension and alignment as you deepen the forward bend. With the spine already lengthened in the preparatory stage, the blocks provide support to preserve that length as the hands come to the floor level. The hips remain vertically aligned with the ankles—neither leaning forward nor shifting back. The feet and legs stay active, and the support from the blocks enables more conscious lift through the chest and space through the spine.
- Begin in the same wide stance with feet straight and legs firm
- Fold forward from the hips and bring the hands to tall blocks directly beneath the shoulders
- Maintain the vertical alignment of the hips relative to the ankles, avoiding forward or backward lean
- Press the big toe bases down and gently squeeze the heels inward to compact the hips
- Extend the sternum forward, maintaining lift in the chest and length in the spine
- Use the blocks to support the pose and allow the chest to continue moving forward with clarity
16. Savasana – Final Resting Pose
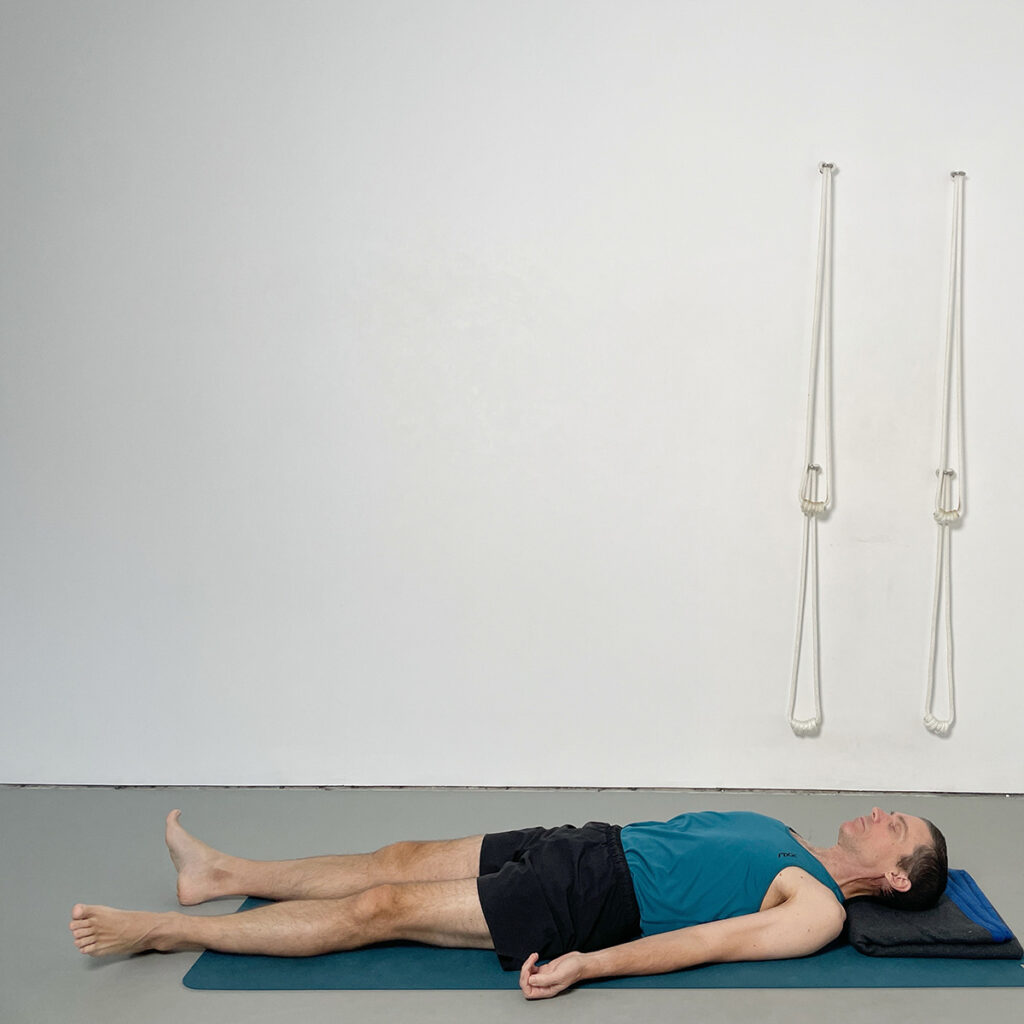
The sequence concludes in Savasana, giving the body and breath time to settle after the work of the standing poses. A folded blanket is placed under the head to support the neck and maintain a neutral alignment of the forehead and chin. The pose offers a chance to absorb the effects of the practice, allowing the muscles to release and the breath to quieten. Specific attention is given to releasing tension in the shoulders, jaw, and eyes, and to softening the abdomen with each exhalation.
- Lie back with a folded blanket supporting the head to keep the forehead and chin level
- Place the arms at roughly 30° from the trunk with the palms turned up and outer shoulders pinned down
- Extend the heels slightly away from the calves and allow the feet to fall outward naturally
- Tuck the shoulder blades under and lift the chest gently before allowing the arms to settle
- Soften the eyes, tongue, and jaw, and allow the breath to become quiet and even
- With each exhalation, let the weight of the body release further into the floor
Your Beginner Iyengar Yoga Questions Answered
A: Yes. Iyengar Yoga is especially well-suited to beginners because it emphasises alignment, uses props to adapt poses for all levels, and encourages step-by-step progression. The method builds body awareness, strength, and confidence from the very first class.
A: Foundational standing poses include Tadasana (Mountain Pose), Trikonasana (Triangle Pose), Virabhadrasana II (Warrior II), Parsvakonasana (Extended Side Angle), and Prasarita Padottanasana (Wide-Legged Forward Bend). This article introduces variations of these poses in a progressive, accessible way.
A: Not necessarily. While Iyengar Yoga often uses props, this beginner class is designed with minimal equipment. A yoga mat and a block (or household alternative like a firm book) are helpful. As you progress, using a belt, wall, or chair can further enhance alignment and accessibility.
A: Practicing 2–3 times per week is a great start. Consistency helps you develop familiarity with the poses, improve alignment, and begin to notice benefits such as improved posture, strength, and mental clarity. The Yoga Selection Beginner Course provides a structured 30-class progression to support regular practice.
A: This class offers a complete introduction to standing poses and foundational techniques. The 30-class beginner course builds on this by covering all major pose groups — including seated poses, forward bends, twists, and restorative work — guiding you from first-time student to confident independent practice, all in an online format.
Start Your Iyengar Yoga Journey
Get full access to our complete library of structured beginner classes — perfect for building confidence and skill, step by step.
Start Free TrialNo commitment. Cancel anytime.
About Rod Stennard
Rod Stennard – Founder of Yoga Selection
Rod Stennard is the founder of Yoga Selection, the first online yoga platform dedicated entirely to Iyengar Yoga. A certified Iyengar Yoga teacher since 2002, Rod has practiced yoga since 1992 and studied under senior teachers from around the world, including members of the Iyengar family in Pune, India.
Rod launched Yoga Selection in 2016 to bring structured, high-quality Iyengar Yoga training to a global audience. As a pioneer in the field of online yoga education, he is passionate about making this method accessible to all, through rigorous, inclusive, and thoughtfully designed classes. His work continues to support students of all levels in over 50 countries.
Continue Your Iyengar Yoga Journey
Whether you’re just beginning or revisiting the fundamentals, working through these 16 poses gives you a solid foundation in the essential techniques of Iyengar Yoga. This class is an ideal entry point for anyone looking for a clear and supportive introduction to Iyengar Yoga for beginners. By developing awareness, alignment, and balance from the start, you’ll build the confidence and clarity needed for independent home practice.
To keep progressing, explore the complete 30-Class Beginner Course on Yoga Selection. This online program offers step-by-step instruction, guided sequences, and detailed pose breakdowns — all designed to take you from your first pose to confident, ongoing practice.
Related Reading
Looking for more beginner-friendly resources?
Explore our guide to 10 Essential Iyengar Yoga Poses for Beginners — a helpful starting point if you’re building confidence with key foundational asanas.