A gentle, methodical Iyengar Yoga for Back Care sequence designed to ease back tension, improve mobility, and support long-term spinal comfort—using clear, reliable techniques you can return to anytime.
An Iyengar Approach to Creating Space, Stability, and Ease in the Spine
Maintaining a healthy back requires a balance of mobility, stability, and consistent, well-directed practice. This accessible Iyengar Yoga for Back Care sequence brings together key poses that gently create space in the lower back, reduce lumbar compression, and improve overall spinal mobility. You’ll learn practical methods for troubleshooting movements that can sometimes aggravate the back, alongside gentle twists that release tightness through the spinal muscles and ease accumulated stiffness. Targeted work with the hamstrings and adductors helps redirect strain away from the lumbar region, while restorative positions calm soreness and steady the nervous system. Suitable for beginners through to experienced practitioners, this is a sequence you can return to regularly—an ongoing maintenance practice that supports spinal comfort, resilience, and long-term wellbeing.
Free Iyengar Yoga for Back Care Class: Practice the Sequence with Guidance
Follow along with this 40-minute Iyengar Yoga for Back Care class designed to support spinal comfort and improve mobility. Practice the full sequence with clear, step-by-step instruction before reviewing the pose-by-pose breakdown below.
Build a Supportive, Sustainable Back-Care Practice
Join Yoga Selection to access guided Iyengar Yoga classes for ongoing back care — including targeted sequences, gentle release work, and prop-supported techniques that build real, steady change over time.
Your membership includes full access to over 900 on-demand classes and all structured courses.
Clear Instruction. Intelligent Sequencing. Iyengar Yoga for Every Body.
Table of Contents
- An Iyengar Approach to Creating Space, Stability, and Ease in the Spine
- Free Back-Care Class: Practice the Sequence with Guidance
- The Back-Care Sequence at a Glance
- 1. Supta Baddha Konasana (Reclining Bound Angle Pose)
- 2. Adho Mukha Virasana (Downward Facing Hero Pose)
- 3. Ardha Uttanasana (Half Standing Forward Bend – at the Wall)
- 4. Utkatasana (Chair Pose)
- 5. Standing Marichyasana III
- 6. Supported Parivrtta Trikonasana (Revolved Triangle Pose)
- 7. Chair Bharadvajasana (Bharadvaja’s Twist)
- 8–10. Chair Malasana (Progressive Stages)
- 11. Eka Pada Pavanamuktasana
- 12. Pavanamuktasana
- 13. Supta Padangusthasana 4 Variation (Figure-Four Hip Release)
- 14. Supta Padangusthasana 2 (Reclining Leg Stretch to the Side)
- 15. Viparita Karani Variation (Bolster on Feet)
- 16. Supported Savasana (Calves on Chair with Bolster on Pelvis)
- Building a Supportive Back-Care Practice
- Frequently Asked Questions
The Iyengar Yoga for Back-Care Sequence at a Glance
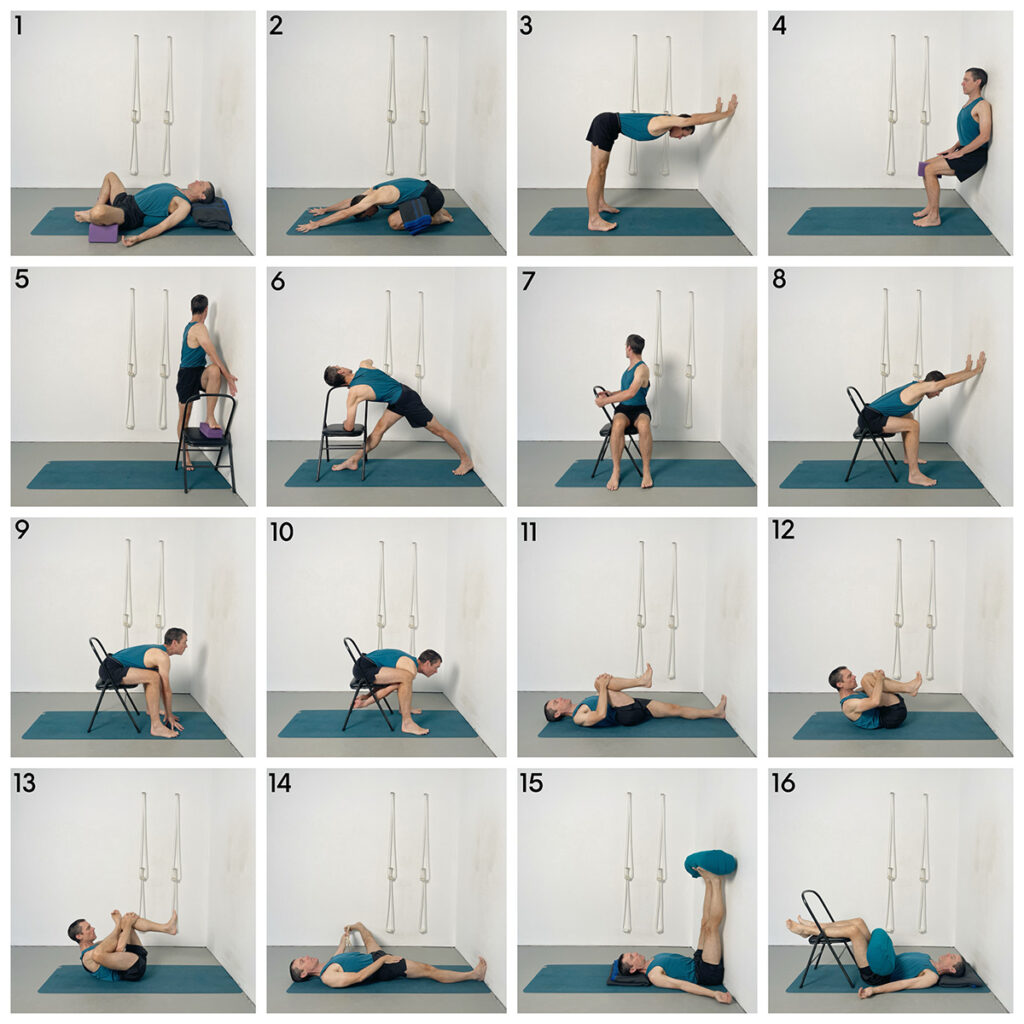
This 16-pose grid gives you a visual overview of the full sequence. Use it as a quick reference before practicing or while following the written instructions and video. Each pose is shown in the order it appears in the class, showing the variety of actions included in the class, from gentle release work to strengthening, mobilising, and restorative positions.
1. Supta Baddha Konasana (Reclining Bound Angle Pose)
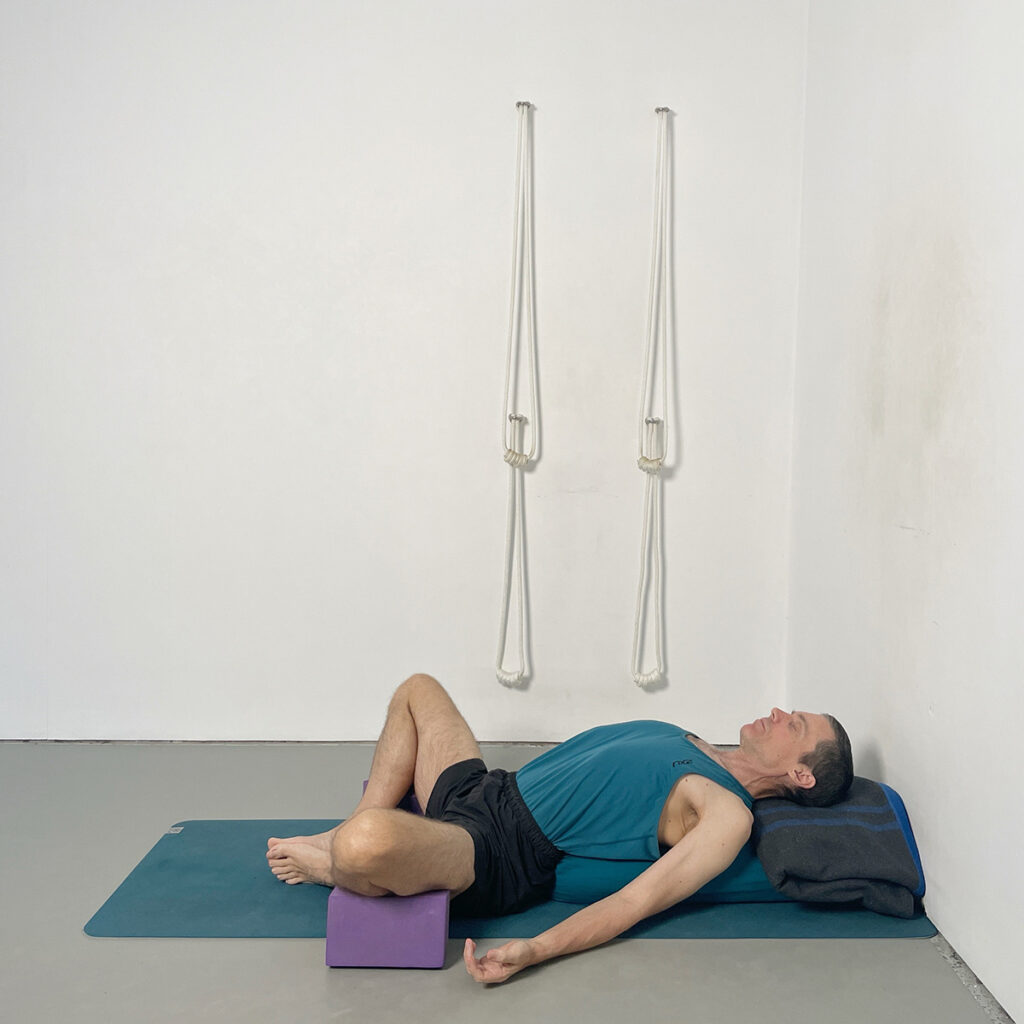
This supported reclining pose gently settles the spine and prepares the body for back-care work. For some people – especially those with lower-back discomfort – this position can feel surprisingly challenging. Elevating the outer thighs on blocks is a simple troubleshooting option that helps prevent overarching in the lower back, reducing potential discomfort and making the pose more accessible. The blanket under the head encourages a neutral cervical position, while the overall shape creates space across the abdomen and lumbar region, allowing the spinal muscles to release before moving into more active work. It also helps to calm the breath and settle the nervous system – an ideal starting point for an ongoing back-care sequence.
Practice Points
- Lie back over the bolster with a folded blanket under your head to keep the forehead and chin level.
- Bring the soles of the feet together and place blocks either side of your pelvis to slightly elevate your knees.
- Relax the muscles either side of your lumbar spine.
- Relax the arms out to the sides with the palms turned up and broaden the collarbones.
- Keep the abdomen soft and allow the natural weight of the pelvis to settle evenly across both sides.
- Breathe quietly, letting each exhalation encourage a deeper release through the groins, abdomen, and lower back.
2. Adho Mukha Virasana (Downward Facing Hero Pose)
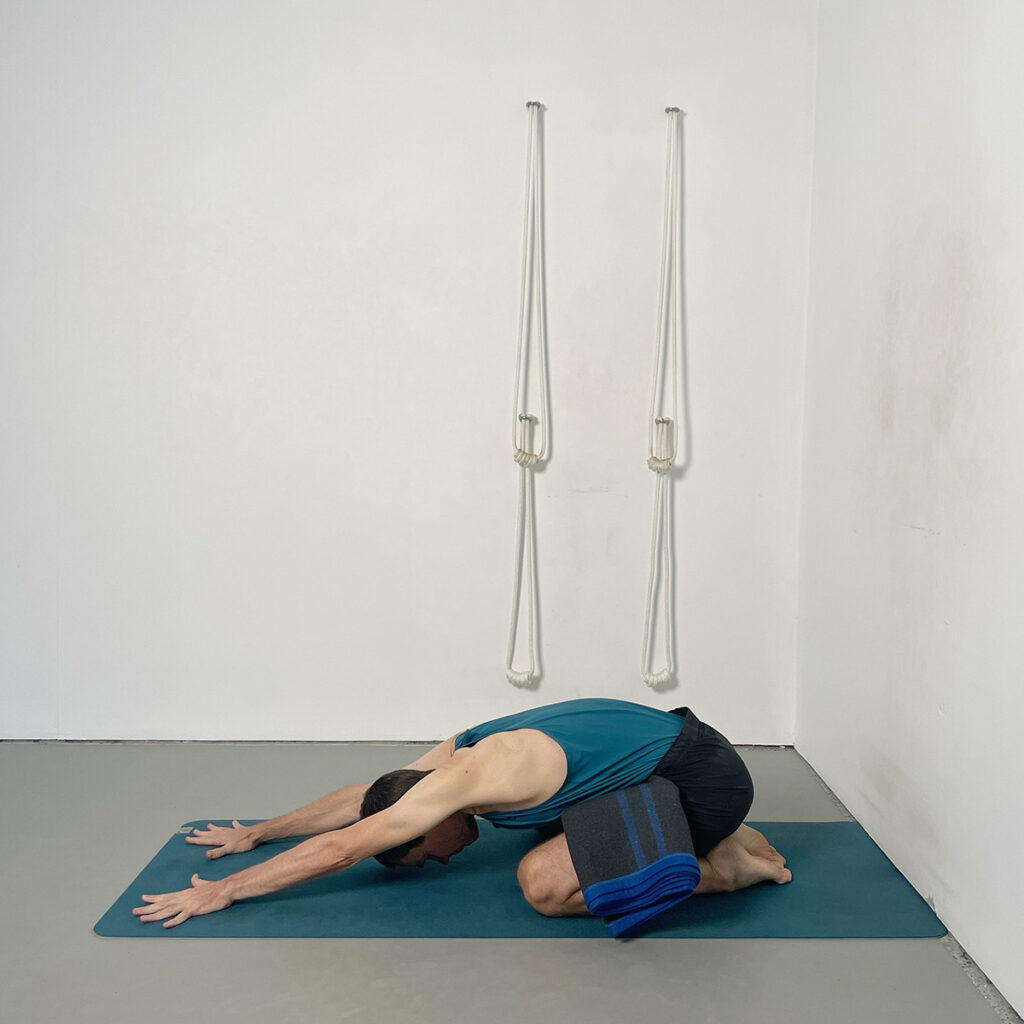
This gentle forward-bending variation lengthens the spine while preventing the lower back from collapsing. Placing a folded blanket between the lower abdomen and the tops of the thighs adds subtle lift and support, helping the lumbar region stay long, broad, and spacious. This simple adjustment makes the pose more accessible for those with back sensitivity and encourages a calming, grounded release through the hips and spine.
Practice Points
- Start in an upright kneeling position and place a neatly folded blanket across the tops of the thighs, close to the groin.
- Lower the torso forward so the blanket fills the space between the lower abdomen and thighs, supporting the lumbar spine.
- Rest the forehead towards the floor releasing the neck and throat.
- Relax the shoulders away from the neck and broaden across the upper back.
- Soften the abdomen into the blanket support as you exhale, allowing the lower back muscles to lengthen.
- Let the breath spread through the back ribs, creating gentle expansion around the spine.
3. Ardha Uttanasana (Half Standing Forward Bend – at the Wall)
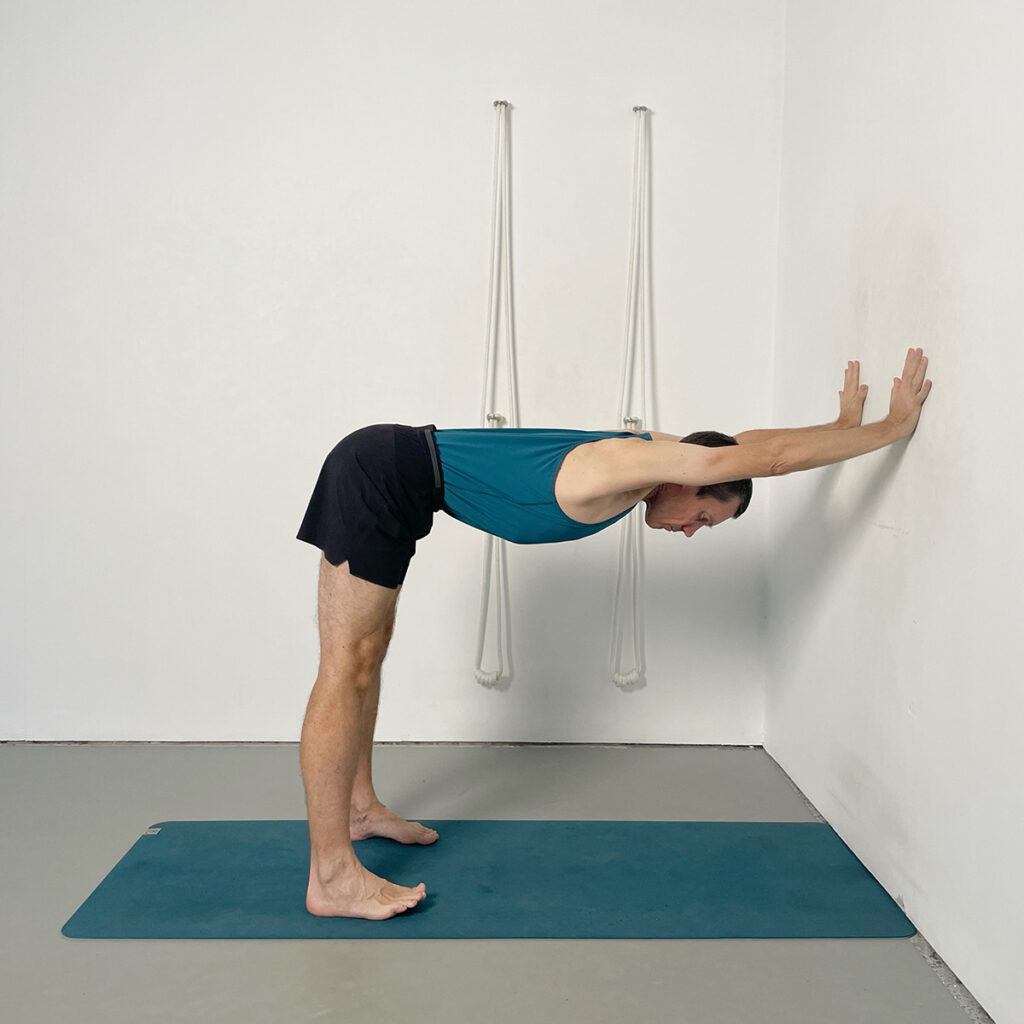
This wall-supported variation of Ardha Uttanasana is ideal for people practicing with tight hamstrings. It creates length and through the spine while keeping the lower back safe and stable. The contact of the hands against the wall helps draw the hips back and the chest forward, allowing the abdominal region to lengthen and the lumbar spine to decompress. It is an ideal way to introduce gentle spinal lengthening before moving into more challenging standing poses or twists.
Practice Points
- Place your hands to the wall at waist height and step back until your torso forms a right angle, with the hips directly above the heels and the legs straight.
- Press the hands firmly into the wall and straighten your elbows.
- Press your heels down and move your pelvis back, creating even length along both sides of the waist.
- Keep the lower ribs contained and allow the abdominal wall to gently recede as it lengthens, supporting the lumbar spine.
4. Utkatasana (Chair Pose)
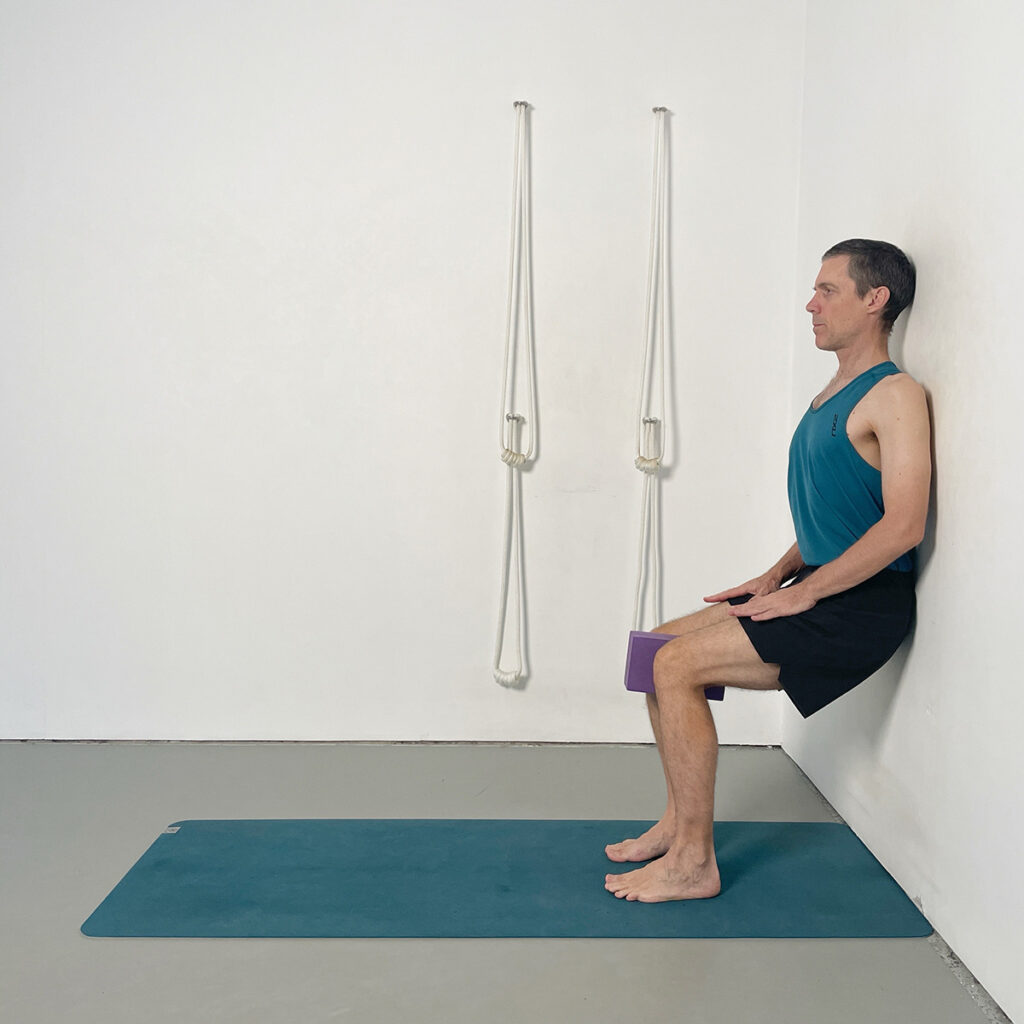
Utkatasana strengthens the legs and while teaching essential pelvic control for back care. The work in the thighs, buttocks, and abdomen helps stabilise the pelvis and prevents the lower back from collapsing or overarching. This pose prepares the body for standing twists and forward bends by cultivating steadiness, balance, and integrated support through the legs and core.
Practice Points
- Stand with the feet hip-width apart and bend the knees, lowering the pelvis as if sitting into a chair.
- Keep the weight evenly distributed across the feet.
- Simultaneously press the big toe bases and the outer heels into the floor.
- Draw the thighs back and lift the frontal hip bones to maintain a neutral, supported lumbar spine.
- Lengthen the sides of the waist and broaden the chest without pushing the lower ribs forwards.
- Press the palms against the front thighs to roll your shoulders back, move your shoulder blades in and lift your chest up.
5. Standing Marichyasana III

This supported twist offers a safe, structured way to release the spinal muscles without straining the lower back. With one foot elevated on the chair and the hands pressing into the wall, the pelvis is kept level and stable whilst the spine and ribcage twists. The lift through the spine and containment of the standing-leg hip allow the rotation to occur primarily through the mid and upper back, where mobility is most beneficial for spinal health.
Practice Points
- Stand beside the wall and place one foot onto the chair seat, supporting it with a block if needed to ensure that your knee is kept higher than your hip.
- Before progressing to the twist ensure your hips are level.
- Place both hands on the wall and use them to lengthen the sides of the waist and chest upward before turning the torso towards the wall.
- Press evenly through both feet to stabilise the pelvis and prevent tipping or rotation in the hips.
- Turn the chest and shoulders toward the wall, allowing the twist to build progressively through the rib cage and upper spine.
6. Supported Parivrtta Trikonasana (Revolved Triangle Pose)
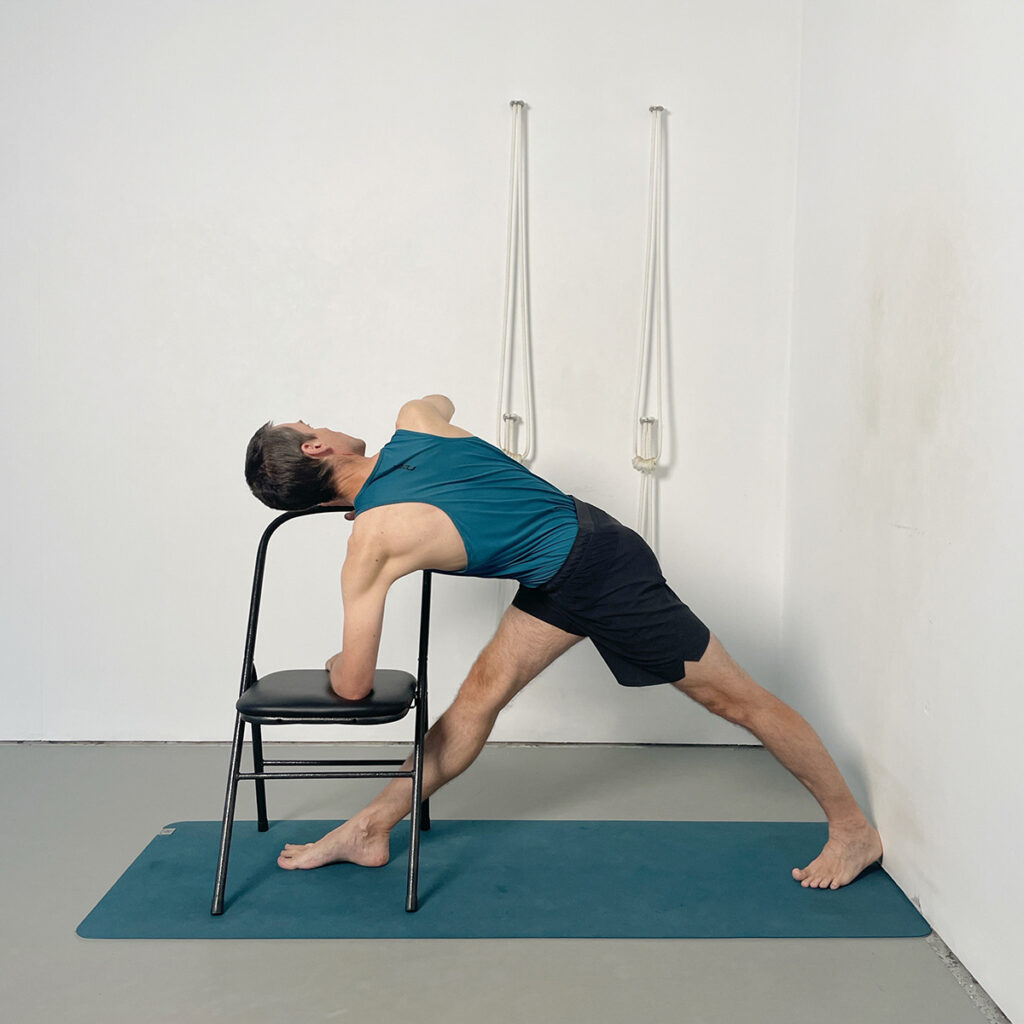
Using the chair for support transforms this potentially complex standing twist into a safe and effective back-care pose. The lift from the chair seat allows the spine to lengthen without forcing the hamstrings or compromising the lower back. By anchoring the back heel to the wall and containing the outer hip, the pelvis stays level, ensuring that the twist originates in the waist, ribs, and upper back. This creates spacious, well-directed rotation that helps release tightness along the spine.
Practice Points
- Stand with your back heel to the wall and step the front foot out a legs length distance.
- Turn the back foot in deeply to level the pelvis.
- Place the yoga chair over the front foot with the frame of the chair facing towards the right side.
- Place the lower arm (elbow to wrist) across the chair seat; If you have tight hamstrings place a block under your elbow to ensure you are able to keep the front-leg knee straight.
- Press firmly through both feet, lifting the outer hip of the front leg up and back to stabilise the pelvis.
- Lengthen the torso forward over the chair before beginning any rotation, extending evenly through both sides of the waist.
- Use the pressure of the arm on the chair and the opposite hand on the chair back to lift the shoulders and initiate a controlled twist.
- Turn the rib cage, chest and neck to look upwards toward the ceiling.
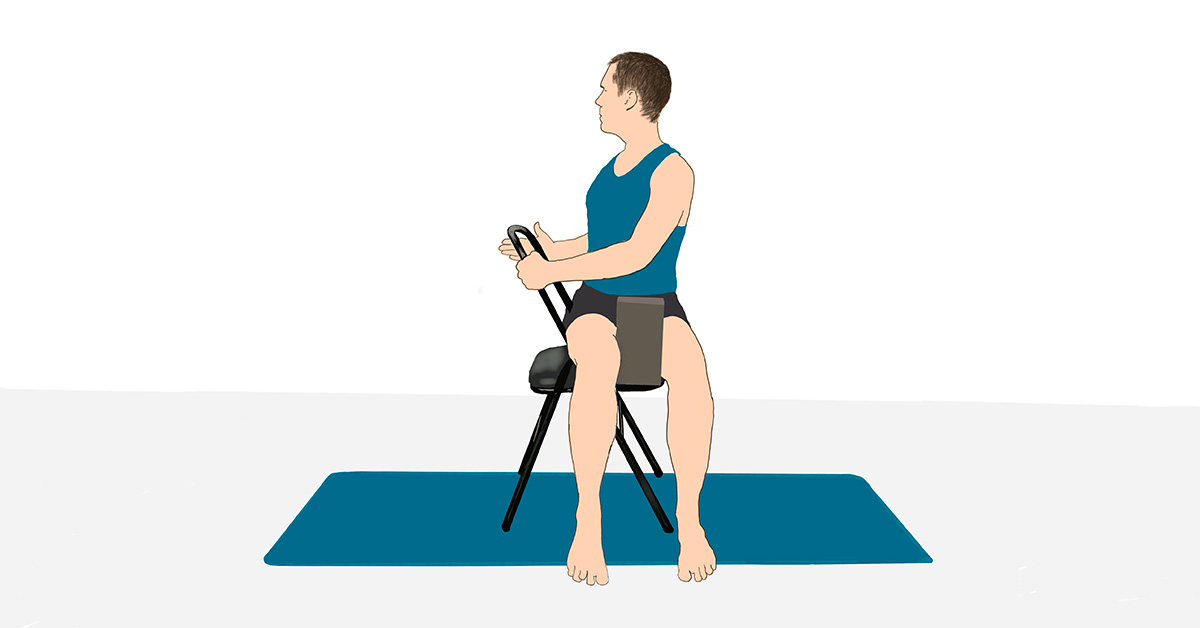
7. Chair Bharadvajasana (Bharadvaja’s Twist) – Iyengar Yoga for Back Care
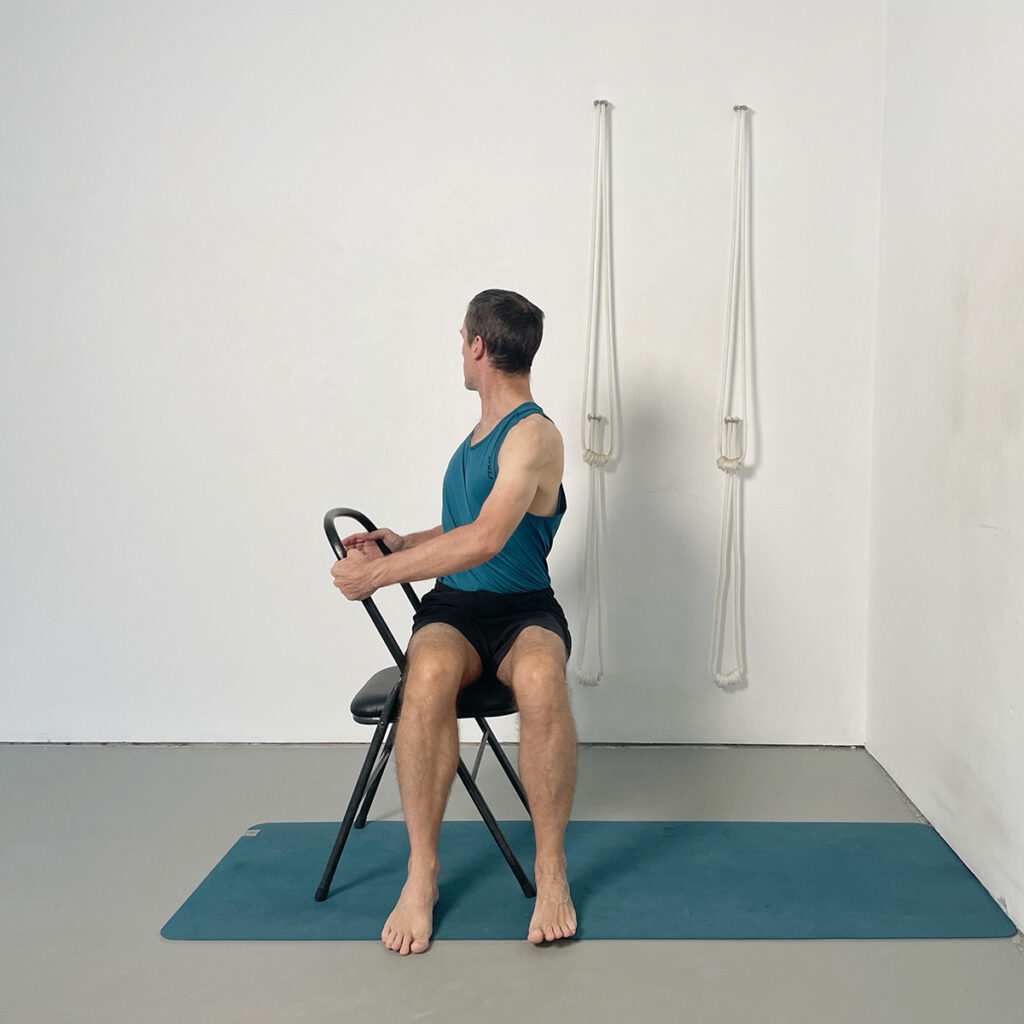
Using a chair allows this twist to be spacious, stable, and easy to adapt, ideal for gently releasing the spinal muscles without disturbing the lower back. Sitting with the pelvis level supports healthy rotation through the waist and rib cage, while holding the sides of the chair helps lift the spine before turning. This variation encourages the twist to rise upward rather than pulling from the lumbar region, making it a reliable pose for easing back stiffness.
Practice Points
- Sit sideways on the chair with both feet firmly on the floor and the inner knee aligned with the inner hip.
- Lengthen the spine upward as you hold the backrest or sides of the chair, keeping the pelvis steady and level.
- Begin the twist from the lower ribs, turning the abdomen gently without gripping or hardening it.
- Lift the breastbone and broaden the collarbones as you revolve the upper chest and shoulders.
- Keep the outer thighs and hips grounded to prevent the twist from dragging the pelvis out of alignment.
- Turn the neck softly at the end, keeping the throat relaxed and the breath steady.
Build a Supportive, Sustainable Back-Care Practice
Join Yoga Selection to access guided Iyengar Yoga classes for ongoing back care — including targeted sequences, gentle release work, and prop-supported techniques that build real, steady change over time.
Your membership includes full access to over 900 on-demand classes and all structured courses.
Clear Instruction. Intelligent Sequencing. Iyengar Yoga for Every Body.
8-10. Chair Malasana (Progressive Stages)
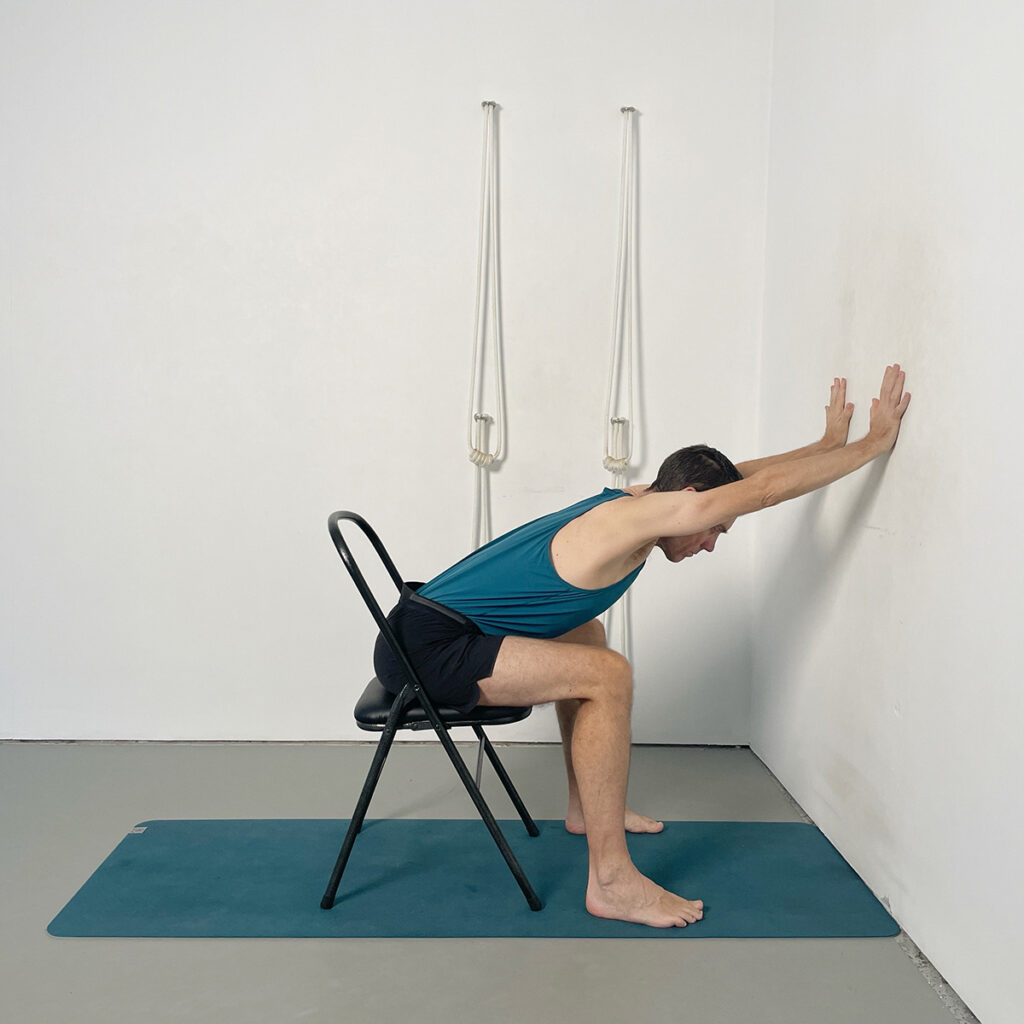
This sequence of chair-supported Mālāsana variations provides a controlled way to release the the lumbar spine. Beginning with the hands on the wall creates lift and space through the torso; moving to hands on the floor introduces a gradual deepening; and finally, bringing the arms inside the legs encourages the fuller release. These stages gently traction the lower back and help redirect strain away from the lumbar region. It is especially beneficial for people suffering from tightness and compression in the lower back.
Practice Points
- Stage 1: Hands to wall
- Position the chair within reach of the wall.
- Sit in the chair with your feet and knees shoulder width apart.
- Extend the arms to the wall, lengthening the sides of the chest and creating space in the abdomen.
- Walk the hands higher up the wall.
- Lengthen the front of the spine and move the back of the spine into the body.
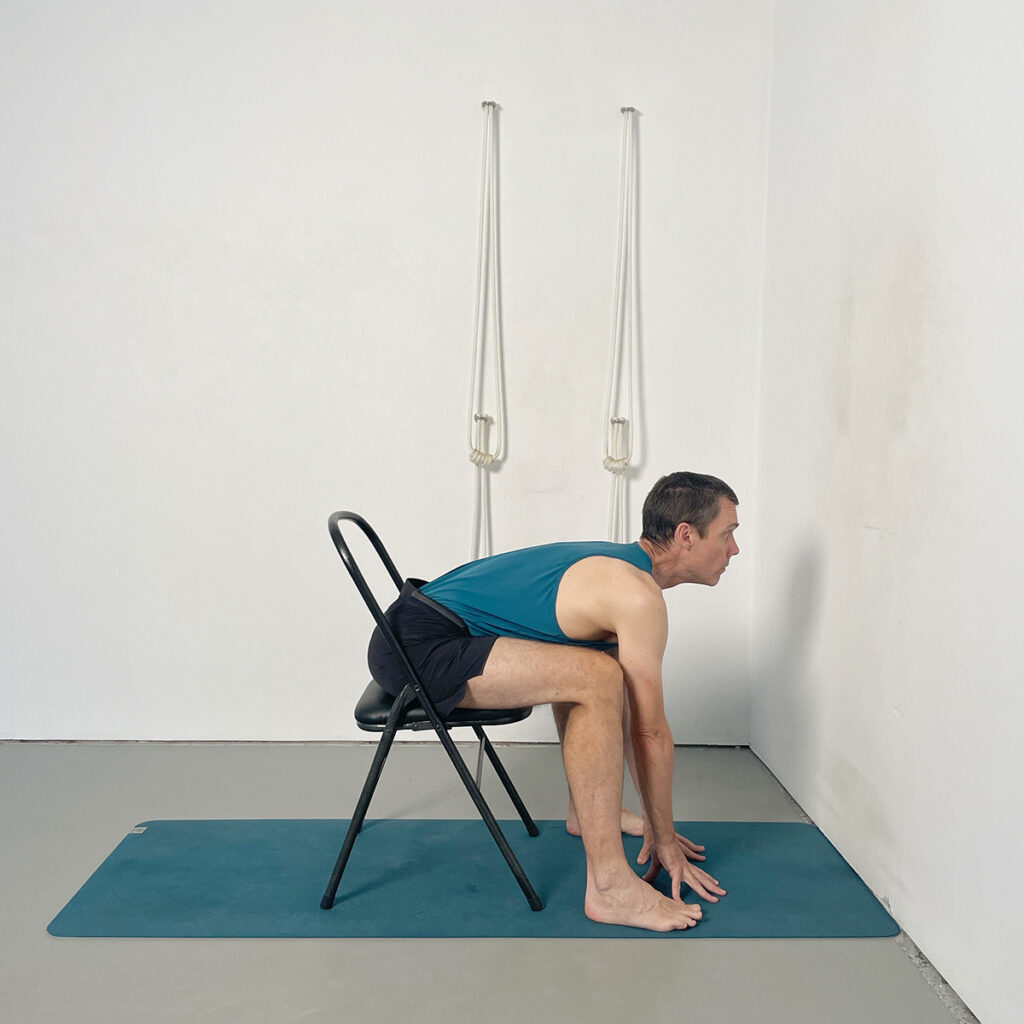
- Stage 2: Hands to floor
- Walk the hands down the wall to the floor, placing them between the feet.
- Maintain the length you created in the first stage by pressing the fingers to the floor.
- Move the breastbone towards the wall whilst anchoring the sitting bones down into the seat.
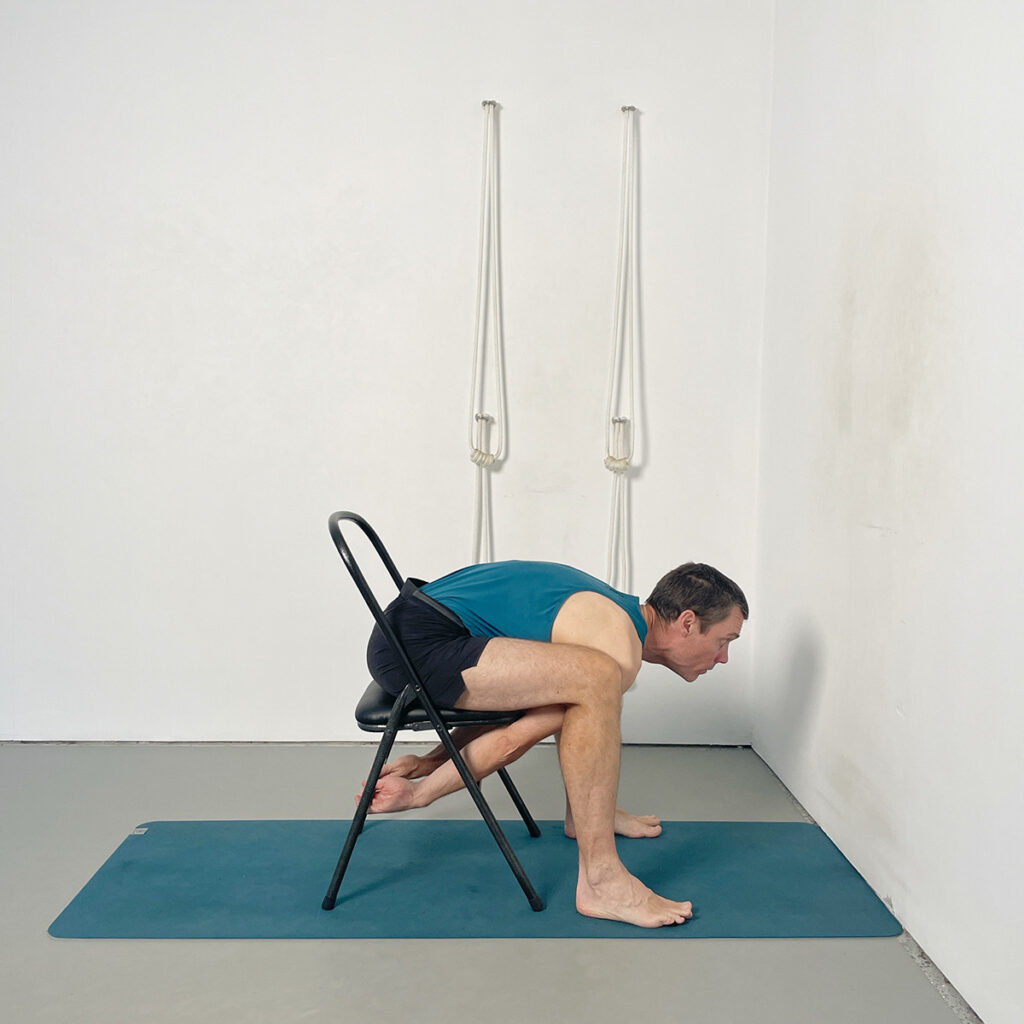
- Stage 3: Arms inside legs
- Reach in between your legs to hold the back legs of the chair.
- Lift the head and look forwards.
- Lengthen the whole spine towards the wall.
11. Eka Pada Pavanamuktasana

This simple but effective pose helps to release tension in the lower back by gently lengthening the lumbar spine. Drawing one knee toward the chest creates a controlled traction effect on the lower back muscles, helping to ease stiffness without strain. Keeping the opposite leg extended teaches balanced length through both sides of the pelvis, an essential foundation for ongoing back care.
Practice Points
- Lie on your back with both legs extended and the feet flexed.
- Draw one knee toward the chest, interlacing the fingers just below the knee.
- Keep the extended leg active, lengthening the heel away to stabilise the pelvis.
- Draw the thigh toward you, allowing the lumbar spine to broaden and release.
- Deepen the bent leg thigh crease towards the wall.
12. Pavanamuktasana (Iyengar Yoga for Back Care)
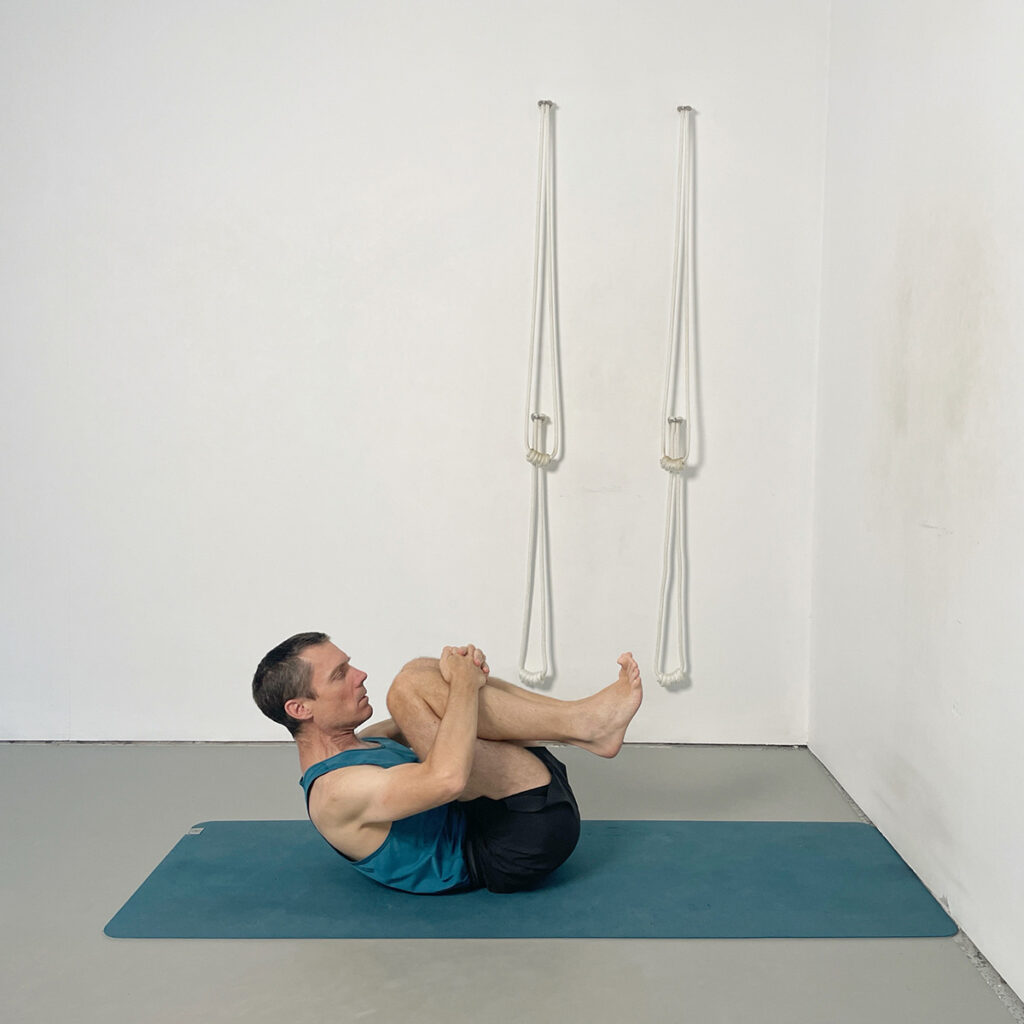
Drawing both knees toward the chest creates a gentle, symmetrical release for the lower back. This variation broadens and simultaneously lengthens the lumbar region, and helps settle tension in the hip flexors. Lifting the head slightly, as shown here, can further engage the abdominal wall to create a supportive lumbar release. This is particularly useful for people who tend to arch excessively in the lower back.
Practice Points
- Lie on your back and draw both knees toward your chest.
- Whilst drawing the knees towards your chest resist the knees back against your hands.
- Lengthen the pubic bone away from the navel.
- Press the entire back waist to the floor.
- Whilst descending the back waist lift the head and bring your face towards the knees.
13. Supta Padangusthasana 4 Variation (Figure-Four Hip Release)
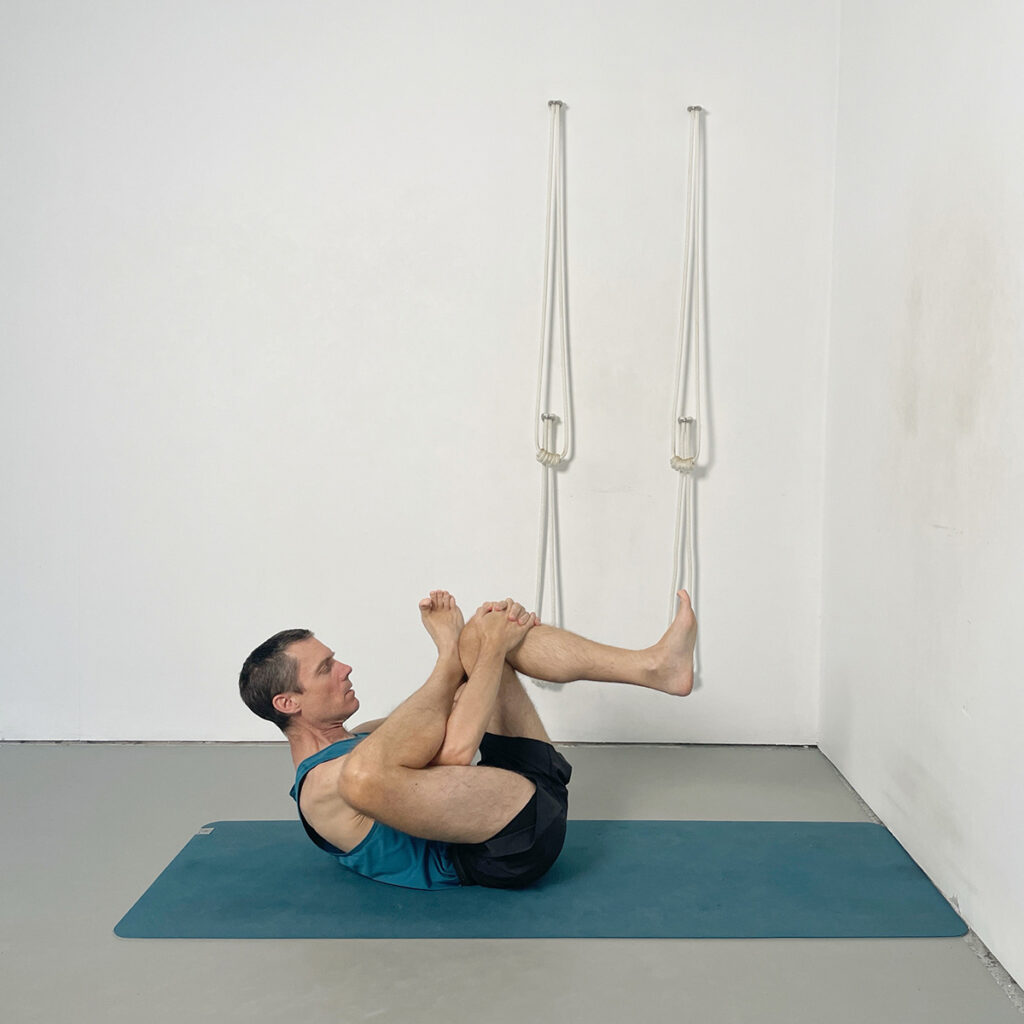
This variation opens the hips and gluteal muscles, areas that frequently contribute to lower-back tightness when they become stiff. By crossing one ankle over the opposite thigh and drawing the legs towards the chest, the pose targets the deep lateral hip muscles while also widening the sacrum and creating space around the lumbar spine. Lifting the head, and engaging the abdominal muscles can help to emphasise the back releasing potential of the pose.
Practice Points
- Lie on your back and cross one ankle over the opposite thigh, just above the knee.
- Thread the hands around the uncrossed shin and draw the legs toward you.
- Lift the head and draw the ankle of the crossed leg closer.
- Use your elbow to resist the knee of the crossed away from the chest
- Contain the hip socket of the crossed leg into the body.
14. Supta Padangusthasana 2 (Reclining Leg Stretch to the Side)
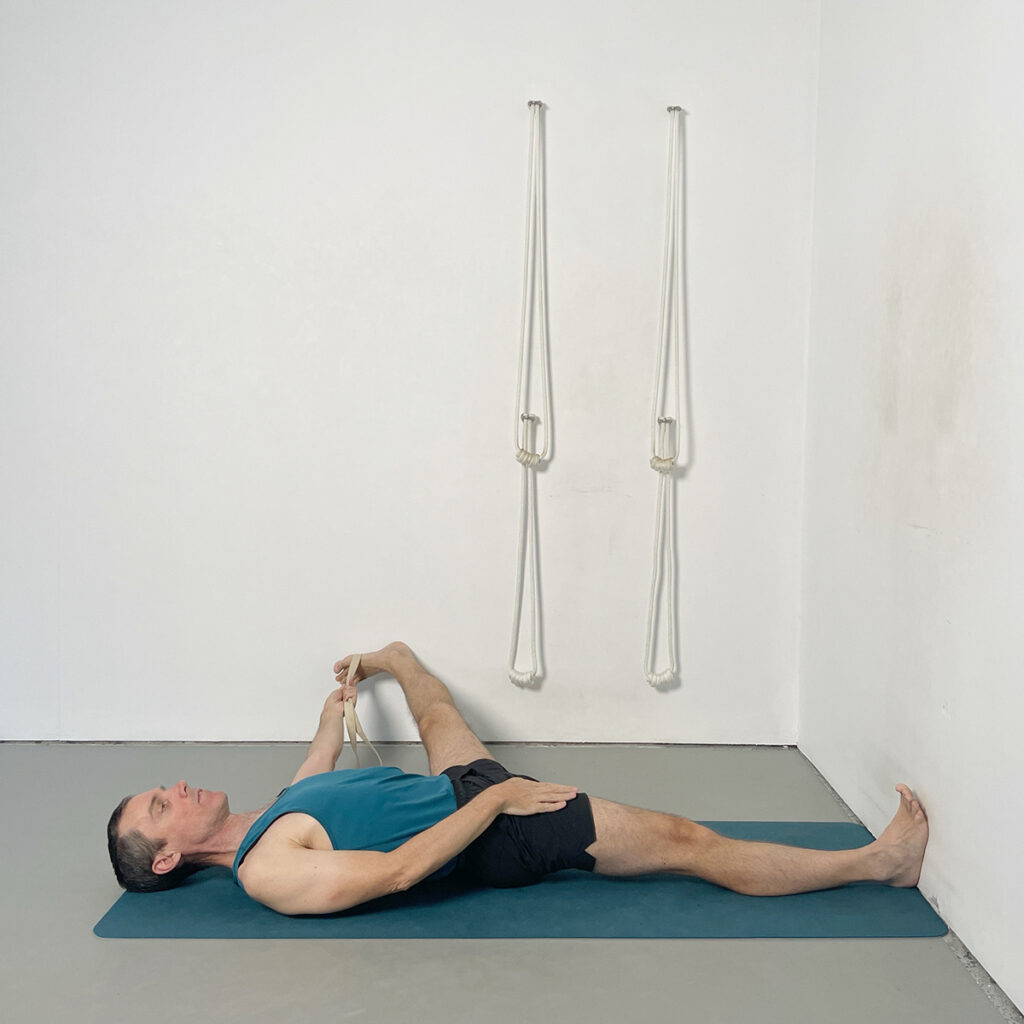
This variation lengthens the inner thigh adductor region of the lifted leg while anchoring the opposite side of the pelvis. By widening the leg to the side without tilting the pelvis, the pose helps redirect load away from the lumbar spine. This stabilising action required in the centre of the pelvis, makes this an excellent pose for managing stiffness that can pull on the lower back.
How to practise
- Lie on your back with one leg extended along the floor, the foot pressing firmly into the wall for stability.
- Place the belt around the ball of the lifted leg and open it out to the side, keeping the knee straight.
- Place the opposite hand on the front of the thigh to prevent the pelvis from tipping toward the lifted leg.
- Maintain evenness through both sides of the waist.
- Press the thigh of the extended leg downwards so the pelvis remains grounded.
15. Viparita Karani Variation (Legs-Up-the-Wall with Bolster on Feet)
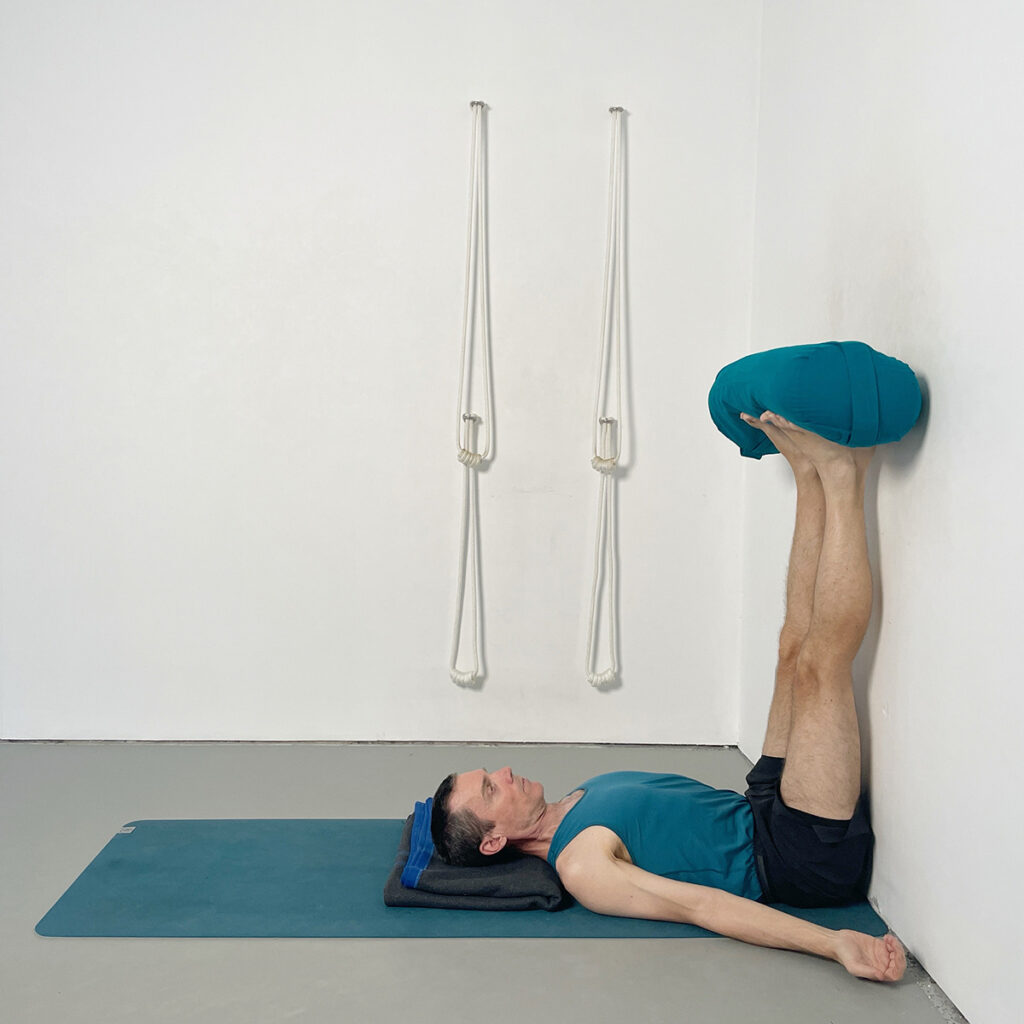
This variation offers the calming benefits of Viparita Karani while keeping the pelvis grounded, making it especially suitable for back-care work. Placing a bolster on the soles of the feet provides gentle, sustained traction through the lower back, and encourages the muscles associated with the back of the pelvis to soften. The position helps quieten the nervous system, relieve lumbar fatigue, and settle the breath. It is an ideal transitional pose before moving into the final relaxation of Savasana.
Practice Points
- Sit sideways against the wall and swing the legs upward, bringing the sitting bones close to the wall.
- Place a folded blanket under the head and neck to keep the forehead and chin level.
- Rest a bolster on the soles of the feet, allowing its weight to encourage the legs to release down into the pelvis, and the pelvis to release down into the floor.
- Keep the pelvis grounded and the lower back broad, allowing the abdominal wall to soften downward.
- Release the arms outward with the palms up, widening the chest and relaxing the shoulders.
- Stay for several minutes, letting the pose draw tension away from the lower back and quieten the whole body.
16. Supported Savasana (Calves on Chair with Bolster on Pelvis)
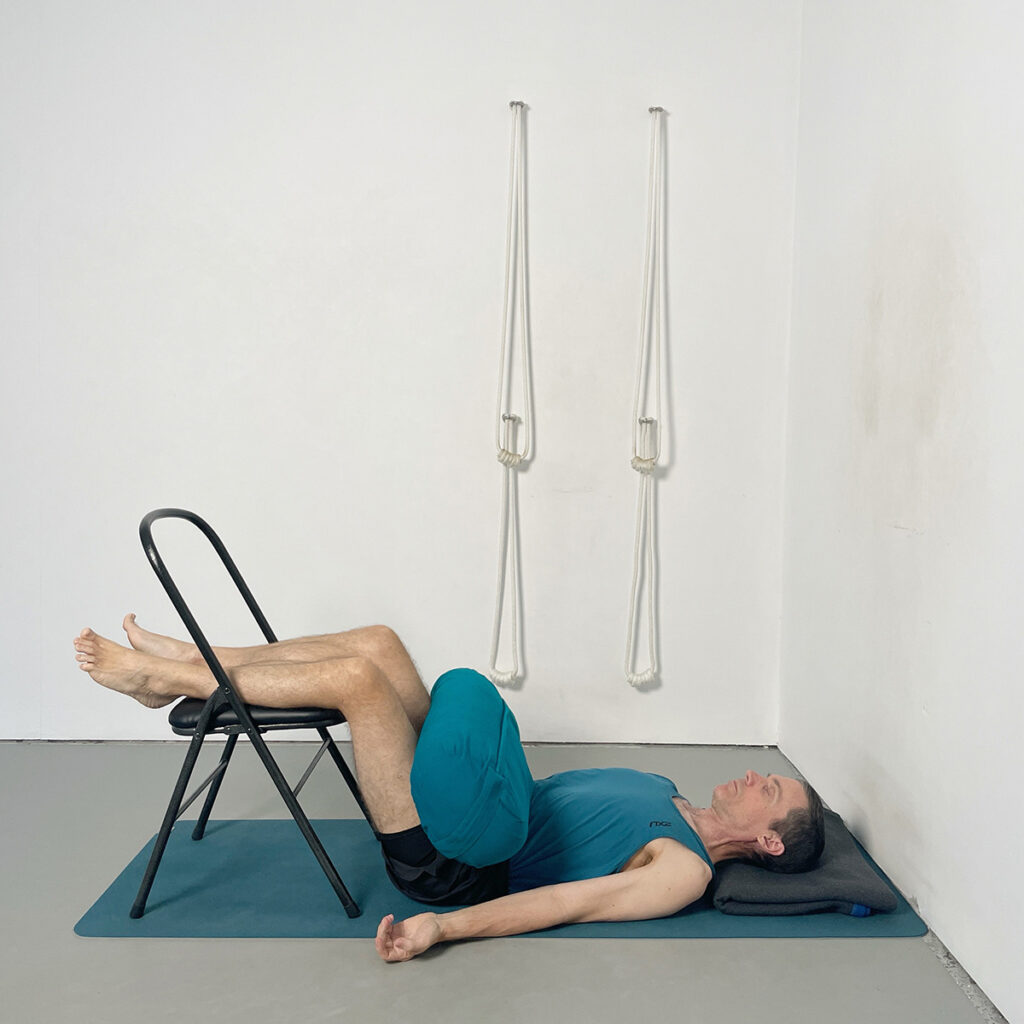
This deeply restorative variation of Savasana gently decompresses the lower back by placing the calves on a chair, allowing the lumbar spine to settle fully into the floor. Resting a bolster on the pelvis adds a soothing, grounding weight that encourages the lower back to soften. The combined effects reduce tension across the hip flexors, release residual strain in the spine, and invite a state of complete rest, an ideal conclusion to this ongoing Iyengar Yoga for Back Care sequence.
Practice Points
- Lie on your back with the calves resting on the seat of a chair, ensuring the thighs and shins are fully supported.
- Place a bolster on the front of the pelvis, letting its weight encourage release through the back of the pelvis.
- Support the head and neck with a folded blanket.
- Let the shoulders release away from the neck and rest the arms out to the sides, palms turned upward.
- Release the lower back into the floor and allow the breath to become smooth and soft.
- Stay for several minutes, letting the pose settle the nervous system and dissolve lingering tension through the spine.
Building a Supportive Back-Care Practice
Caring for the back is most effective when approached with patience, consistency, and clear technique. This Iyengar Yoga for Back Care sequence offers reliable methods for creating space, reducing tension, and improving mobility, tools you can return to whenever your body needs steadiness or relief. Over time, these poses help cultivate a more resilient spine and a calmer, more confident relationship with your practice. Whether used as a stand-alone routine or integrated into your broader Iyengar Yoga journey, it’s a sequence designed to support you for the long term.
Frequently Asked Questions
1. Can I do this back-care sequence if I have chronic lower-back pain?
Yes – many people with chronic lower-back discomfort find this sequence helpful because it emphasises gentle traction, supported positions, and progressive mobility. However, if you have acute pain, recent injury, or nerve-related symptoms, please check with a healthcare professional before practising.
2. How often should I practise this sequence for best results?
You can repeat this sequence two to four times per week. The gentle, supported nature of the poses makes it suitable as an ongoing maintenance routine, even on days when your back feels sensitive or tired.
3. Do I need all the props shown in the photos?
Not necessarily. Iyengar Yoga uses props to make poses safer, more accessible, and more effective. If you don’t have a chair, bolster, or blocks, many poses can be adapted using household items such as firm cushions, folded blankets, or a stable dining chair.
4. What if some of the poses feel too strong for my back?
Move slowly and prioritise sensation over depth. Each pose description includes clear troubleshooting actions to help you adjust positioning, height, or support. It’s normal to stop before your maximum range when working with back sensitivity.
5. Can this sequence help with stiffness from sitting or standing for long periods?
Yes. Many of the poses – especially Ardha Uttanasana at the wall, supported twists, and the hip-release variations – are designed to counteract the compressive effects of long sitting or standing.
6. Is this a good practice for beginners?
Absolutely. The sequence is structured to be accessible for beginners while still offering depth and refinement for experienced practitioners. The prop-supported variations make it particularly suitable for people who are new to yoga or working with stiffness.
7. Will this sequence improve flexibility in my hips and hamstrings?
Yes. Tight hamstrings and adductors can contribute to lower-back strain. The targeted reclining leg variations in the latter part of the sequence help increase mobility safely without pulling on the lumbar spine.
8. Where can I learn more Iyengar Yoga sequences like this?
You can access over 900 on-demand Iyengar Yoga classes – including full back-care, hip-mobility, and restorative courses – inside the Yoga Selection membership. A free trial is available for new members.
Build a Supportive, Sustainable Back-Care Practice
Join Yoga Selection to access guided Iyengar Yoga classes for ongoing back care — including targeted sequences, gentle release work, and prop-supported techniques that build real, steady change over time.
Your membership includes full access to over 900 on-demand classes and all structured courses.
Clear Instruction. Intelligent Sequencing. Iyengar Yoga for Every Body.
Looking for more supportive practices? Explore our related resources: Iyengar Yoga for Lower Back Pain, Yoga for Ageing or Stiff Bodies, and Yoga at Home (Beginner Friendly).
Rod Stennard – Founder of Yoga Selection
Rod Stennard is the founder of Yoga Selection, the first online yoga platform dedicated entirely to Iyengar Yoga. A certified Iyengar Yoga teacher since 2002, Rod has practiced yoga since 1992 and studied under senior teachers from around the world, including members of the Iyengar family in Pune, India.
Rod launched Yoga Selection in 2016 to bring structured, high-quality Iyengar Yoga training to a global audience. As a pioneer in the field of online yoga education, he is passionate about making this method accessible to all, through rigorous, inclusive, and thoughtfully designed classes. His work continues to support students of all levels in over 50 countries.