A structured sequence to improve flexibility in your legs and hips using precise, accessible Iyengar Yoga techniques.
Ideal for stiff bodies, beginners, and anyone wanting safer, more effective lower-body mobility.
Tightness in the legs and hips is one of the most common obstacles people encounter in yoga. Stiff calves, hamstrings, inner thighs, or gluteal muscles can make simple movements feel restricted and can limit progress in standing poses, forward bends, and everyday mobility. These areas also tend to tighten easily from long hours of sitting, driving, or repetitive sports.
This sequence offers a clear, structured approach to improving flexibility in the lower body using foundational Iyengar Yoga techniques. The poses have been chosen to gradually release the calves, hamstrings, adductors, and gluteal region, beginning with accessible variations that create space without strain. Each posture uses support in a precise way, helping you work safely even if you identify as stiff, recovering from injury, or returning to practice after time away.
We start by easing the shins and ankles, an often-overlooked area that can significantly affect leg mobility. From here, the sequence progresses through supported standing and reclining variations that lengthen the calves and hamstrings while maintaining a neutral spine. The final section of the sequence targets the hips and glutes from several directions so you can find the angle that best helps you access these deeper muscle groups.
Whether you are new to yoga, working with tightness, or simply wanting to improve your range of motion, this methodical progression will help you develop balanced leg and hip flexibility. Below, you’ll find a step-by-step breakdown of the full 16-pose sequence featured in the accompanying class video.
Table of Contents
- Watch the Full Leg and Hip Flexibility Video
- Leg and Hip Flexibility Sequence Overview
- 1. Vajrasana with Two Blankets (Stage 1: Introductory Shin Release)
- 2. Vajrasana (Stage 2: Introducing Gap Between Blankets)
- 3. Adho Mukha Virasana (Forward-Facing Hero Pose)
- 4. Adho Mukha Svanasana (With Hands on Blocks)
- 5. Tadasana on Slanted Blocks (Calf Lengthening Variation)
- 6. Ardha Uttanasana at the Wall (Half Standing Forward Bend)
- 7. Wall-Supported Parsvottanasana (Intense Side Stretch Pose)
- 8. Utthita Hasta Padangusthasana I
- 9. Utthita Hasta Padangusthasana II
- 10. Sukhasana Forward Bend (Easy Cross-Legged Variation)
- 11. Gomukhasana Preparation (Forward Bend Variation)
- 12. Seated Gluteal Stretch at the Wall (Pigeon Pose Variation)
- 13. Reclined Glute and Hip Opening (Figure Four Pose Variation)
- 14. Supta Padangusthasana I (Reclined Hamstring Lengthening with Belt)
- 15. Supta Padangusthasana II (Reclined Adductor Stretch with Belt)
- 16. Savasana (Corpse Pose)
- Integrating Leg and Hip Flexibility Into Your Practice
- Frequently Asked Questions
Watch the Full Leg and Hip Flexibility Video
This full-length class guides you progressively through each stage of the sequence, using clear, precise instruction and accessible prop support. Move steadily through the poses, adapting where needed, and allow the hips and legs to open gradually without strain.
Develop Safer, More Effective Leg & Hip Flexibility
Join Yoga Selection to access structured Iyengar Yoga classes designed to improve lower-body mobility — including targeted work for shins, calves, hamstrings, adductors, and gluteals using intelligent prop support.
Your membership includes full access to over 900 on-demand classes and all structured courses.
Clear Instruction. Intelligent Sequencing. Iyengar Yoga for Every Body.
Leg and Hip Flexibility Sequence Overview

This 16-pose grid image shows the full progression of the class at a glance. Each pose builds logically on the previous one, moving from shin and calf mobility through hamstrings and adductors, and finishing with focused hip and gluteal work. Scroll down for detailed instructions and key alignment points for every stage.
Pose 1. Vajrasana with Two Blankets (Stage 1: Introductory Shin Release)
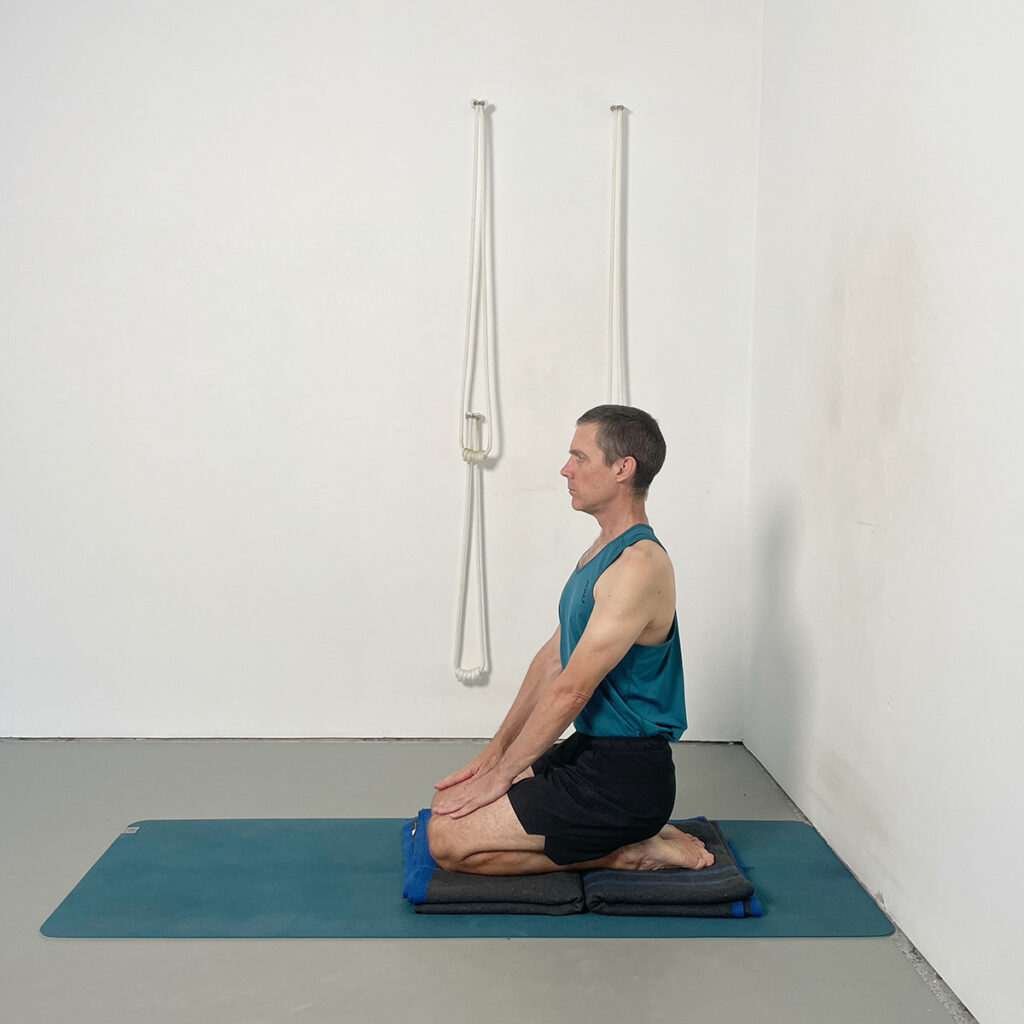
This supported variation of Vajrasana gently introduces mobility into the shins and is ideal for practitioners who experience tightness or discomfort in this area. Kneeling with the shins positioned on two folded blankets allows the muscle tissue along the front of the ankles and shins to gradually lengthen and soften.
Instructions:
- Position two folded blankets edge-to-edge and kneel with your shins fully supported along their length.
- Keep the knees and big toes together.
- Sit the buttocks back towards the heels, allowing gradual release through the front of the ankles.
- Lift the sternum bone upwards while keeping the lower front ribs contained.
- Keep the shoulders back and down as the spine ascends.
- Maintain an even weight distribution across both shins as they soften into the support.
Pose 2. Vajrasana (Stage 2: Introducing Gap Between Blankets)
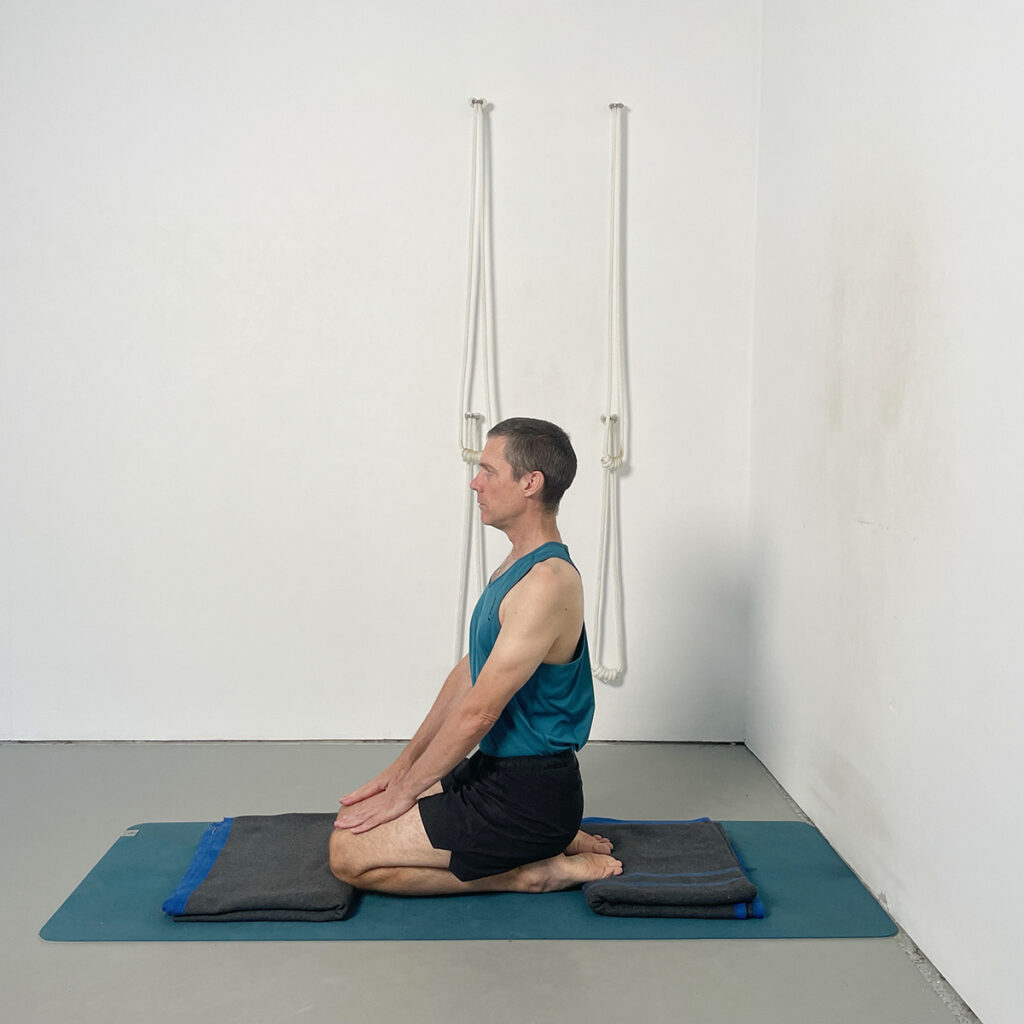
This second-stage variation increases the shin-opening effect by introducing a gap between the blankets. The unsupported space between the blankets allows the shins to settle more deeply, producing a stronger opening across the front of the lower legs. It is suitable for practitioners who want to work more intensively once the introductory variation becomes comfortable.
Instructions:
- Arrange two folded blankets with a gap running between them, leaving the centre of the shins unsupported.
- Kneel so that the mid section of the shins lies over the gap with the knees and tops of the feet supported by the blankets.
- Keep the big toes and knees together and sit the buttocks back towards the heels, letting the shins descend into the space.
- Lift the spine and chest upwards, without overarching the lower back.
- Release the shoulders down whilst broadening across the collarbones.
- Allow the front of the ankles and shins to soften gradually without pushing or forcing the descent.
Pose 3. Adho Mukha Virasana (Forward-Facing Hero Pose)
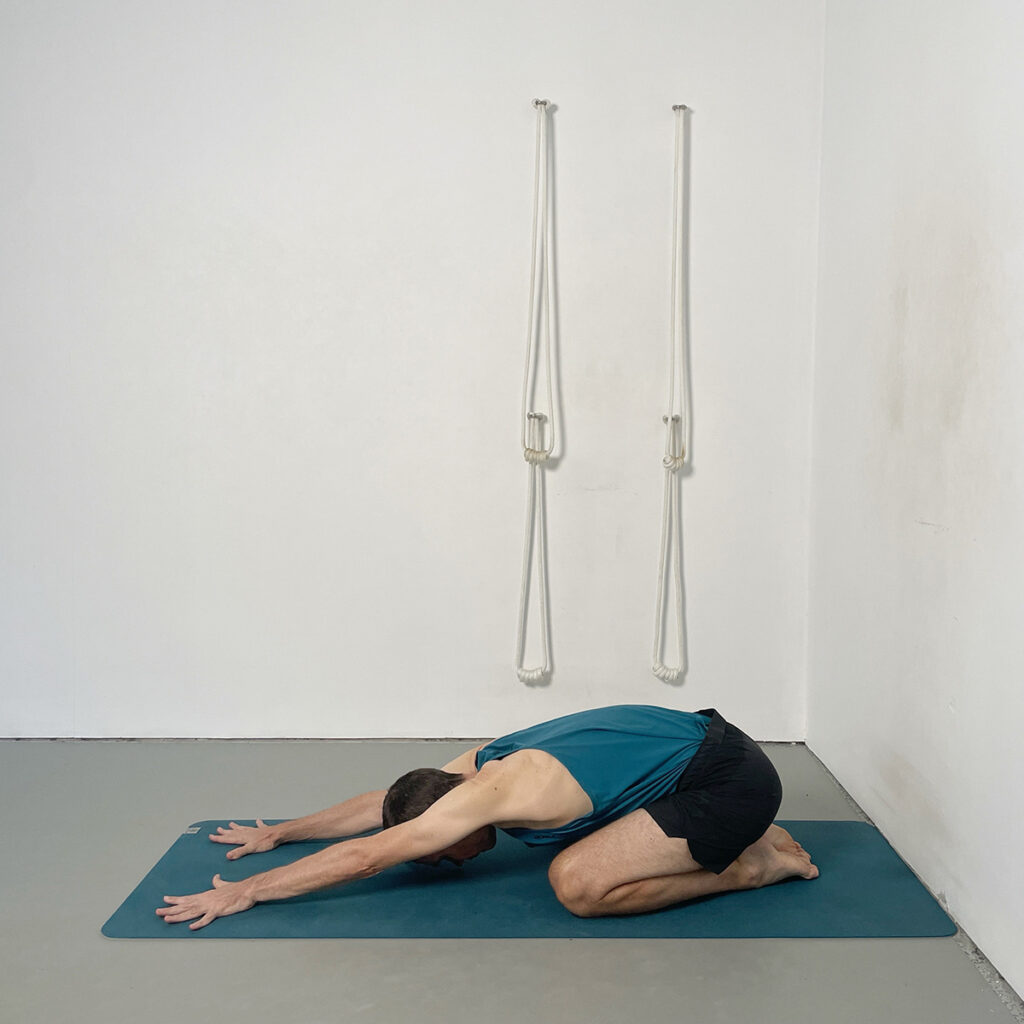
Adho Mukha Virasana gently lengthens the spine while releasing tension through the adductors, and lower back. After the initial shin-focused work, it provides a soothing transition that spreads the effects of the opening further up the body. The pose creates a broadening release across the back ribs and a gentle traction in the lumbar sine.
Instructions:
- Sit back on your heels with the big toes touching and the knees apart.
- Extend the arms forward on the mat, keeping the elbows lifted.
- Allow the pelvis to descend towards the heels, maintaining a soft release through the groins.
- Lengthen the chest forwards, creating space between the waist and the ribcage.
- Spread the fingers and press the palms firmly down to help traction the spine.
- Let the forehead rest towards the floor, encouraging the neck to soften and release.
Pose 4. Adho Mukha Svanasana (With Hands on Blocks)
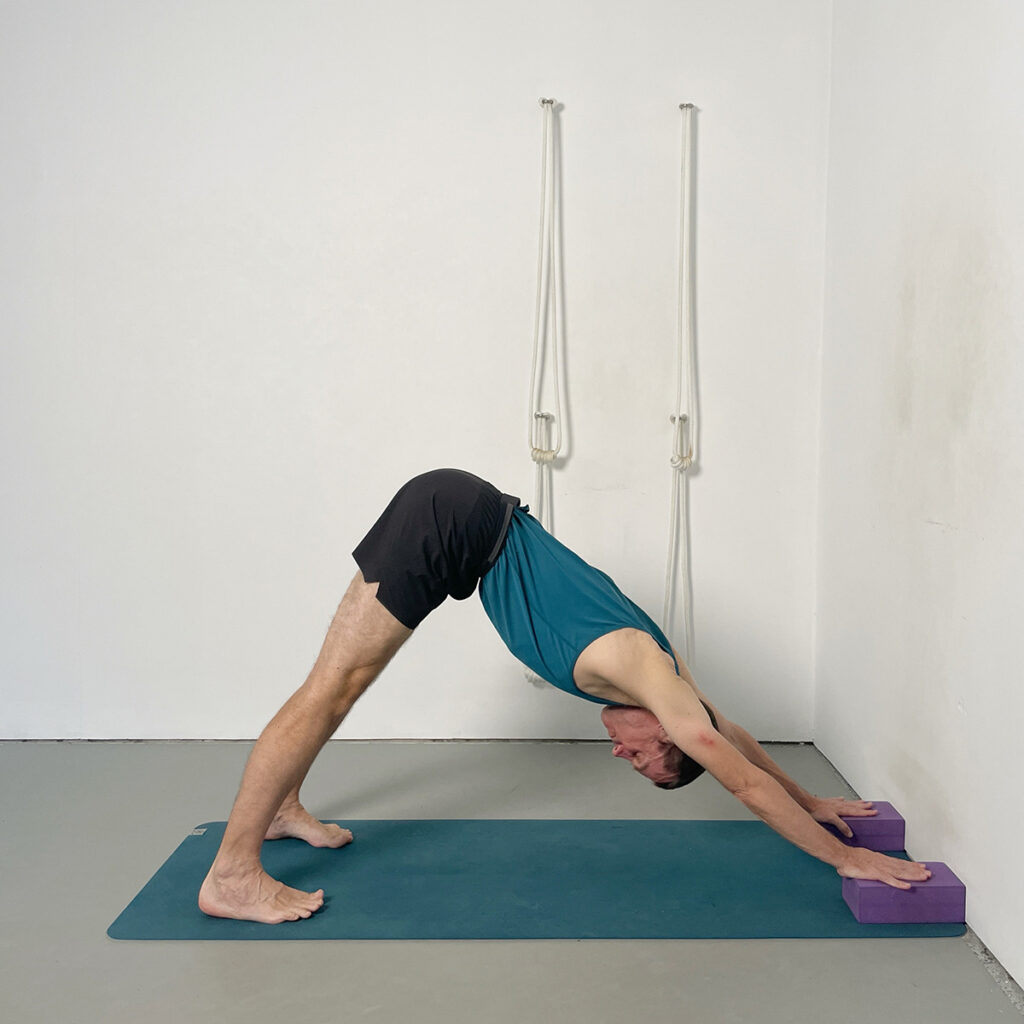
Placing the hands on blocks in Adho Mukha Svanasana creates additional space for the heels to descend, increasing the lengthening effect on the calves and the backs of the ankles. This variation is particularly useful for practitioners with tight lower legs or limited flexibility through the backs of the legs.
Instructions:
- Set two yoga blocks at the wall and place your hands on them with the fingers spread.
- Step the feet back into downward facing dog pose.
- Press the heel bones actively toward the floor, observing how the elevated hands helps to encourage deeper calf lengthening.
- Lift the sitting bones upwards and backwards, whilst descending the heels.
- Press the tops of the thighs back as the heels descend.
Pose 5. Tadasana on Slanted Blocks (Calf Lengthening Variation)
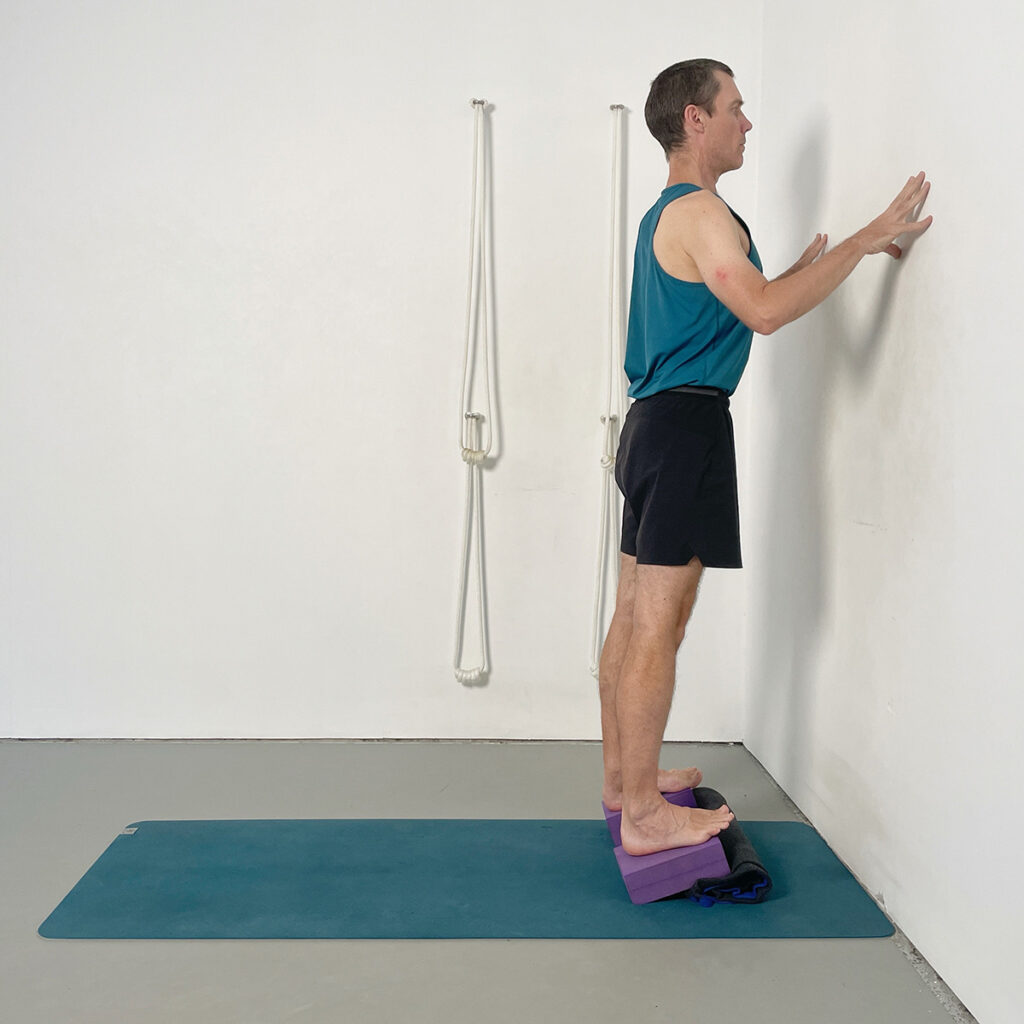
Standing on slanted blocks intensifies the lengthening effect on the calves and Achilles tendons by placing the heels lower than the toes. This variation builds directly on the work of the previous pose, helping to broaden the ankle region and increase mobility through the lower legs. The support of the wall allows you to maintain upright alignment while the calves gradually release.
Instructions:
- Position two slanted blocks on a rolled blanket
- Stand on the blocks so the toes are higher and the heels lower.
- Lightly touch the fingertips to the wall to steady the balance without leaning forwards.
- Lift the kneecaps and stabilise the front thighs, whilst moving the back of the pelvis in and the tailbone down.
- Whilst keeping the big toe bases anchored press the outer heels down.
- Ascend evenly through the front body, lifting the sternum while keeping the lower front ribs contained.
Pose 6. Ardha Uttanasana at the Wall (Half Standing Forward Bend)
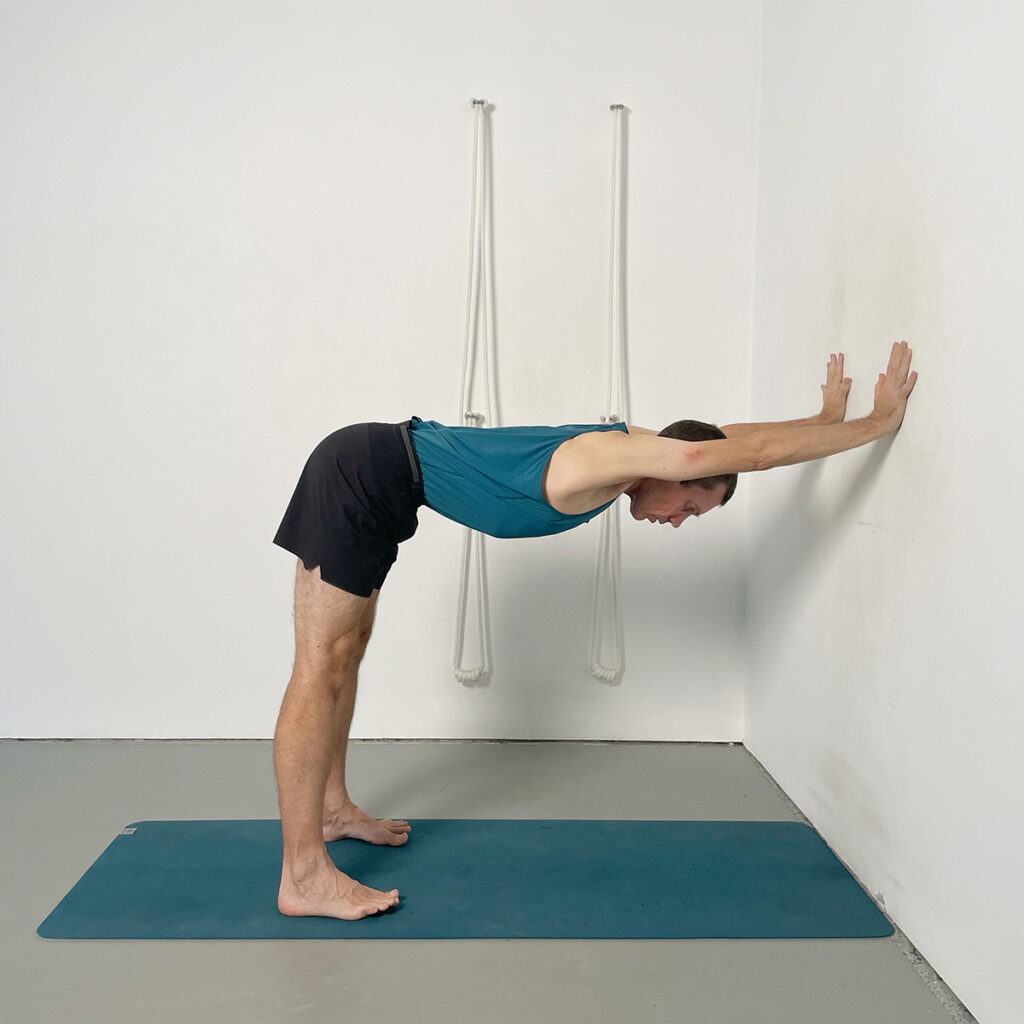
This wall-supported variation of Ardha Uttanasana allows tight hamstrings to lengthen without placing strain on the spine. By anchoring the hands at the wall, the spine can lengthen as the thighs press back. The support encourages a safe, spacious forward extension that is ideal for practitioners who find full Uttanasana difficult or compressive due to restricted mobility.
Instructions:
- Stand facing the wall and place your hands shoulder-width apart at waist height.
- Walk the feet back until your torso forms a right angle with your legs.
- Press the hands firmly into the wall to straighten and lift the elbows.
- Press the tops of the thighs back and descend the heels.
- Keep the head in line with the arms with the gaze directed straight down.
- Maintain a straight line from the wrists through to the elbows, shoulders and pelvis.
Pose 7. Wall-Supported Parsvottanasana (Intense Side Stretch Pose)
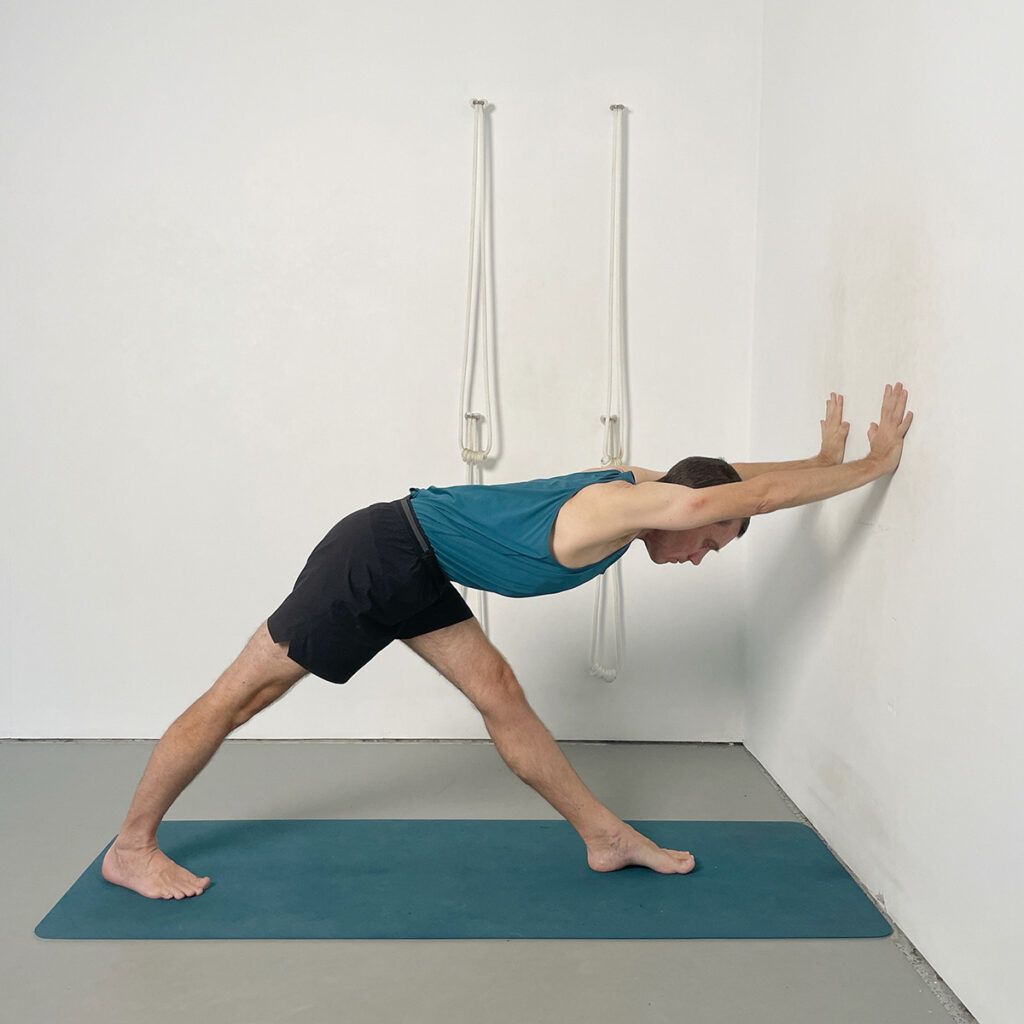
This wall-based variation of Parsvottanasana builds directly on the previous poses by lengthening the hamstring of the front leg while simultaneously opening the calf of the back leg. The hands press into the wall to keep the spine supported and the chest open.
Instructions:
- Step one foot forward and the other foot back to create a legs length distance between the feet.
- Keep both knees straight.
- Place the hands firmly on the wall, shoulder-width apart, and extend the torso forward.
- Lift the front kneecap and draw the front thigh upward to assist hamstring lengthening.
- Press the back heel firmly toward the floor to deepen the calf release.
- Keep the hips level, spine straight and chest open.
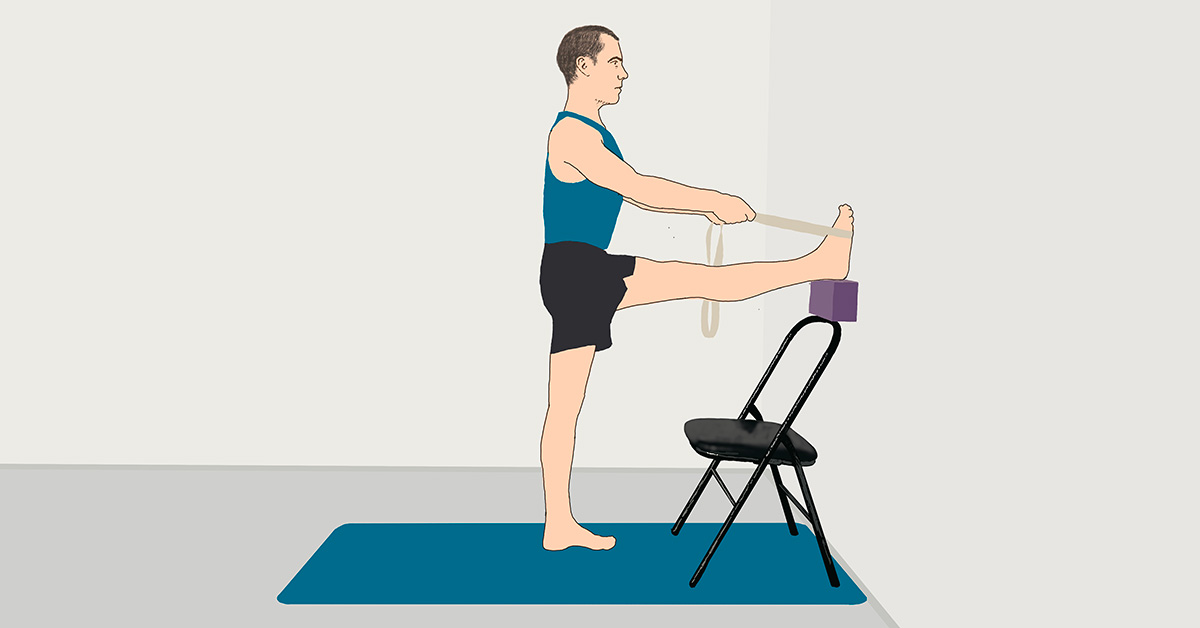
Pose 8. Utthita Hasta Padangusthasana I
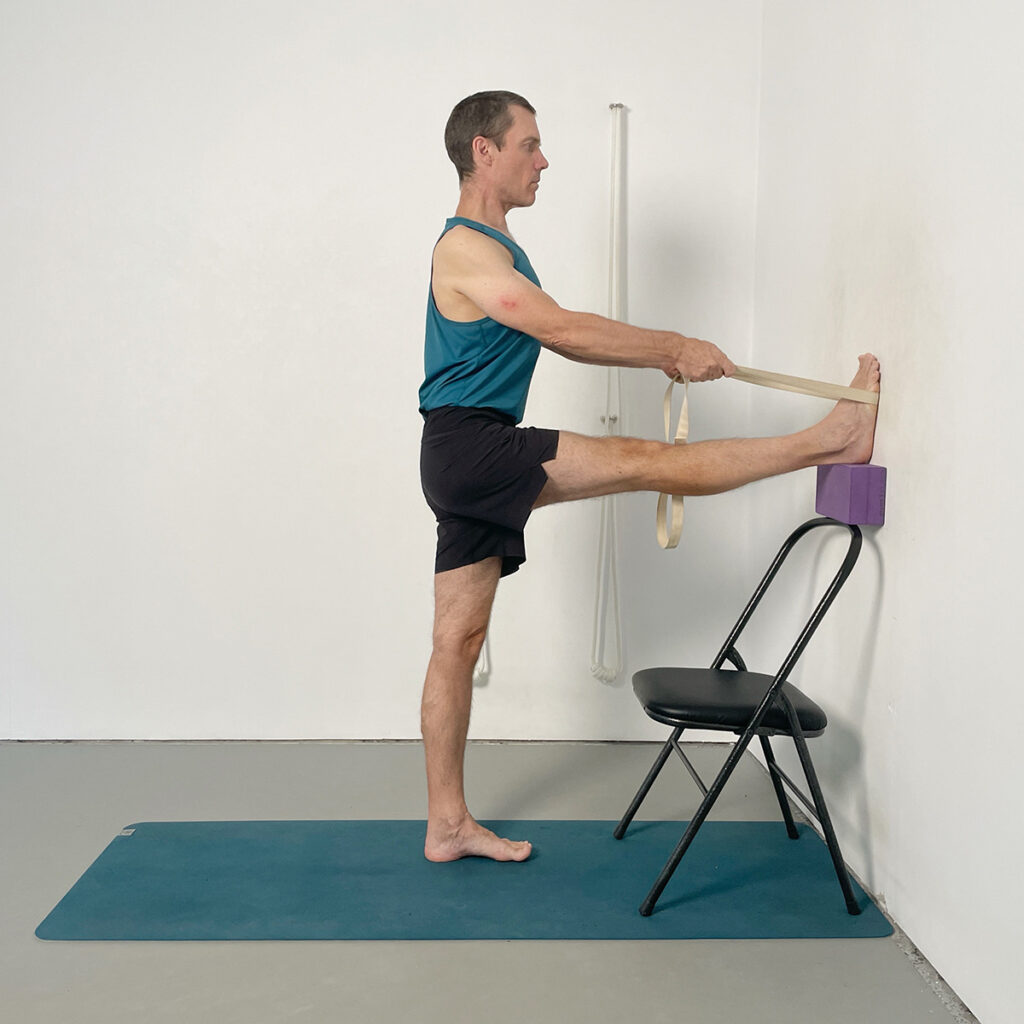
This version of Utthita Hasta Padangusthasana helps develop hamstring flexibility while keeping the spine upright and supported. Using the chair and belt allows the raised leg to be fully supported so the hamstrings can lengthen without pulling on the lower back. The setup can be easily adjusted to suit different flexibility levels, making the pose accessible and effective for a wide range of practitioners. In this picture the height of the top of the chair is increased with a block, but for less flexible bodies the heel can rest lower down, on a bolster placed over the seat of the chair.
Instructions:
- Place the heel of the raised leg on a chair positioned against the wall.
- Loop a belt under the ball of the foot and hold the ends securely with both hands.
- Keep the standing leg straight at the knee, lifting the kneecap and engaging the front thigh.
- Draw the outer hip of the raised leg back and down to bring the pelvis level.
- Move the back ribs in
- Lift the sternum and front chest, ensuring the spine remains long and vertical.
Develop Safer, More Effective Leg & Hip Flexibility
Join Yoga Selection to access structured Iyengar Yoga classes designed to improve lower-body mobility — including targeted work for shins, calves, hamstrings, adductors, and gluteals using intelligent prop support.
Your membership includes full access to over 900 on-demand classes and all structured courses.
Clear Instruction. Intelligent Sequencing. Iyengar Yoga for Every Body.
Pose 9. Utthita Hasta Padangusthasana II
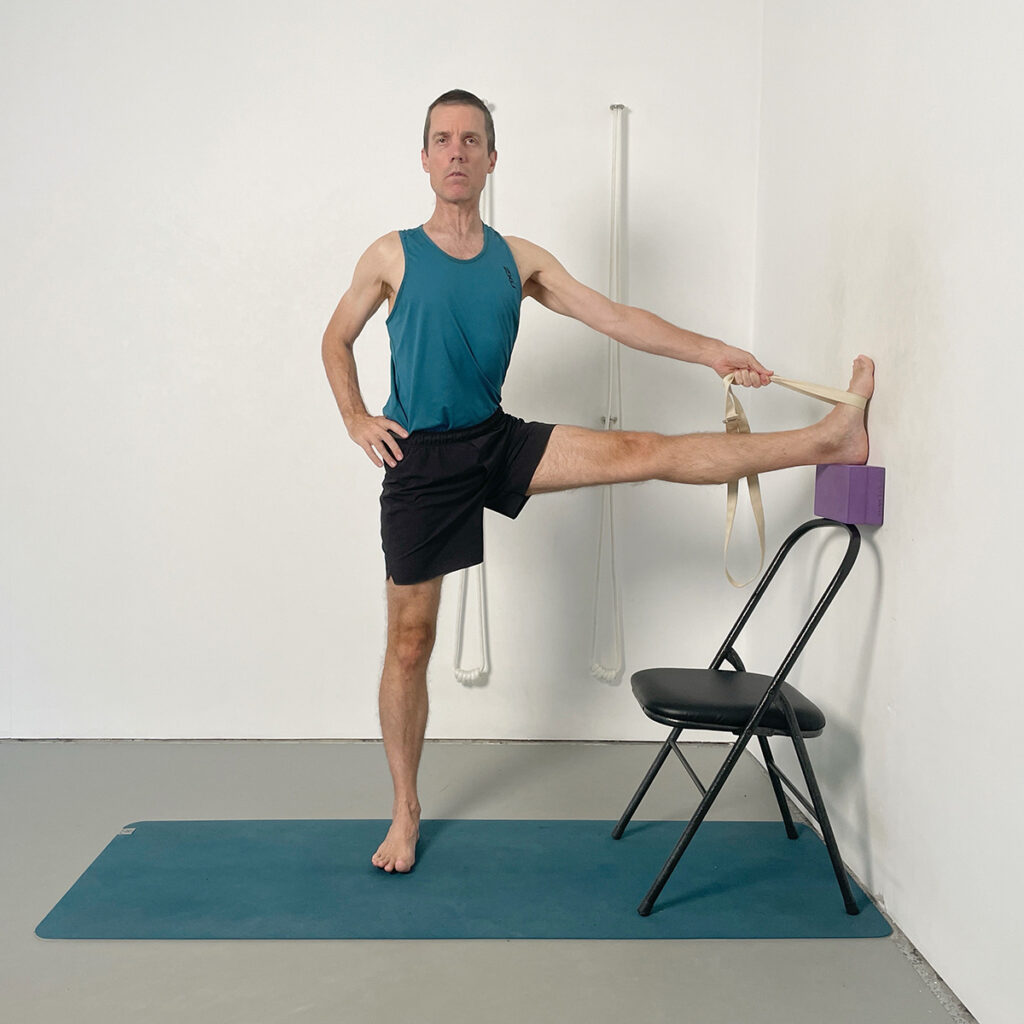
This second variation turns the raised leg out to the side, shifting the focus from the hamstrings to the adductors and inner groins. The chair and belt provide support so that the leg can open laterally without disturbing the alignment of the standing leg or pelvis. This controlled outward rotation helps improve flexibility in the inner thigh region.
Instructions:
- From the previous position, rotate the raised leg outward so it turns to the side.
- Keep the heel supported on the chair setup.
- Position the belt under the ball of the raised foot.
- Anchor the standing leg, lifting the kneecap and firming the front thigh.
- Draw the outer thigh crease of the lifted leg downward.
- Lift and turn the chest to keep the torso facing directly forwards.
Pose 10. Sukhasana Forward Bend (Easy Cross-Legged Variation)
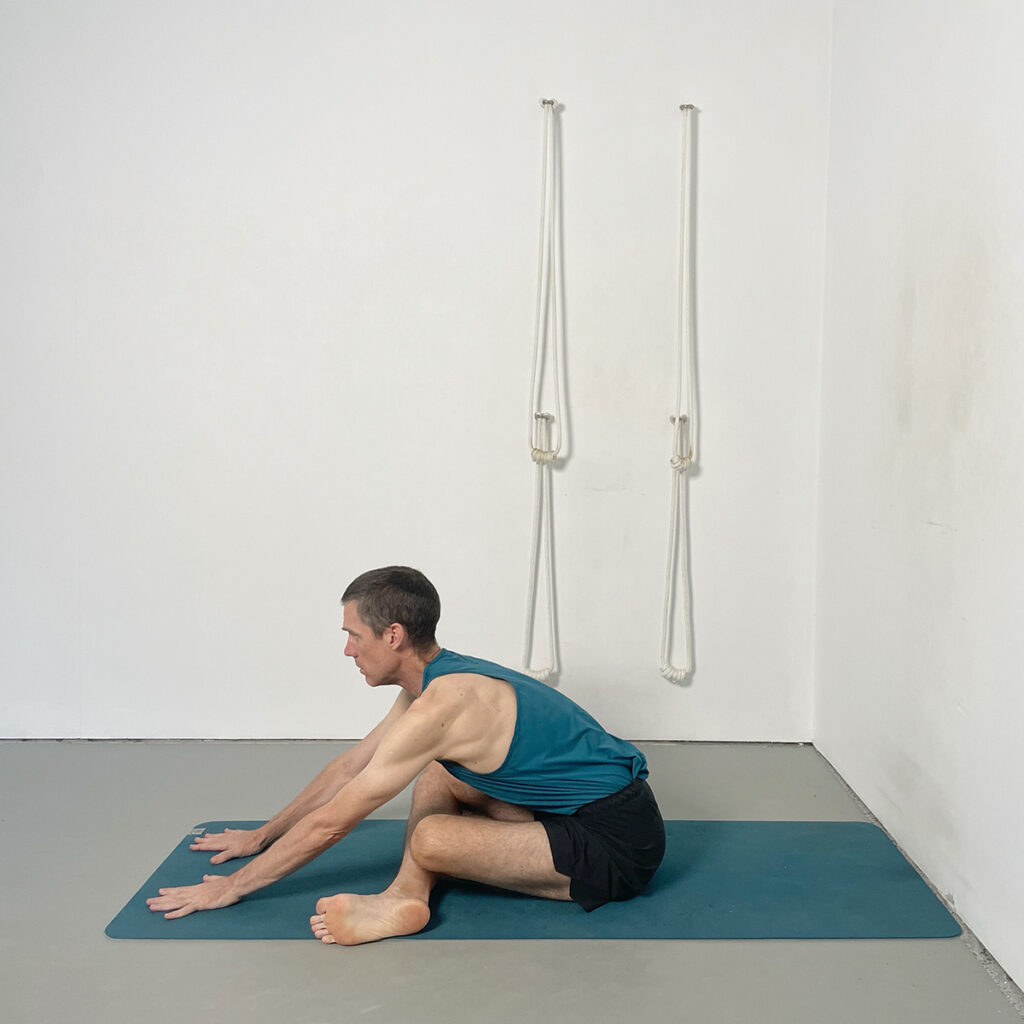
This simple cross-legged forward bend marks a shift in the sequence toward the hips and gluteal region. By folding forward in Sukhasana, the hips, glutes, and lower back begin to release in a gentle, accessible way. The pose helps prepare the body for deeper hip-focused work later in the sequence.
Instructions:
- Sit in a comfortable cross-legged position with the shins crossed evenly.
- Walk the hands forward along the floor, lengthening the spine as you fold.
- Move the back of the spine into the body.
- Lengthen the front of the spine away from the pelvis.
- Keep the sternum raised to avoid rounding through the upper back.
- Maintain even weight on both sitting bones, avoiding collapse to one side.
- Breathe evenly, softening the groins and letting the forward bend deepen gradually.
Pose 11. Gomukhasana Preparation (Forward Bend Variation)
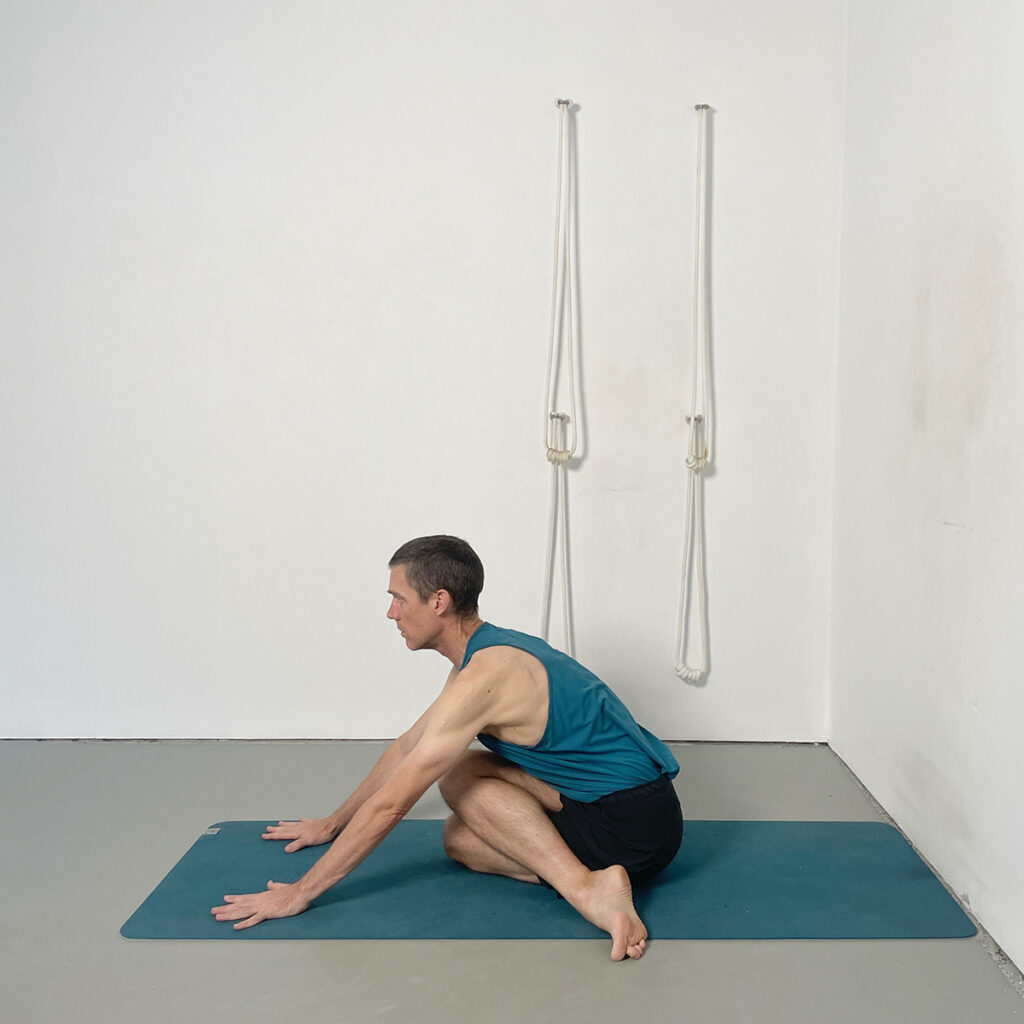
This Gomukhasana preparation develops the hip and gluteal work introduced in Sukhasana by creating a deeper opening around the buttock region. Crossing the legs in this way targets the gluteus maximus and deep lateral rotators more intensively while the forward extension adds a lengthening component through the lower back. It is an effective transitional pose that builds toward more focused glute and piriformis work later in the sequence.
Instructions:
- Cross one leg more deeply over the other so that the knees stack in front of you.
- Walk the hands forward to initiate a gradual forward bend, keeping the spine long.
- Allow the outer hips, sitting bones and gluteal muscles, especially on the top-leg side, to release downward.
- Keep the pelvis level, avoiding tipping to one side as the opening intensifies.
- Broaden the collarbones and lift the sternum, maintaining space in the chest as you bend forwards.
- Breathe evenly, letting the groins soften and the deep hip muscles gradually release.
Pose 12. Seated Gluteal Stretch at the Wall (Pigeon Pose Variation)
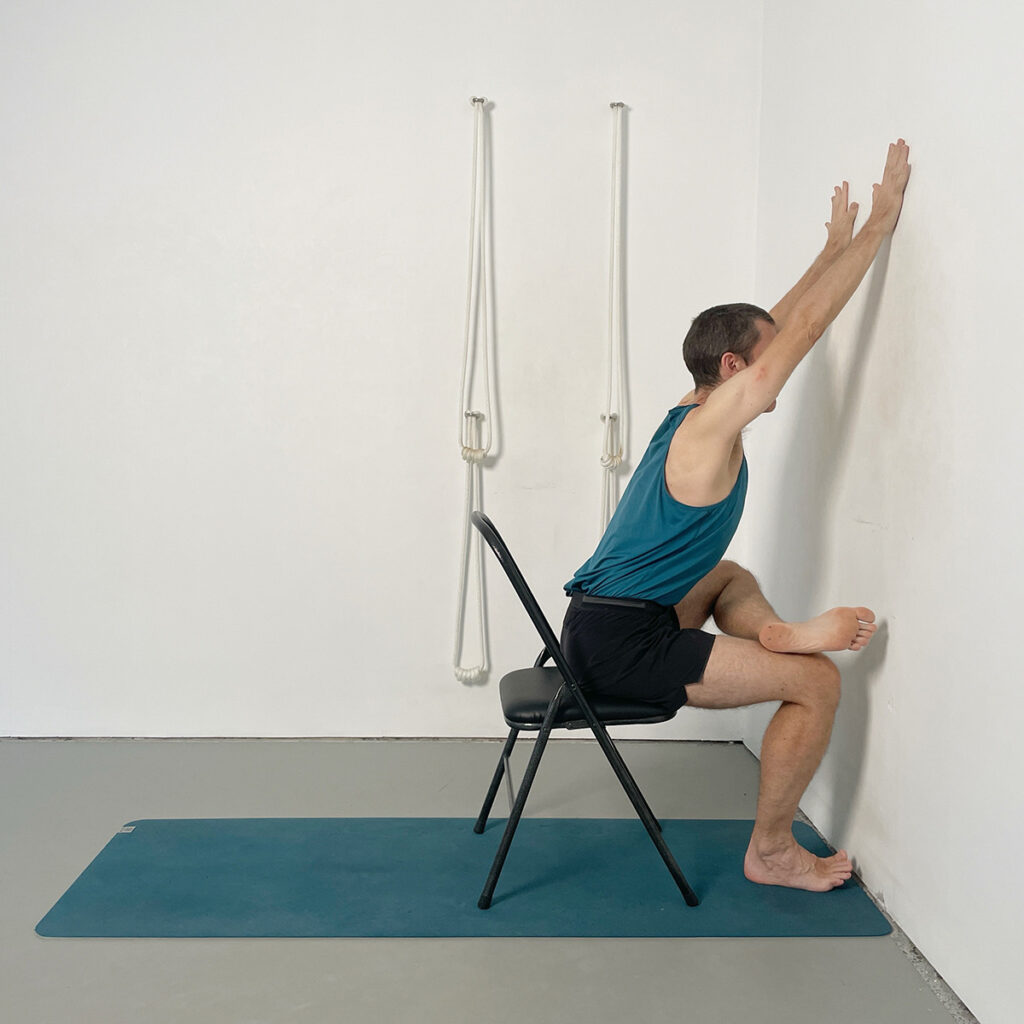
This chair-supported variation offers a different perspective for accessing the gluteal muscles, especially useful for practitioners with tight hips. By placing one ankle across the opposite thigh and leaning forwards to bring your hands to the wall, the pose provides a clear and controlled way to target the deep gluteal region. Approaching the area from this new angle helps broaden the hips and prepares the body for the stronger glute-focused work that follows.
Instructions:
- Sit on the chair facing the wall.
- Position the chair within arms reach of the wall.
- Cross one ankle over the opposite thigh, keeping the shin parallel to the wall.
- Lean forwards and reach the arms up the wall, extending the side ribs and lengthening the spine.
- Maintain an upright chest while allowing the outer hip of the crossed-leg side to release.
- Keep the standing foot grounded and the pelvis level, avoiding tipping to one side.
Pose 13. Reclined Glute and Hip Opening (Figure Four Pose Variation)
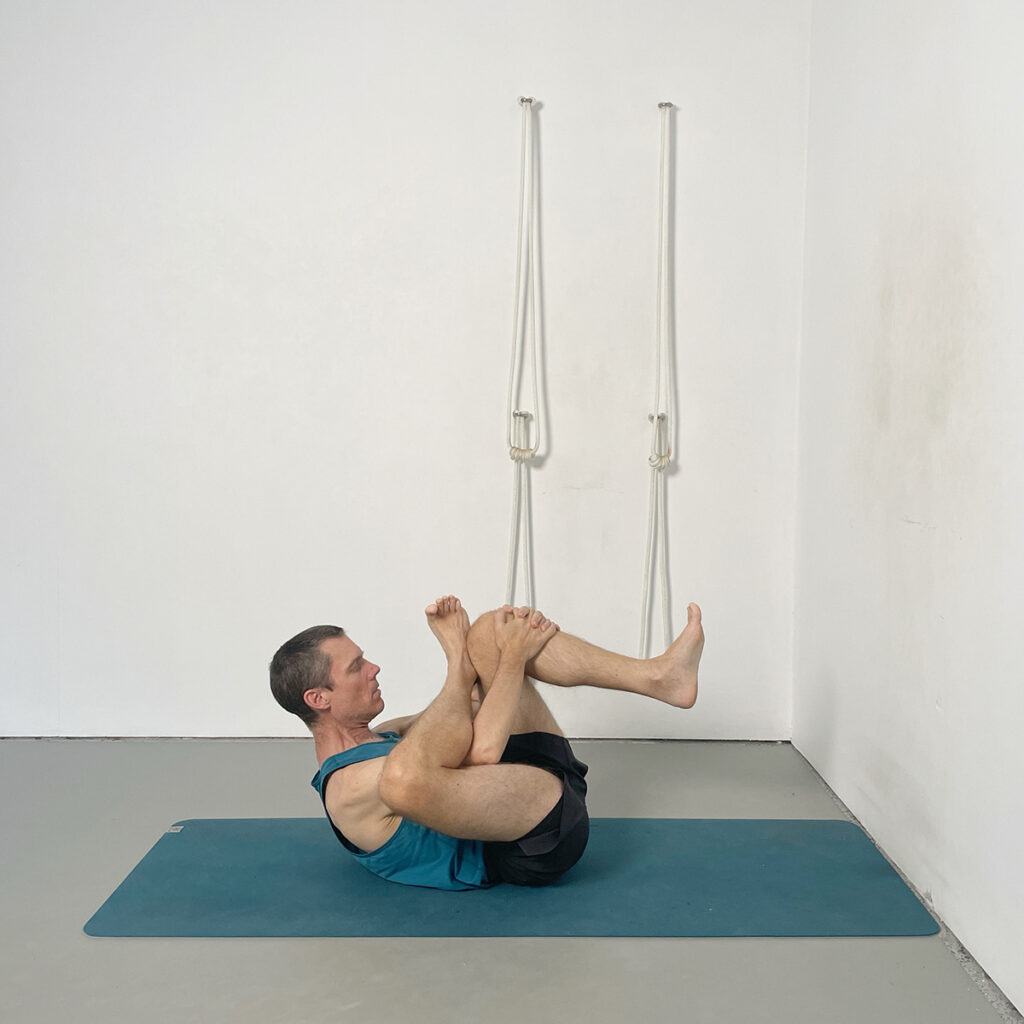
This supported reclined variation targets the same hip and gluteal muscles explored in the previous two poses but removes weight-bearing demands from the knees and hips. By working supine, the spine stays neutral and the hip can release more freely, making this an excellent option for practitioners with knee sensitivities or limited range of motion.
Instructions:
- Lie on your back and bring both knees towards the chest.
- Cross one ankle over the opposite thigh to form a figure-four shape.
- Thread the hands through the legs to hold the shin of the supporting leg.
- Bend the elbows to bring the ankle of the crossed leg closer to the face.
- Press your elbow against the crossed leg to resist the knee away from the shoulder.
- Keep the outer hip of the crossed-leg side moving away from the armpit to deepen the gluteal opening.
Pose 14. Supta Padangusthasana I (Reclined Hamstring Lengthening with Belt)
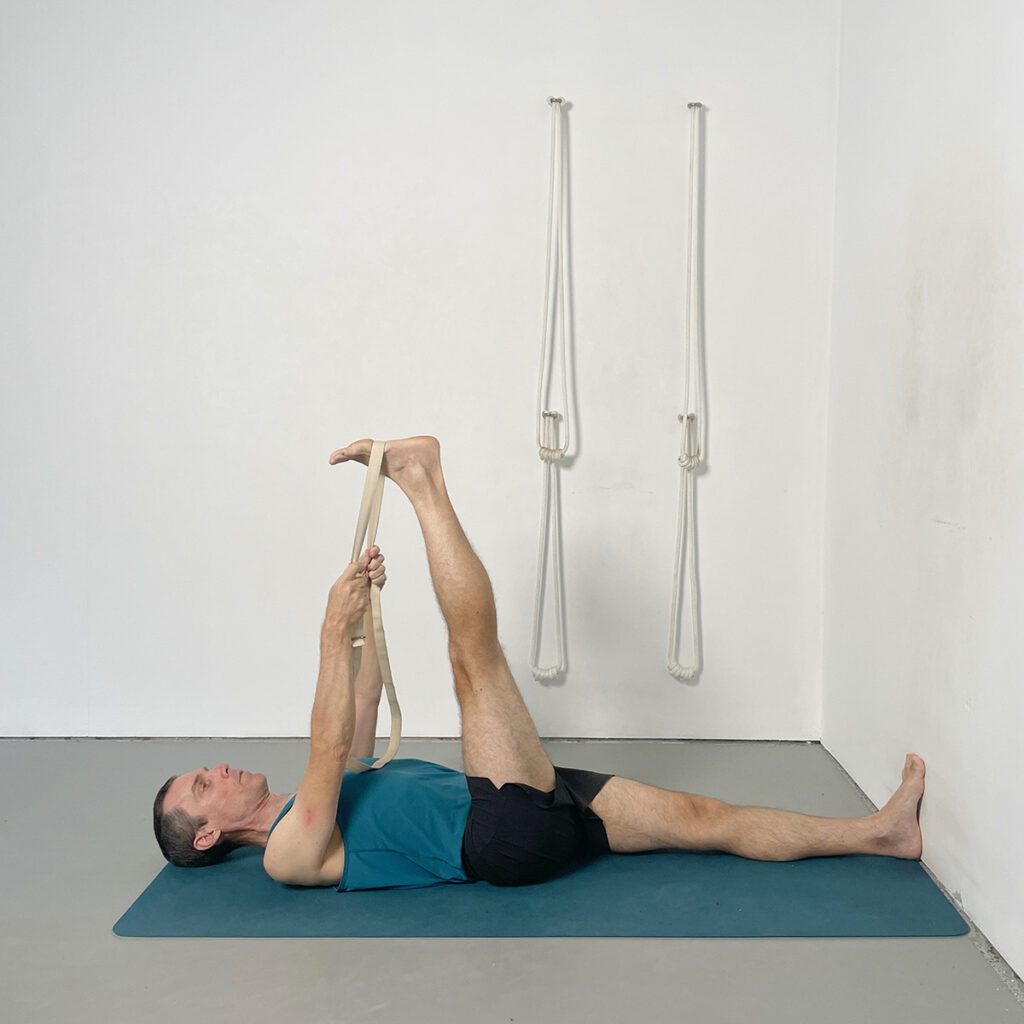
This reclined variation provides maximum support, allowing you to lengthen the hamstrings without placing pressure on the spine. Working supine helps stiff practitioners relax unnecessary muscular effort and access the back of the leg more effectively, making it an essential pose for developing safe, progressive hamstring mobility.
Instructions:
- Lie on your back with both legs extended and evenly grounded along the mat.
- Loop a belt around the ball of the right foot and raise the leg upwards.
- Press the big toe base of the left foot into the wall, whilst pressing the front of the left thigh downwards.
- Move the right outer hip towards the wall, keeping it in line with the left hip.
- Resist down with the belt but press the ball of the right foot up into the belt.
- Bring the backs of the shoulders to the floor whilst lifting the chest upwards.
Pose 15. Supta Padangusthasana II (Reclined Adductor Stretch with Belt)
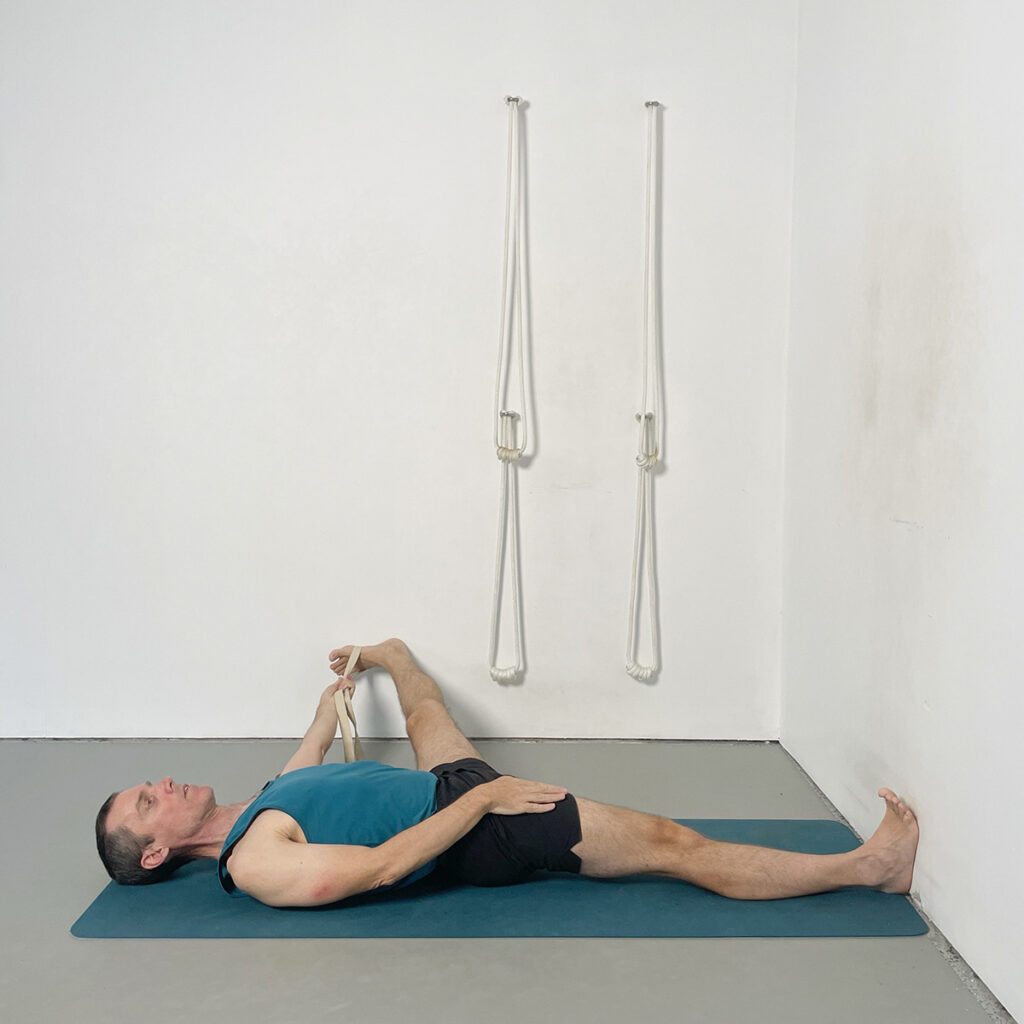
This second variation of Supta Padangusthasana shifts the focus from the hamstrings to the adductor and inner-groin region. With the full support of the floor and controlled use of the belt this is an ideal way for stiff bodies to explore inner-leg opening without strain or collapse.
Instructions:
- From the previous position, hold the belt in the right hand and bring the right leg out to the side.
- Keep the left leg grounded and press the left foot firmly into the wall as the right leg descends.
- Allow the right leg to descend only as far as you are able to keep the back of the left hip in contact with the floor – avoid rolling to the right.
- Move the right hip socket towards the wall so that the hips remain level.
- Resist the belt against the foot whilst pressing the right big-toe base back into the belt to straighten the knee.
- Anchor the back of the left shoulder to the floor whilst opening the right side of the chest.
Pose 16. Savasana (Corpse Pose)
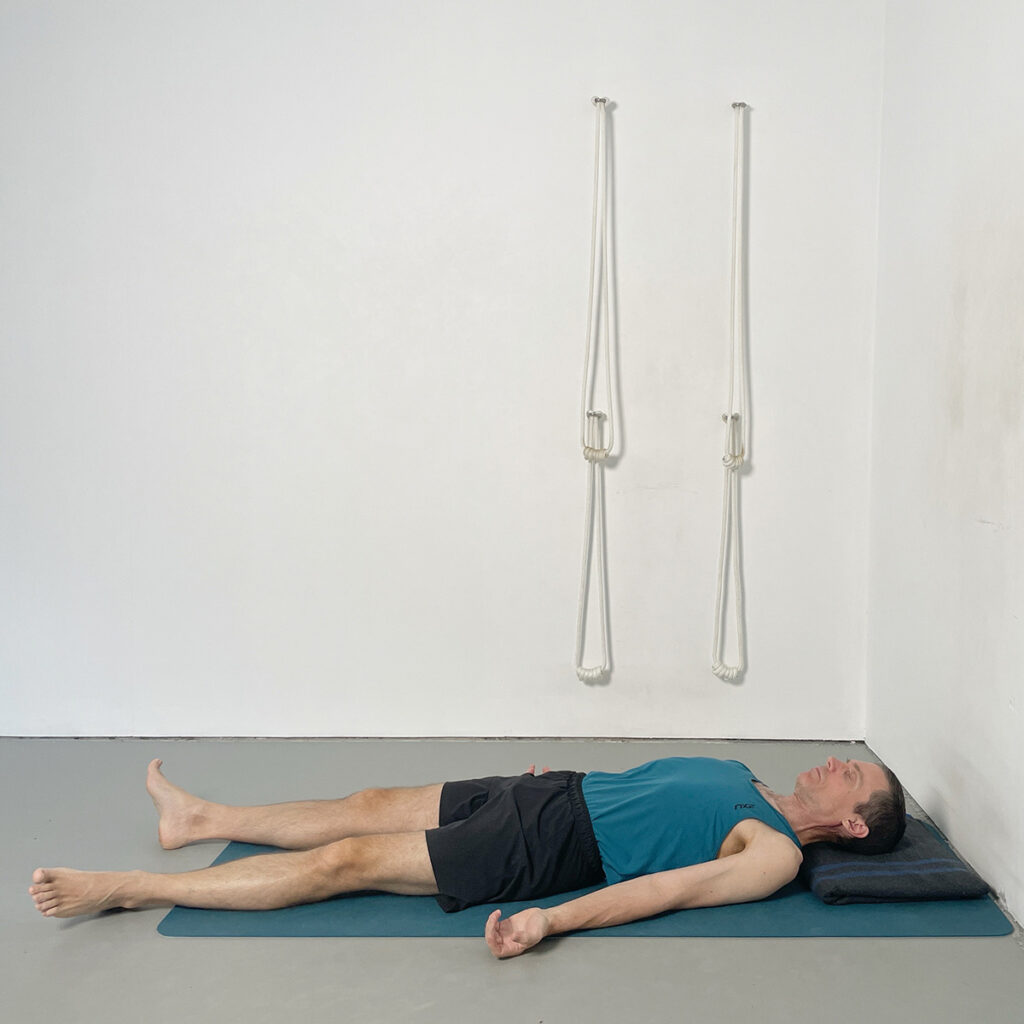
The sequence concludes with Savasana to allow the legs, hips, and lower back to fully release after the focused mobility work. This resting position gives time for the nervous system to settle and for the effects of the practice to integrate without effort.
Instructions:
- Lie back with the spine centred and the head supported on a folded blanket.
- Extend both legs evenly, allowing the feet to gently fall out to the sides.
- Soften the abdomen and allow the back of the pelvis to recede into the floor.
- Release the shoulders downwards and away from the neck.
- Let the arms rest slightly away from the body with the palms turning upward.
- Allow the breath to naturally soften.
- Stay for several quiet minutes, letting the whole body settle into stillness.
Frequently Asked Questions
1. How often should I practice this leg and hip flexibility sequence?
For best results, practice this sequence 1–3 times per week. Consistency is more important than intensity. Gradual, repeated exposure to the poses allows flexibility to improve without placing strain on the joints.
2. Is this class suitable for beginners?
Yes. The sequence uses progressive stages and prop support to make lower-body flexibility accessible. Beginners should move steadily, use the suggested supports, and avoid forcing the range of movement.
3. What if I have tight hamstrings?
Tight hamstrings are specifically addressed through supported variations of standing and reclining poses. Using blocks, belts, and wall support allows the hamstrings to lengthen without rounding the spine or overloading the lower back.
4. Can this help with tight hips and glutes?
Yes. The later stages of the sequence target the gluteal and piriformis region from both upright and reclining positions. Approaching these muscle groups from multiple angles helps improve mobility more effectively.
5. Is this practice safe for sensitive knees?
The sequence emphasises generating mobility from the hips rather than twisting the knee joint. However, if you have existing knee pain or injury, work conservatively and consider using additional support.
6. What equipment do I need?
Two folded blankets, yoga blocks, a belt, and a wall are recommended. These supports make the poses more accessible and help create stability while flexibility develops.
Integrating Leg and Hip Flexibility Into Your Practice
Regular practice of this structured sequence can significantly improve flexibility in the legs and hips while reducing unnecessary strain on the knees and lower back. By progressing methodically from the shins and calves through the hamstrings, adductors, and gluteal muscles, mobility develops in a balanced and sustainable way.
Explore the full Yoga Selection library for further structured classes designed to build flexibility safely and progressively.
Develop Safer, More Effective Leg & Hip Flexibility
Join Yoga Selection to access structured Iyengar Yoga classes designed to improve lower-body mobility — including targeted work for shins, calves, hamstrings, adductors, and gluteals using intelligent prop support.
Your membership includes full access to over 900 on-demand classes and all structured courses.
Clear Instruction. Intelligent Sequencing. Iyengar Yoga for Every Body.
Continue Exploring with Yoga Selection
- → Iyengar Yoga for Beginners – A structured starting point for building clarity and confidence.
- → Yoga at Home – Establish a steady, sustainable home practice.
- → Yoga for Stiff Bodies – Supported sequences designed to improve mobility safely.
- → Iyengar Yoga for Back Care – Develop strength and stability to support spinal health.
Rod Stennard – Founder of Yoga Selection
Rod Stennard is the founder of Yoga Selection, the first online yoga platform dedicated entirely to Iyengar Yoga. A certified Iyengar Yoga teacher since 2002, Rod has practiced yoga since 1992 and studied under senior teachers from around the world, including members of the Iyengar family in Pune, India.
Rod launched Yoga Selection in 2016 to bring structured, high-quality Iyengar Yoga training to a global audience. As a pioneer in the field of online yoga education, he is passionate about making this method accessible to all, through rigorous, inclusive, and thoughtfully designed classes. His work continues to support students of all levels in over 50 countries.